Introduction: Why Exterior Door Replacement Is a Smart DIY Upgrade
Few home improvement projects offer as much curb appeal and practical benefit as replacing an exterior door. Whether you’re battling drafts, boosting security, or modernizing your home’s facade, a new door can be transformative. Yet, many U.S. homeowners hesitate to tackle this project themselves, daunted by concerns over cost, tools, or compliance. In reality, with careful planning and clear guidance, DIY exterior door replacement is within reach for most handy homeowners—and it can deliver substantial savings over hiring a pro.
This guide is your comprehensive roadmap to taking on exterior door replacement with confidence. We’ll walk through realistic cost estimates, help you assemble the right toolkit, and spotlight common mistakes that trip up even seasoned DIYers. You’ll learn about compliance considerations like permitting, how to spot when a door frame must also be replaced, and practical tips for achieving a weather-tight, secure, and visually appealing result. By the end, you’ll have all the knowledge you need to decide whether this is your next home improvement win—and the know-how to avoid costly missteps along the way.
Understanding Exterior Door Types and Choosing the Right One
Pre-Hung vs. Slab Doors
Before you shop for a new exterior door, it’s crucial to understand the difference between pre-hung and slab doors:
- Pre-hung doors come with the door already mounted on a frame, including hinges and (often) weatherstripping. This is the go-to choice for most DIYers, especially if your existing frame is damaged or you want a smooth installation process.
- Slab doors are just the door leaf. They’re best suited for situations where the existing frame is in excellent condition and you’re confident in your carpentry skills to mortise hinges and cut for hardware.
Materials and Performance Considerations
- Steel doors are budget-friendly, secure, and resist warping but can dent and may need repainting if scratched.
- Fiberglass doors mimic wood grain, resist weather and dents, and offer excellent insulation, making them a popular modern choice.
- Wood doors provide classic beauty but require diligent maintenance to prevent warping and rot, especially in harsh climates.
Measuring for Success
Precise measurement is critical. Measure the width, height, and thickness of your existing door, and check the rough opening if you plan to replace the frame. Don’t forget to note the swing direction (left or right, in or out).
Budget Breakdown: What to Expect in 2024
Door Costs
- Pre-hung steel door: $150–$400
- Pre-hung fiberglass door: $350–$1,000
- Pre-hung wood door: $450–$1,500+
- Add $150–$500 for decorative glass or custom features
Hardware & Accessories
- Locks/Deadbolts: $30–$200
- Weatherstripping: $10–$50 (if not included)
- Threshold/Sill Replacement: $25–$75
- Paint/Stain & Supplies: $30–$100
Tool Rental or Purchase
- Power drill & bits: $40–$100 (purchase)
- Oscillating multi-tool (for trimming): $60–$120
- Level: $15–$40
- Caulking gun: $7–$30
- Many DIYers already own basic hand tools (screwdrivers, hammer, tape measure).
Disposal Fees
- Old door/frame disposal: $20–$50 (local dump or pickup fee)
Hidden Expenses
- Unexpected frame repairs: $50–$300 for materials
- Permit costs (where required): $30–$150 (varies by municipality)
Total DIY cost range: $300–$2,000+, depending on materials, features, and whether you need to purchase tools.
Essential Tools and Materials Checklist
- Tape measure
- Level (4-foot recommended for accuracy)
- Hammer and pry bar (for removing old trim and door)
- Power drill and driver bits
- Saw or oscillating multi-tool (for trimming jambs or shims)
- Utility knife
- Caulking gun and high-quality exterior caulk
- Expanding foam insulation (minimal expanding type for doors/windows)
- Wood shims
- Safety glasses and gloves
- Paint/stain and brushes (if finishing the door)
- Replacement hardware (lockset, deadbolt, strike plate)
Gather all tools and materials before you start to prevent mid-project delays.
Permits, Compliance, and Code Considerations
When Permits Are Required
Most U.S. municipalities do not require a permit for a straight swap of an exterior door—if you’re not altering the structure or enlarging the opening. However, you will need a permit if:
- You’re changing the size or location of the opening
- Structural framing is being altered
- The door serves as a fire exit or is part of a multi-family building
Always check your local building department’s website or call before starting work. Fines for non-compliance can outweigh the cost of a permit.
Energy and Security Codes
Modern exterior doors must meet energy efficiency standards (U-factor and air infiltration rates). In hurricane- or tornado-prone regions, additional wind and impact resistance may be mandated. Ensure any new door is rated for your climate and locale.
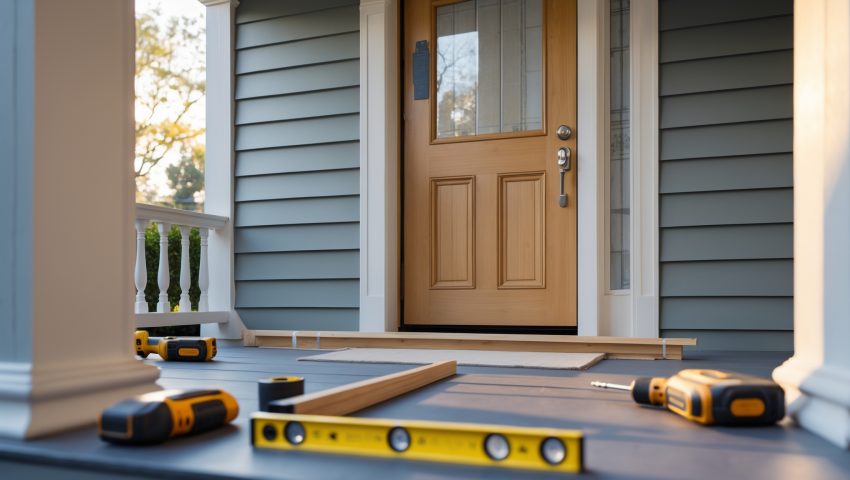
Step-by-Step DIY Exterior Door Replacement
1. Remove the Old Door and Frame
- Take off interior and exterior trim using a pry bar and hammer.
- Unscrew hinges and carefully remove the old door leaf.
- Unscrew and extract the frame from the rough opening. Watch for hidden nails and screws.
- Inspect the rough opening for rot or damage. Repair as needed before proceeding.
2. Prepare the Opening
- Clean debris and old caulk from the sill and jambs.
- Check for square and level using your 4-foot level. Use shims to correct minor issues. Major structural problems may require professional help.
- Apply flashing tape to the sill and lower jambs for extra moisture protection, especially in wet climates.
3. Dry Fit the New Door Unit
- With help, carefully lift the pre-hung door into the opening.
- Check for fit—there should be a small, even gap around the frame for shimming (typically 1/8″–1/4″).
- Test that the door swings freely and latches before fastening anything.
4. Secure and Shim the Frame
- Insert shims behind hinges and strike plate locations to prevent the frame from bowing when you drive screws.
- Drive long screws through the jamb and shims into the framing at hinge/lock points. Check for plumb and level after every screw.
- Trim protruding shims with a utility knife or oscillating tool.
5. Insulate and Seal
- Use minimal-expanding foam insulation between the frame and rough opening (avoid overfilling, which can bow the frame).
- Once foam sets, trim any excess flush with the frame.
- Apply high-quality exterior caulk around the exterior perimeter of the frame for weatherproofing.
6. Install Hardware and Finishing Touches
- Install new or existing lockset and deadbolt according to manufacturer instructions.
- Replace or reinstall interior and exterior trim. Caulk any gaps and fill nail holes.
- Paint or stain the door as needed, following product recommendations for exterior durability.
- Double-check door operation, weatherstripping contact, and lock alignment.
Common DIY Mistakes—and How to Avoid Them
- Incorrect Measurements: Always measure twice—width, height, thickness, and swing direction. Don’t rely on the old door’s size alone.
- Skipping the Dry Fit: Never fasten the frame before confirming the door swings and latches properly.
- Over-Insulating: Regular spray foam can expand too much and bow the frame, causing misalignment. Use only minimal-expanding foam rated for doors/windows.
- Poor Weather Sealing: Inadequate caulking or missing flashing can lead to leaks and drafts. Take your time with this step.
- Neglecting Permits: Don’t assume permits aren’t needed. Check with local authorities, especially for structural work.
- Ignoring Security: Use long screws (at least 3 inches) for striking plates and hinges to resist forced entry.
- Rushing the Finish: Don’t skip priming and painting edges, especially on wood doors, to prevent moisture intrusion.
Maintenance Best Practices for Long-Term Performance
- Inspect weatherstripping every six months and replace if brittle or compressed.
- Lubricate hinges and locks annually with silicone spray or graphite.
- Touch up paint or stain on all door edges to prevent water infiltration.
- Check caulking around the frame each spring and fall. Reapply as needed to maintain a watertight seal.
- In colder regions, clear snow and ice from thresholds to prevent warping and sticking.
With a little routine attention, a well-installed door can last decades and continue to save energy and boost security.
When to Call a Professional
- The rough opening is out of square by more than 1/2 inch
- There is significant rot or structural damage in the framing
- You need to cut a new opening or enlarge an existing one
- The door is part of a load-bearing wall or fire-rated assembly
Don’t risk structural problems or code violations. For these scenarios, hire a licensed contractor or carpenter.
Conclusion: Confidence, Savings, and Curb Appeal
Taking on an exterior door replacement is one of the most satisfying DIY upgrades you can tackle as a U.S. homeowner. Not only does it boost your home’s appearance and value, but it also improves security and energy efficiency. With careful planning and the right tools, you can achieve professional-level results and save hundreds—sometimes thousands—of dollars over hiring a contractor.
Remember, success hinges (pun intended) on precise measurements, attention to details like weatherproofing, and a willingness to double-check your work at every step. Avoid common pitfalls by reading instructions thoroughly, using the correct materials, and not rushing the finishing touches. If you encounter unexpected framing issues or code complexities, don’t hesitate to seek professional help—knowing your limits is part of DIY wisdom.
Regular maintenance after installation will protect your investment and ensure your new door keeps out the elements and welcomes guests for years to come. Ready to open the door to your next project? With this guide, you’re equipped to make it a smooth, cost-effective, and rewarding home improvement journey.
You mention compliance and permitting for DIY door replacement. Are there specific permit requirements that vary by city, or is there a general standard homeowners should be aware of in most U.S. areas?
Permit requirements for exterior door replacement can vary significantly by city or county. Some places require permits for any exterior changes, while others may not. It’s best to check with your local building department to confirm the specific rules for your area.