Introduction: Preserving the Character of Historic Wood Trim
Historic wood trim is more than just an architectural detail—it’s a testament to the craftsmanship, heritage, and story of your home. Whether you live in a Victorian, Craftsman, Colonial, or mid-century property, original trim elements like baseboards, casings, crown moldings, and wainscoting embody the unique charm that sets your house apart. Restoring these features isn’t just about aesthetics; it’s about respecting history and adding long-term value. However, many DIYers and even some contractors make costly mistakes during the restoration process, leading to irreversible damage or a loss of authenticity.
This comprehensive guide is designed to help U.S. homeowners avoid the most common pitfalls when restoring historic wood trim. We’ll cover how to assess and plan your project, navigate the unique challenges of old wood, select the best tools and products, and follow professional preservation practices. By the end, you’ll have the confidence and knowledge to tackle your trim restoration project with care, ensuring beautiful, lasting results that honor your home’s past.
Understanding Historic Wood Trim: Types and Challenges
Common Types of Historic Trim in U.S. Homes
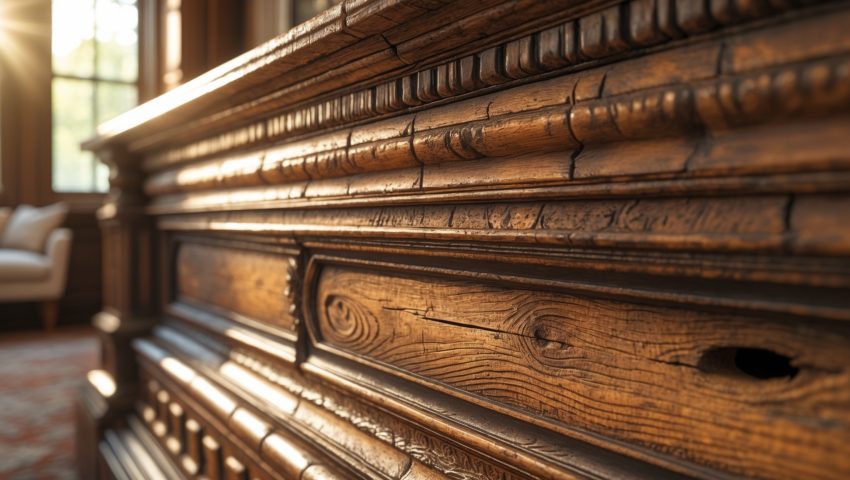
- Baseboards: Wide, detailed boards at the bottom of walls; often include decorative caps or beadwork.
- Casings: Moldings that frame doors and windows; shapes vary from simple to highly ornate profiles.
- Crown Moldings: Decorative trim where walls meet ceilings; common in formal rooms of older homes.
- Wainscoting & Paneling: Wood covering the lower portion of walls, often with raised or recessed panels.
- Picture Rails & Chair Rails: Functional and decorative mid-wall moldings for hanging art or protecting walls.
Unique Restoration Challenges
- Multiple Paint Layers: Decades of paint can obscure details and complicate stripping.
- Lead Paint Risks: Homes built before 1978 often contain hazardous lead-based paint.
- Wood Damage: Water, insects, and daily wear can cause rot, cracks, or missing sections.
- Matching Profiles: Finding or replicating original shapes is often difficult if pieces are missing.
- Historical Accuracy: Modern materials or shortcuts can compromise authenticity.
Step 1: Assessment and Planning
Survey the Condition
Begin with a thorough inspection of all trim elements you intend to restore. Take detailed notes and photographs. Look for areas with missing pieces, deep gouges, loose sections, or evidence of old repairs. Test for soft spots that indicate rot. Note any unusual profiles or joinery that may require special attention.
Research and Documentation
Dig into your home’s history through local archives, real estate records, or old photos. Understanding the original style and finish helps guide restoration decisions. Documenting existing profiles—using tracings or profile gauges—will be invaluable if you need to replicate missing sections.
Testing for Lead Paint
Use EPA-approved lead test kits to check for lead-based paint if your home was built before 1978. If tests are positive, plan for safe removal (see Safety section below).
Budgeting for Restoration
- Materials: Strippers, sandpaper, wood fillers, stains, sealers, specialty tools
- Replacement Trim: Custom millwork can be pricey if profiles are rare
- Personal Protective Equipment: Respirators, gloves, goggles, drop cloths
- Professional Help: Lead abatement, intricate repairs, or finish-matching may require specialists
Step 2: Safe and Effective Paint Removal
Common Mistake #1: Aggressive Sanding
Avoid using power sanders or heavy grit sandpaper, as they can quickly erase delicate details and round crisp edges. Instead, opt for hand sanding with fine grits or use gentle stripping techniques first.
Choosing the Right Paint Removal Method
- Chemical Strippers: Low-odor, biodegradable strippers are safest for detailed trim. Follow manufacturer instructions and neutralize residue before refinishing.
- Infrared Heat Tools: These soften paint for easy scraping without burning the wood. Use with caution and never on lead paint unless equipped with proper HEPA filtration and PPE.
- Steam: Can be effective for thick paint but may raise wood grain—test on inconspicuous areas first.
Lead Paint Safety Precautions
- Seal off work areas with plastic sheeting and tape.
- Wear a NIOSH-approved respirator (P100 rating), gloves, and goggles.
- Use a HEPA vacuum for cleanup and never dry-sand or use open-flame tools on lead paint.
- Dispose of debris according to local hazardous waste guidelines.
Step 3: Repairing and Replacing Damaged Trim
Common Mistake #2: Overfilling or Using the Wrong Wood Filler
Not all wood fillers are created equal. Avoid generic vinyl fillers for historic trim—choose wood-epoxy systems for structural repairs and stainable fillers for cosmetic touch-ups. Overfilling can create unsightly bulges that are obvious after finishing.
Techniques for Repair
- Small Cracks and Nail Holes: Use a stainable wood filler applied with a putty knife. Sand flush after curing.
- Rot or Large Missing Sections: Excise all damaged wood. Repair with custom-fit wood patches or use a two-part epoxy consolidant and filler. Shape with carving tools and sand smooth.
- Loose Trim: Re-secure with finish nails or trim-head screws, countersinking and filling holes for a seamless look.
Matching and Replacing Profiles
- Bring a sample or detailed tracing to your local millwork shop for reproduction.
- If custom milling is cost-prohibitive, search architectural salvage yards for period-appropriate pieces.
- Install replacements with care to maintain consistent reveal and alignment.
Step 4: Sanding and Surface Preparation
Common Mistake #3: Skipping the Finer Grits
After paint removal and repairs, sand with progressively finer grits (120, 180, then 220) to ensure a smooth, even surface. Always sand with the grain. Use detail sanding sponges or custom-cut sanding blocks to follow intricate profiles.
Cleaning Up
- Vacuum all dust with a HEPA-filtered vacuum.
- Wipe surfaces with a tack cloth or slightly damp microfiber cloth before finishing.
- Inspect under good lighting to catch any remaining imperfections.
Step 5: Finishing—Paint, Stain, or Natural?
Historic Finish Considerations
Research what finish was originally used—many early homes had painted trim, but natural or stained finishes became popular at different periods. Decide whether to restore the original look or update it with historically sympathetic colors or stains.
Choosing the Right Products
- Primer: Use a high-quality, stain-blocking primer for painted finishes. For stain or clear finishes, apply a wood conditioner if using softwoods.
- Paint: Opt for enamel or acrylic latex paints for durability; select a sheen (satin, semi-gloss) that matches historic precedent.
- Stain & Sealer: Use oil-based or water-based stains, followed by a clear topcoat (polyurethane or shellac) for protection.
Application Tips
- Use high-quality brushes sized for your trim’s profile; avoid rollers or sprayers for small, detailed work.
- Apply thin, even coats, allowing proper drying time between each.
- Lightly sand between coats for ultra-smooth results.
- For historic accuracy, consider hand-brushing instead of spraying to mimic original tool marks.
Step 6: Maintenance and Long-Term Preservation
Routine Cleaning
- Dust trim regularly with a soft cloth or brush attachment on a vacuum.
- Clean gently with a damp cloth—never use harsh chemicals or abrasives.
Inspect and Address Issues Early
- Annually inspect for signs of moisture, insect activity, or finish failure.
- Touch up chips or scratches promptly to prevent deeper damage.
- Maintain caulking and sealants at joints to keep out moisture.
Expert Tool & Equipment Guide for Trim Restoration
- Profile gauge or contour duplicator
- Detail hand scrapers and putty knives
- Biodegradable chemical paint stripper
- Infrared paint remover (optional)
- Fine-grit sanding sponges and blocks
- HEPA vacuum
- High-quality natural bristle and synthetic brushes
- Respirator (P100 for lead protection), gloves, goggles
- Wood epoxy repair kit
Common Myths About Historic Wood Trim Restoration
- Myth: “You need to strip all old paint to bare wood.”
Fact: Only remove paint if it’s failing or if you want to reveal the original wood. Sound, well-adhered paint can be a stable base for new finishes. - Myth: “Modern trim from big-box stores is just as good for patches.”
Fact: Modern profiles and materials often mismatch in size, shape, and wood quality—use custom-milled or salvaged trim for best results. - Myth: “Power sanding saves time on detailed trim.”
Fact: Power tools can quickly destroy delicate profiles; hand work is slower but safer for details.
Case Study: Restoring Oak Trim in a 1920s Bungalow
Background: The homeowners of a 1920s Craftsman bungalow in St. Paul, MN, wanted to restore their original oak trim, which had been painted over several times.
- Assessment revealed mostly sound wood, but several baseboard sections had rot from old plumbing leaks.
- Lead paint was present under newer latex layers; professionals handled containment and removal.
- Custom-milled oak replaced the damaged sections, matched using tracings of the original profile.
- All trim was stripped using low-odor chemical strippers and cleaned with denatured alcohol.
- Color-matched oil stain and a satin polyurethane topcoat restored the rich, warm appearance.
Outcome: The restored trim became a focal point, increasing the home’s value and historic authenticity.
Conclusion: Honoring the Past While Enhancing Your Home
Restoring historic wood trim is a rewarding endeavor that blends craftsmanship, preservation, and personal satisfaction. By avoiding the most common mistakes—aggressive sanding, improper filler choice, and neglecting safety—you safeguard irreplaceable details and the legacy of your home’s construction. Thoughtful planning, careful research, and respect for original materials ensure that your restoration work will endure for decades.
Remember, taking the time to document, test, and match historic finishes pays dividends in authenticity and resale value. Be mindful of health and environmental risks, especially with lead paint, and don’t hesitate to consult experts for complex repairs or specialty tasks. With ongoing care and routine inspections, your restored trim will continue to add beauty, character, and a tangible connection to the past—making your house not just a home, but a living piece of history. Whether you’re a seasoned DIYer or embarking on your first restoration, the pride in preserving these details is well worth the effort.