Introduction: Why Power Tool Maintenance Matters for Every DIYer
Whether you’re a weekend warrior, a seasoned home improvement enthusiast, or just starting out in the world of DIY, your power tools are the backbone of your projects. From cordless drills to circular saws and sanders, these mechanical workhorses make ambitious restoration and improvement jobs possible. However, many U.S. homeowners overlook one crucial aspect: regular power tool maintenance. Neglecting this can lead to premature breakdowns, decreased performance, and even serious safety hazards. In an era where quality tools can represent a significant investment—sometimes hundreds of dollars per piece—protecting that investment is not just smart, it’s essential. This comprehensive guide will walk you through practical, step-by-step routines for cleaning, lubricating, inspecting, and storing your power tools, as well as troubleshooting common issues. You’ll also learn how to spot warning signs of wear, choose the right maintenance supplies, and understand regional considerations that can affect tool longevity. By mastering these maintenance practices, you’ll not only save money and frustration but also enjoy safer, smoother, and more successful DIY projects for years to come.
Choosing the Right Maintenance Supplies and Workspace
Selecting Quality Cleaning Products
Before you can start maintaining your tools, assemble the right cleaning supplies. Use a soft-bristle brush, microfiber cloths, and compressed air for dust removal. For stubborn grime, opt for a non-abrasive degreasing wipe or a mild detergent solution. Avoid harsh chemicals unless recommended by the manufacturer, as these can damage tool housings or internal parts.
- Compressed air: Removes dust from vents and tight spaces.
- Lubricant: Use tool-specific lubricants like light machine oil for moving parts; avoid household oils that attract dust.
- Protective gloves and goggles: Safety first, especially when using solvents or compressed air.
- Toothpicks/cotton swabs: For cleaning crevices and electrical contacts.
Setting Up a Safe and Efficient Maintenance Area
Choose a well-ventilated, well-lit workspace. Lay down a rubber mat or old towel to prevent small components from rolling away. Keep all supplies within reach and store cleaning chemicals out of children’s reach. If possible, dedicate a shelf or cabinet to tool maintenance gear to encourage regular routines.
Cleaning Your Power Tools: Step-by-Step Guide
1. Unplug and Disassemble When Appropriate
Always unplug corded tools and remove batteries from cordless models before maintenance. For tools with removable guards, blades, or attachments, follow the manufacturer’s instructions to safely disassemble these parts for thorough cleaning.
2. Remove Dust and Debris
Use a soft brush or compressed air to remove dust from vents, fans, and exterior surfaces. Pay extra attention to areas around the motor housing and switches, where sawdust and grit often accumulate. For tools used on masonry or drywall, vacuum or brush off fine particles, as they can be abrasive and cause early wear.
3. Wipe Down Exteriors
Lightly dampen a microfiber cloth with water or a mild detergent solution to wipe down the tool’s exterior. Avoid getting moisture into any openings. For sticky residues, a degreasing wipe can be effective, but always spot-test first.
4. Detailing and Crevice Cleaning
Use cotton swabs or toothpicks to clean around triggers, buttons, and blade holders. These areas often trap dust and may impede smooth operation if neglected. For electrical contacts, use a contact cleaner spray sparingly.
Proper Lubrication: Keeping Tools Running Smoothly
Understanding Lubrication Needs by Tool Type
- Drills & Drivers: Apply a drop of light machine oil to the chuck and rotating parts every few months or after heavy use.
- Saws: Lubricate blade pivots, guide rails, and adjustment knobs per the tool’s manual.
- Sanders: Some models require lubrication of bearing points; check your specific model’s guidelines.
How to Apply Lubricant Safely
Only lubricate the areas indicated in your tool’s manual. Over-lubrication can attract dust and create gummy build-up. After applying, wipe away excess oil with a clean cloth. Run the tool briefly (if safe) to distribute lubricant, then wipe again to remove any residue.
Inspecting for Wear and Damage: What to Look For
Checking Power Cords and Batteries
- Power cords: Look for fraying, cracked insulation, or loose plugs. Replace damaged cords immediately.
- Batteries: Inspect terminals for corrosion. Clean gently with a dry cloth; never use water on battery contacts.
Examining Moving Parts
- Blades and bits: Check for dullness, chips, or warping. Replace as needed to prevent motor strain and poor cuts.
- Bearings and gears: Listen for grinding or squealing noises during operation—these indicate worn parts requiring service.
Ensuring Safety Features Function Properly
- Test safety switches, blade guards, and locks to ensure they operate smoothly and reliably.
- If a safety feature fails, cease use and have the tool professionally serviced.
Storing Power Tools: Protecting Your Investment
Climate and Humidity Considerations
High humidity can cause rust and electrical degradation. Store tools in a dry, well-ventilated area, ideally above ground level. Consider using silica gel packs or a small dehumidifier in your storage space, especially in coastal or southern U.S. regions.
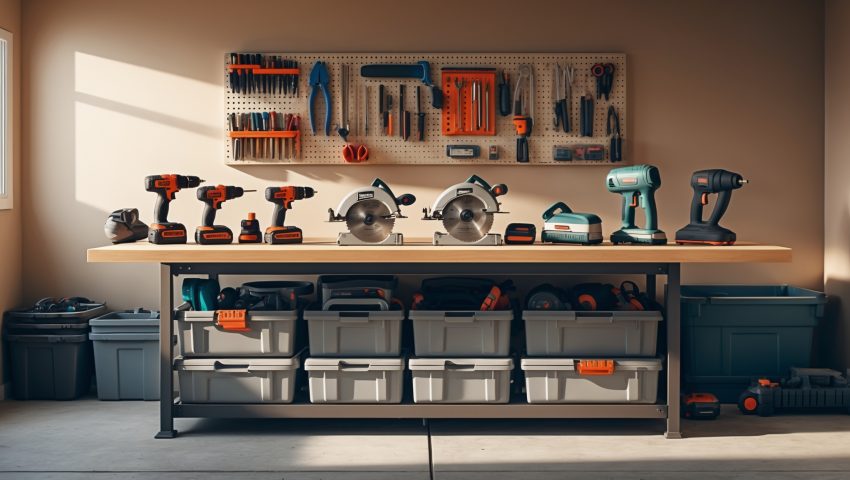
Organizing for Accessibility and Safety
- Hang tools on pegboards or store them in labeled bins to prevent accidental drops and damage.
- Keep power cords loosely coiled; avoid tight wraps that can cause internal wire breakage.
- Store batteries in a cool, dry place, away from direct sunlight and extreme temperatures.
Seasonal and Regional Maintenance Tips
Cold Weather Care
In northern states, avoid storing tools in unheated garages during winter. Cold can cause plastic parts to become brittle and battery performance to degrade. Bring essential tools indoors or use insulated storage chests.
Heat and Sun Exposure
In the Southwest and other hot regions, keep tools out of direct sunlight to prevent warping and battery overheating. Never leave battery-powered tools in a hot car.
Dealing With Corrosive Environments
Coastal homeowners should wipe down tools with a corrosion-inhibiting spray after each use to combat salty air. Rinse masonry dust from tools with a barely damp cloth to prevent corrosive buildup.
Troubleshooting Common Power Tool Issues
Tools Won’t Start
- Check for tripped breakers, dead batteries, or blown fuses.
- Inspect the power switch and contacts for dust or debris build-up.
- Try a different outlet before assuming the tool is faulty.
Unusual Noise or Vibration
- Remove and inspect blades, bits, or attachments for damage.
- Lubricate moving parts if maintenance is overdue.
- If the noise persists, consult a professional technician.
Overheating
- Stop using the tool immediately and let it cool.
- Clean air vents and check for blocked cooling fans.
- Prolonged overheating may indicate internal electrical issues—seek service if in doubt.
Power Tool Maintenance Schedule: A Practical Checklist
- After each use: Dust off, wipe down, and store in a clean, dry place.
- Monthly: Inspect cords, batteries, blades, and moving parts. Lubricate as needed.
- Seasonally: Deep clean exteriors and vents. Check for rust, corrosion, and function of safety features.
- Annually: Replace worn parts, update lubricants, and recalibrate adjustable tools.
When to DIY and When to Call a Pro
Routine cleaning, lubrication, and inspection are DIY-friendly tasks. However, for repairs involving electrical components, internal wiring, or complex mechanical assemblies—especially on expensive or specialty tools—it’s often safer and more cost-effective to consult a certified repair technician. Many tool brands offer mail-in service centers; check your warranty before attempting major repairs.
Conclusion: Make Maintenance a Habit, Not a Hassle
Power tool maintenance isn’t just about keeping your equipment looking good—it’s about ensuring every project is safer, smoother, and more satisfying. By adopting regular cleaning, lubrication, and inspection routines, you protect your investment and dramatically extend the working life of your most essential DIY equipment. Smart storage and seasonal adjustments further prevent common regional pitfalls, whether you’re battling coastal humidity or northern cold snaps. Remember, a few minutes of care after each project can save you hours of frustration and hundreds of dollars in replacement costs down the line. Most importantly, well-maintained tools help you avoid accidents and deliver professional-quality results, no matter your skill level. Start small, stay consistent, and treat tool upkeep as a vital part of your home improvement journey. Your future self—and your next big project—will thank you.