Introduction: Why DIY Basement Waterproofing Matters
A dry basement is the unsung hero of a healthy, comfortable home. In the U.S., where weather patterns can shift from torrential downpours to snowmelt in a single season, moisture intrusion into basements is a pervasive issue. Water in your basement can lead to mold growth, structural deterioration, ruined possessions, and even a drop in property value. Yet, many homeowners are intimidated by the idea of tackling basement waterproofing themselves, fearing that the process is too complex, costly, or risky. Fortunately, with the right preparation, tools, and knowledge, DIY basement waterproofing is a practical project that can protect your home—and your investment—while saving you thousands of dollars in professional labor costs. This comprehensive guide will walk you through every step: from diagnosing moisture sources and choosing the right waterproofing method, to budgeting, tool selection, and executing the project safely and effectively. Whether you’re dealing with occasional dampness or persistent leaks, you’ll learn how to create a water-tight basement environment tailored to your region’s unique climate and your home’s specific needs.
Understanding Basement Water Problems
Recognizing Sources of Moisture
Before you dive into waterproofing, it’s critical to understand where basement moisture comes from. Common culprits include:
- Surface Water: Rain or melting snow pooling near your home’s foundation due to poor grading or clogged gutters.
- Groundwater: High water tables or heavy rainfall can force water through cracks and porous concrete.
- Internal Leaks: Plumbing failures, including leaking pipes or water heaters.
- Condensation: Warm, moist air contacting cooler basement surfaces.
Identifying Symptoms
Look for these telltale signs of basement water problems:
- Musty odors or visible mold/mildew
- Efflorescence (white powdery deposits on walls)
- Peeling paint or bubbling wall coverings
- Cracks in foundation walls or floors
- Standing water or persistent dampness
Planning Your Basement Waterproofing Project
Assessing Project Scope
The best waterproofing approach depends on the severity and source of your water issues. Minor dampness or condensation may only require interior fixes, while persistent leaks demand more comprehensive solutions. Consider:
- Size of the Area: Are you waterproofing the entire basement or just one wall?
- Severity: Occasional dampness versus frequent puddles or flooding.
- Foundation Type: Poured concrete, block, or stone foundations each require specific treatments.
Choosing the Right Waterproofing Method
There are three main categories of basement waterproofing:
- Interior Sealants: Coatings and sealants applied to walls and floors to block moisture.
- Interior Drainage: Solutions like French drains or sump pumps that manage water entry.
- Exterior Waterproofing: Excavating around the foundation to install membranes and improve drainage—effective but labor-intensive.
This guide focuses on interior methods suitable for most DIYers, but will also outline when to consider exterior work or professional help.
Budgeting: What to Expect
Cost Breakdown
DIY basement waterproofing can range from a few hundred dollars to several thousand, depending on the scope:
- Interior Sealants: $150–$500 (materials for 500 sq. ft.)
- Interior Drainage (with sump pump): $500–$2,500 (pump, drain tile, gravel, tools)
- Exterior Excavation: $2,000+ (usually requires equipment rental or professionals)
Factor in costs for:
- Crack repair products: $30–$80 per tube/kit
- Dehumidifier: $200–$400 (optional but recommended)
- Tools (if not already owned): $100–$300
Money-Saving Tips
- Compare prices at hardware stores and online retailers for bulk savings on sealants and membranes.
- Rent tools you’re unlikely to use again, such as rotary hammers or demolition saws.
- DIY labor can save you 50–80% compared to hiring a contractor for interior solutions.
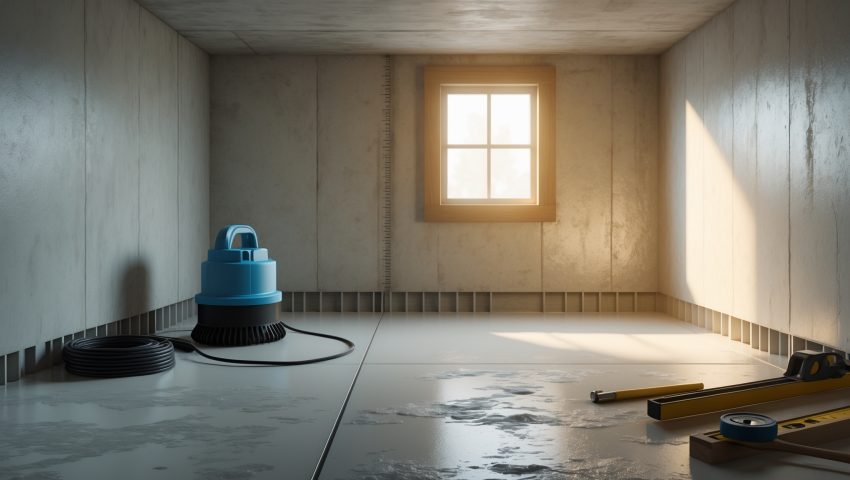
Tools & Materials: What You’ll Need
Essential Tools
- Wire brush and putty knife (for cleaning and prepping surfaces)
- Caulking gun
- Paint roller and brush (for sealants)
- Hammer drill (if installing drain tile or sump pit)
- Utility knife and tape measure
- Shop vacuum
- Safety gear: gloves, goggles, dust mask
Materials Checklist
- Hydraulic cement or epoxy (for sealing cracks)
- Waterproof masonry paint or liquid membrane
- Polyethylene sheeting (for vapor barrier, optional)
- Drainage tile and gravel (for interior drains)
- Sump pump and basin (if needed)
- Dehumidifier (to control humidity after waterproofing)
Step-by-Step DIY Basement Waterproofing Process
Step 1: Preparation and Safety
- Clear the basement perimeter of all items.
- Wear gloves, goggles, and a dust mask.
- Ensure proper ventilation—open windows and use a fan if possible.
Step 2: Surface Cleaning and Inspection
- Use a wire brush and shop vacuum to remove dirt, efflorescence, and loose paint from walls and floors.
- Inspect for cracks, holes, or deteriorating mortar joints.
- Mark all problem areas for repair.
Step 3: Repairing Cracks and Joints
- Widen small cracks with a chisel or rotary tool to at least 1/4″ for better adhesion.
- Mix hydraulic cement or epoxy according to manufacturer instructions.
- Force the product deep into cracks and smooth the surface.
- Allow to cure as directed (typically 24 hours).
Step 4: Applying Interior Sealant
- Choose a waterproofing paint or liquid membrane rated for below-grade use.
- Apply the first coat with a roller or brush, working into all nooks and crannies.
- Let dry completely, then apply a second coat for maximum protection.
- Pay special attention to wall-to-floor joints and corners.
Step 5: Installing Interior Drainage (if needed)
- Mark a trench line 8–12 inches from the affected wall(s).
- Use a hammer drill and demolition saw to create a trench 6–8 inches wide and deep.
- Lay perforated drainage pipe (French drain) and cover with washed gravel.
- Connect the pipe to a sump basin installed at the lowest point.
- Backfill with gravel and patch the concrete floor.
- Install and test the sump pump.
Step 6: Managing Humidity and Preventing Future Issues
- Run a dehumidifier to keep relative humidity below 50%.
- Seal rim joists and windows with expanding foam or caulk.
- Ensure downspouts direct water at least 6 feet away from your foundation.
- Regrade landscaping as needed to slope away from the house.
Maintenance Best Practices
Ongoing Inspections
- Check your basement every spring and fall for new cracks, damp spots, or musty odors.
- Test the sump pump by pouring water into the basin.
- Inspect gutters and downspouts each season.
Cleaning and Upkeep
- Keep the perimeter of your home clear of debris and mulch that could trap moisture.
- Wipe down walls and floors with a mild bleach solution if mold appears.
- Replace dehumidifier filters regularly.
Common DIY Mistakes to Avoid
- Ignoring the Source: Only treating symptoms (like painting over dampness) without addressing exterior grading or gutter issues can lead to recurring problems.
- Poor Surface Preparation: Failing to clean and repair surfaces before applying sealant reduces effectiveness.
- Inadequate Drainage: Skipping interior drains or not extending downspouts far enough can allow water to return.
- Using the Wrong Products: Not all paints or sealants are rated for below-grade moisture—always check manufacturer specs.
- Safety Shortcuts: Neglecting to wear protection or ensure ventilation during application of chemicals can cause health problems.
When to Call a Professional
- Structural cracks wider than 1/4″ or foundation bowing.
- Persistent flooding despite DIY efforts.
- Mold infestations covering more than 10 square feet.
- Need for exterior excavation beyond your skill or comfort level.
Professional waterproofers have specialized tools and expertise for severe cases. Don’t risk your health or safety on major structural repairs.
Conclusion: Investing in a Dry, Healthy Basement
Basement waterproofing isn’t just about keeping water out—it’s about creating a space that’s healthy, usable, and adds value to your home. By understanding the underlying causes of moisture, choosing the right DIY approach, and diligently following each step, you can transform even the dampest basement into a dry, worry-free environment. The investment of time and modest expense for materials pays off in preventing costly repairs, stopping mold before it starts, and preserving your possessions. With regular maintenance and periodic checks, your hard work will last for years to come. Remember: while many aspects of basement waterproofing are well within the reach of a dedicated DIYer, don’t hesitate to consult a pro if you find yourself facing significant structural issues or persistent leaks. Your basement is the foundation of your home—treating it with care and attention ensures your entire household stays safer, healthier, and more comfortable, no matter what the weather brings. Roll up your sleeves, gather your tools, and take pride in safeguarding your home from the ground up.
If my basement only smells musty after heavy rain, does that usually mean groundwater is the main problem rather than surface water or plumbing?
A musty smell after heavy rain often points to groundwater seeping through walls or floors, rather than surface water or plumbing leaks. However, checking gutters, downspouts, and plumbing for issues is still a good idea to rule out other sources.
If I’m only seeing occasional dampness instead of major leaks, is it worth doing a full DIY waterproofing, or are there simpler, less expensive steps I should try first?
For occasional dampness, you can often start with simpler steps like improving drainage around your foundation, sealing visible cracks, and using a dehumidifier. Reserve full DIY waterproofing for persistent or worsening moisture problems.
Can you give a ballpark figure for the total DIY budget, including the essential tools, for an average-sized basement in the Midwest?
For an average Midwest basement, expect to spend around $800 to $1,500 for DIY waterproofing. This includes essential tools, sealants, and materials, but costs can vary based on basement size and existing issues.
When budgeting for a DIY basement waterproofing project, what unexpected costs should I look out for beyond the standard tools and materials?
Unexpected costs can include repairing hidden water damage, mold remediation, renting specialized equipment like dehumidifiers, disposing of debris, fixing foundation cracks, and possible permit fees. Setting aside a contingency fund will help cover these surprises.
How can I tell if the moisture in my basement is from condensation versus a leaking pipe before I start any repairs?
To distinguish between condensation and a leaking pipe, tape a piece of foil to the wall. If moisture appears on the room side, it’s condensation; if moisture collects behind the foil, it’s likely a leak.
How should I estimate the total budget if my basement has both condensation issues and groundwater seepage after heavy rain?
To estimate your budget, include costs for interior waterproofing to manage condensation, plus exterior solutions or sump pump installation for groundwater seepage. Add expenses for dehumidifiers, sealants, drainage systems, and any labor or material fees specific to your basement’s size.
Could you give more details on what tools are absolutely necessary versus nice to have for a first DIY waterproofing project?
For essential tools, you’ll need a wire brush, putty knife, caulking gun, masonry waterproofing brush or roller, and safety gear like gloves and goggles. Nice-to-have extras include a power washer for cleaning and a dehumidifier for drying the area faster.
If my basement only smells musty but I don’t see obvious water, should I still do full waterproofing or start with smaller steps?
If you only notice a musty smell and no visible water, start with smaller steps like improving ventilation, using a dehumidifier, and checking for hidden leaks or damp areas before committing to full waterproofing.
What are some common mistakes DIYers make when diagnosing moisture sources, and how can they avoid misidentifying the problem?
DIYers often assume moisture comes from leaks when it could be condensation or groundwater. To avoid misdiagnosis, check for plumbing leaks, test for humidity, and observe if the issue changes with weather. Careful inspection inside and out helps identify the real source.
If my basement only has occasional damp spots rather than visible leaks, should I still follow the same waterproofing steps outlined here or focus on different solutions?
For occasional damp spots, you can often focus on basic measures like improving drainage, sealing cracks, and using dehumidifiers. Full waterproofing steps may not be necessary unless the issue gets worse or you notice persistent moisture.
How do you tell the difference between moisture caused by condensation and moisture from an external leak when inspecting your basement?
Condensation usually forms water droplets on cool surfaces like pipes and walls, often during humid weather. External leaks leave stains, damp patches, or trickling water, especially after rain. Check for water trails or mold growth to help distinguish the source.
When figuring out my budget, what are the most expensive tools or materials I should plan for in a typical DIY basement waterproofing project?
For most DIY basement waterproofing projects, the most expensive items are likely to be sump pumps, quality waterproofing membranes or sealants, and possibly specialized tools like a concrete mixer or wet/dry vacuum. Factor these into your budget first.