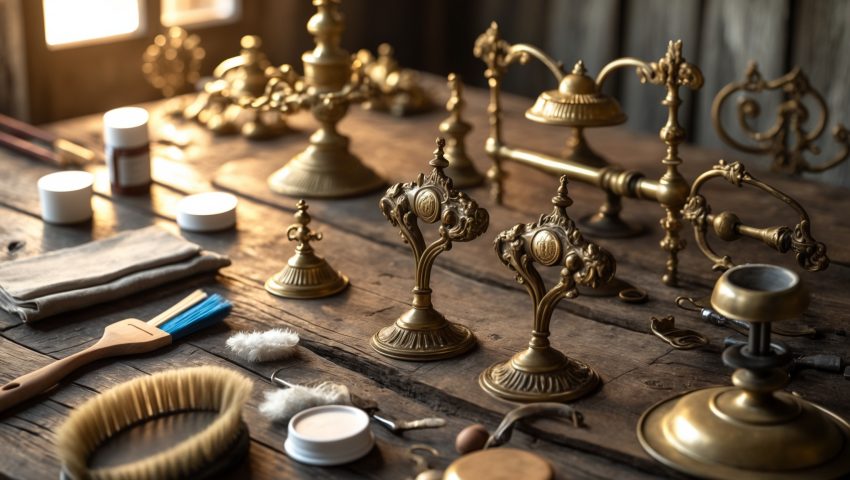
Introduction: Why Antique Metal Fixtures Deserve a Second Chance
Across the United States, homes—both historic and contemporary—often conceal treasures in plain sight: antique metal fixtures. From ornate brass doorknobs to iron vent grilles, these pieces are more than functional hardware; they’re a testament to craftsmanship and a unique way to infuse your space with character. Yet, decades of paint, tarnish, and neglect can leave them looking worse for wear. Instead of discarding and replacing these fixtures, restoring them offers a cost-effective, eco-friendly, and rewarding alternative. However, refinishing metal is a delicate process that requires the right approach to avoid common pitfalls like surface damage, improper cleaning, or accelerated corrosion.
This in-depth guide will walk you through every essential step of refinishing antique metal fixtures. You’ll learn how to assess the quality and value of your pieces, select and use tools suited for brass, iron, copper, and more, and apply preservation strategies that ensure your hard work endures for years. Whether you’re a homeowner tackling a full restoration or a DIY enthusiast hoping to revive a few vintage pieces, this resource provides actionable advice for authentic results. Let’s unlock the hidden beauty in your home’s metal details—and avoid the mistakes that can turn a restoration dream into a costly misadventure.
Assessing Your Antique Metal Fixtures
Identifying Metal Types and Their Challenges
Before you start any restoration, it’s crucial to know what you’re working with. Different metals respond uniquely to cleaning agents, abrasives, and protective finishes. The most common antique fixtures in U.S. homes include:
- Brass: Warm yellow color, often lacquered, sometimes magnetically tested (brass is not magnetic).
- Iron: Heavy, dark gray or black, may show rust or pitting, magnetic.
- Copper: Reddish-brown tone, develops green patina over time, non-magnetic.
- Bronze: Brownish-gold, heavier than brass, often used for hardware and decorative pieces.
- Nickel and Chrome: Silver-toned, common in early-mid 20th-century baths and kitchens.
To test, use a magnet (iron and steel are magnetic, brass/bronze/copper are not). For further certainty, consult a local metalworker or restoration specialist—especially if you suspect your fixture is valuable or historically significant.
Evaluating Condition and Value
Inspect each piece for structural damage, corrosion, missing parts, or prior repairs. Light tarnish and surface rust are generally fixable, but cracks, warping, or deep pitting may require professional intervention. If your fixture has a manufacturer’s mark or patent number, research its origin; some pieces may have collectible value, influencing your restoration choices.
Gathering the Right Tools and Materials
Using the correct tools is vital for safe, effective restoration. Here’s a breakdown by fixture type and metal:
- Basic Supplies:
- Soft-bristled brushes (nylon, brass, and steel)
- Microfiber cloths
- Latex or nitrile gloves
- Plastic or glass containers for soaking
- Painter’s tape and drop cloths
- Chemical Cleaners:
- Mild dish soap
- White vinegar and baking soda
- Commercial metal polishes (Brasso, Barkeeper’s Friend, etc.)
- Citric acid (for tough tarnish)
- Rust remover (Evapo-Rust or similar, for iron/steel)
- Abrasives:
- 0000-grade steel wool (ultra-fine, for metalwork)
- Fine sandpaper (400–800 grit for severe corrosion)
- Scouring pads (non-scratch types)
- Protective Coatings:
- Paste wax (microcrystalline or carnauba)
- Clear lacquer spray (for brass/copper)
- Rust-inhibiting paint (for iron/steel, if painting is desired)
- Optional Tools:
- Dremel rotary tool with polishing attachments
- Small screwdrivers and pliers (for disassembly)
- Ultrasonic cleaner (for intricate hardware)
Safe Removal and Disassembly
Preparation
Before removing fixtures, photograph each one in place and note how parts fit together. This reference will be invaluable during reassembly. Protect surrounding surfaces with painter’s tape and drop cloths.
Disassembly Tips
- Use the correct screwdriver size to avoid stripping heads.
- For stubborn screws, apply a penetrating oil and wait 30 minutes before trying again.
- Keep all small parts (screws, washers, escutcheons) in labeled containers or bags.
- If the fixture is wired (e.g., lighting), turn off power at the breaker before removal. Consult an electrician if you’re unsure.
Cleaning and Stripping: Step-by-Step Techniques
Removing Surface Dirt and Grime
Start with the gentlest cleaning method:
- Soak the fixture in warm water with mild dish soap for 30–60 minutes.
- Use a soft brush to dislodge dirt from crevices.
- Rinse thoroughly and dry with a microfiber cloth.
Stripping Old Paint and Lacquer
- Boiling Water Method (for non-painted brass/copper): Place the fixture in a pot of simmering water with a few tablespoons of baking soda. Paint should bubble off after 30–60 minutes. Use tongs and gloves to handle hot metal.
- Chemical Paint Strippers: Use a gel-type, non-caustic stripper for intricate or painted fixtures. Apply in a well-ventilated area, wear gloves, and follow the manufacturer’s instructions. Scrape gently with a wooden stick.
- Removing Lacquer: Use acetone or lacquer remover, applied with a cloth, for clear coatings on brass or copper.
After stripping, wash the piece thoroughly to remove residues.
Tackling Tarnish, Rust, and Corrosion
- Brass and Copper: Use a paste of white vinegar and baking soda or a commercial polish. Rub gently with a soft cloth or 0000 steel wool for stubborn areas.
- Iron and Steel: For surface rust, submerge in a rust remover or use citric acid. Scrub with a wire brush or fine steel wool. Rinse and dry immediately to prevent flash rusting.
- Nickel/Chrome: Use non-abrasive polish and avoid steel wool, which can scratch the finish.
Polishing and Repair
Manual Polishing
Apply metal polish with a microfiber cloth, buffing in small circles. For intricate patterns, use a soft-bristled brush or cotton swab. Repeat as needed until the desired shine is achieved.
Dremel or Rotary Tool Polishing
For heavily tarnished or detailed pieces, a rotary tool with felt or soft-bristle attachments can save time. Use on the lowest speed and test on a hidden area first. Always wear eye protection.
Repairing Surface Defects
- Fill small pits in iron with metal epoxy, then sand smooth after curing.
- For loose joints or broken parts, use solder (for brass/copper) or consult a metalsmith for brazing or welding.
- Replace missing screws or fasteners with period-appropriate hardware from salvage suppliers.
Preserving and Protecting Your Restored Fixtures
Applying Protective Finishes
- Brass and Copper: Apply a thin coat of microcrystalline wax for a natural sheen and protection. For a longer-lasting barrier, use a clear lacquer spray (ensure the piece is immaculately clean and dry first).
- Iron and Steel: If leaving unpainted, wax provides short-term rust resistance. For outdoor or high-moisture areas, consider rust-inhibiting paint or a clear protective enamel.
- Nickel/Chrome: Regular cleaning and waxing prevent tarnish; avoid harsh chemicals.
Routine Maintenance Tips
- Dust fixtures regularly with a dry microfiber cloth.
- Reapply wax every 6–12 months, or as needed.
- Address spots of rust or tarnish promptly to prevent spread.
- Avoid abrasive sponges and harsh chemicals in daily cleaning.
Common DIY Mistakes and How to Avoid Them
- Over-polishing: Excessive abrasion can strip away decorative details and patina, reducing the value and historical integrity of your fixtures. Always start with the least aggressive method.
- Using the Wrong Chemicals: Ammonia, bleach, and acidic cleaners can permanently discolor or etch metal. Research or test on a small area before proceeding.
- Skipping Protective Coating: Bare metal is vulnerable to rapid tarnish and corrosion. Always finish with wax, lacquer, or another appropriate sealer.
- Improper Storage During Restoration: Allowing cleaned, unprotected fixtures to sit in humid or unventilated areas can cause flash rust or tarnish before reinstallation.
- Incorrect Reassembly: Misplacing parts or improper alignment can affect function and appearance. Use photos and notes for reference.
Case Study: Restoring a 1920s Brass Door Plate
Initial Assessment
A homeowner discovers a heavily tarnished brass door plate beneath layers of paint on an interior door in a 1920s bungalow. The plate is structurally sound but nearly unrecognizable.
Restoration Process
- Removal: The plate is carefully unscrewed, and all parts are stored safely.
- Paint Stripping: Boiling water and baking soda loosen the paint, which is gently scraped away.
- Cleaning: A soft brush and dish soap remove remaining grime.
- Polishing: White vinegar and baking soda paste, followed by a light application of Brasso, revive the brass’s luster.
- Protection: After drying, a coat of microcrystalline wax is applied for protection.
- Reinstallation: The plate is reattached, transforming the door with its restored shine and detail.
Results
The plate’s intricate floral motifs are now crisp and visible, serving as a centerpiece of the room and a conversation starter with guests.
Resources for Finding and Restoring Antique Metal Fixtures
- Architectural salvage yards and online marketplaces (eBay, Etsy, Facebook Marketplace)
- Local metalworking and restoration specialists for complicated repairs
- Online communities: r/Restoration, Old House Journal forums, and Facebook groups focused on vintage hardware
- Manufacturer archives for period hardware identification
Conclusion: Preserving Character, One Fixture at a Time
Restoring antique metal fixtures is more than a cosmetic upgrade—it’s an act of preservation that honors the history and craftsmanship embedded in your home. By investing time and care into these details, you not only save money compared to purchasing replacements but also help reduce waste and maintain the architectural integrity of your space. Each piece you revive becomes a small legacy—an enduring link between past and present, and a testament to hands-on ingenuity.
With the right tools, techniques, and preventative measures, even the most tarnished door plate or rusted vent cover can be transformed. Remember: patience and gentleness yield the best results, and the satisfaction of seeing a dull, forgotten fixture gleam once more is well worth the effort. As you tackle future projects, let these lessons guide your approach—not just to metal, but to every aspect of home restoration. Every home has a story; by restoring its fixtures, you’re helping it shine anew.
For further inspiration, connect with restoration communities, explore local salvage sources, and keep learning about the rich variety of antique hardware in American homes. Whether your project is big or small, your efforts will leave both a visible and lasting impact.
How do you decide when a metal fixture is worth restoring versus replacing, especially if there is a lot of corrosion or pitting on iron pieces?
Assess the fixture’s historical or sentimental value, structural integrity, and cost of restoration versus replacement. If corrosion is mostly surface deep, restoration is possible. Severe pitting, weakened structure, or missing parts may make replacement more practical.
When refinishing an old brass doorknob that has a mix of tarnish and several layers of paint, is it better to use a chemical paint remover or try mechanical methods first?
For a brass doorknob with both tarnish and paint layers, it’s usually best to start with a gentle chemical paint remover. This helps protect the metal from scratches, then you can address tarnish using mild polishing afterward.
When you mention surface damage during refinishing, what are the most common mistakes people make with brass fixtures and how can you avoid them?
Common mistakes with brass fixtures include over-sanding, using harsh chemicals, and aggressive polishing, which can remove original finishes or details. Avoid these by using gentle cleaners, fine abrasives, and testing products on a small area first.