Introduction: Unlocking the Potential Above
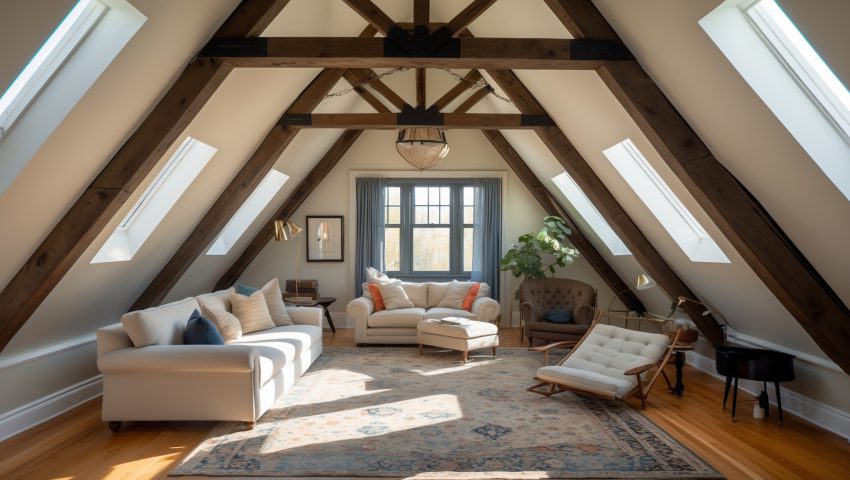
Across the United States, thousands of homeowners are looking up—literally—when it comes to expanding their living space. Attics, often relegated to storing holiday decorations or forgotten memorabilia, offer an exciting and underutilized opportunity for home improvement. Whether you dream of a light-filled studio, a private guest retreat, or a playroom for the kids, converting your attic into a livable loft is a project that can dramatically increase both your home’s value and its day-to-day functionality.
But attic-to-loft conversions are no small feat. There are unique structural, safety, budgetary, and compliance considerations that make this a more complex DIY endeavor than simply finishing a basement or swapping out kitchen cabinets. Done right, however, the rewards are immense—a beautiful, versatile new space and the satisfaction of a project well executed. In this deep-dive, we’ll walk through real conversion stories from U.S. homeowners, break down the true costs (including those pesky hidden ones), provide practical tips and tool guides, and clarify compliance and safety essentials. If you’re serious about turning your dusty attic into a usable, inviting loft, this is your comprehensive, no-nonsense roadmap.
Section 1: Real U.S. Attic-to-Loft Conversion Stories
Case Study 1: The Portland Craftsman – Creating a Home Office Retreat
Sarah and Mike purchased their 1920s Craftsman in Portland, Oregon, knowing the attic was ripe for transformation. With both working remotely, space was at a premium. Their attic conversion, completed over six months, turned a drafty storage space into a bright, insulated home office with built-in shelving and dual workstations.
- Square footage: 350 sq. ft.
- Total DIY cost: $17,800
- Key challenges: Reinforcing old joists to support flooring, adding a legal egress window, and rerouting HVAC vents.
- Proudest feature: Custom skylight nook above the main desk.
Case Study 2: Atlanta Bungalow – Guest Loft on a Budget
For the Jeffersons in Atlanta, Georgia, converting their bungalow’s attic was about creating a comfortable guest suite without breaking the bank. Favoring thrift-store finds and reclaimed wood, they tackled much of the labor themselves, hiring out only electrical work.
- Square footage: 270 sq. ft.
- Total DIY cost: $9,100
- Key challenges: Working around angled ceilings and maximizing headroom.
- Proudest feature: Built-in platform bed with under-bed storage.
Case Study 3: Minnesota Colonial – Playroom with a View
In Minneapolis, the Tran family transformed their chilly attic into a vibrant playroom for their children. Prioritizing safety and comfort, they insulated thoroughly and added carpeting, creating a space that’s now the warmest spot in their home.
- Square footage: 400 sq. ft.
- Total DIY cost: $22,650
- Key challenges: Upgrading insulation to meet local energy codes, adding a stair railing, and soundproofing the floor.
- Proudest feature: Panoramic dormer window seat with built-in bookshelves.
Section 2: True Cost Breakdown—What to Expect (and What Surprises DIYers)
Typical Budget Ranges for U.S. Attic Conversions
- Basic (DIY labor, minimal structural changes): $8,000–$15,000
- Midrange (added windows, upgraded insulation, basic bathroom): $15,000–$30,000
- High-end (dormers, bathrooms, staircase upgrades, custom finishes): $30,000–$60,000+
Major Expense Categories
- Structural reinforcement: $1,500–$8,000 (if joists or rafters need upgrading for habitable space)
- Insulation & vapor barriers: $1,200–$6,000 (critical for comfort and code compliance)
- Windows/skylights: $1,000–$5,000 (for light, egress, and ventilation)
- Electrical upgrades: $1,200–$4,000 (adding outlets, lighting, and sometimes a subpanel)
- HVAC extension: $1,500–$7,000 (mini-splits are a popular DIY-friendly solution)
- Flooring: $800–$3,500 (laminate, carpet, or engineered hardwood)
- Staircase improvements: $1,000–$6,000 (code-compliant and safe access is a must)
- Permits and inspections: $350–$2,000 (varies by municipality)
Hidden or Surprise Costs
- Mold or water damage remediation—especially in older homes ($500–$5,000+)
- Asbestos or lead paint abatement—common in pre-1980s homes ($1,000–$4,000)
- Upgrading smoke/CO detectors to meet modern codes ($150–$800)
- Professional consultations (engineers, architects) for complex projects ($500–$2,500)
Section 3: Compliance, Permits, and Code—What Every DIYer Must Know
Understanding Habitable Space Requirements
For your attic to legally become a living space in most U.S. jurisdictions, it must meet basic code requirements:
- Minimum ceiling height: Usually 7 feet over at least half the floor area
- Safe egress: At least one operable window or door to the outside for emergency exit
- Permanent staircase: Pull-down ladders rarely meet code
- Proper insulation and ventilation: For energy efficiency and moisture control
- Electrical and smoke/CO detectors: Up to modern standards
Permit Process: What to Expect
Most attic conversions require permits, and for good reason—inspectors will check for structural safety, fire egress, and compliance with zoning. The general steps:
- Draw up a floor plan (many cities require architectural drawings for major changes)
- Submit permit application and pay fees
- Undergo plan review (can take 2–6 weeks)
- Schedule inspections at key milestones: after framing, insulation, electrical, and final finish
Skipping permits can derail future sales and insurance claims—never “wing it” here.
Section 4: Practical DIY Tips—From Planning to Finishing Touches
Planning and Preparation
- Use a laser measure to map out floor area and ceiling heights before committing.
- Sketch multiple layouts to maximize usable space around sloped walls.
- Budget for professional help with HVAC, electrical, or structural work unless you are fully qualified.
Essential Tools and Equipment
- Stud finder and laser level (critical for framing and finish carpentry)
- Reciprocating saw and circular saw (demo and new framing)
- Insulation knife and protective gear (respirator, goggles, gloves)
- Staple gun and vapor barrier materials
- Power drill/driver with multiple bits
- Portable work lights (attics can be dim until electrical is in)
- Shop vacuum (dust is inevitable!)
Common DIY Pitfalls—and How to Avoid Them
- Ignoring moisture issues: Always check for leaks before insulating or finishing. Unaddressed moisture leads to mold and ruined finishes.
- Under-insulating: R-38 (or local code minimum) is standard. Skimping now means higher bills and discomfort later.
- Overloading joists: Attics weren’t designed for living loads. Consult a structural engineer if in doubt.
- Improper ventilation: Soffit and ridge vents—or mechanical fans—are vital for healthy airflow.
- Access issues: If your staircase is too steep or narrow, prioritize a code-compliant upgrade for safety.
Energy Efficiency Upgrades to Consider
- Install high-performance windows or skylights with low-E coatings
- Use spray foam insulation for tricky roof slopes
- Add a smart thermostat for any attic-specific HVAC zones
- Seal all air leaks thoroughly before drywalling
Section 5: Step-by-Step Overview—DIY Attic-to-Loft Transformation
1. Assessment and Planning
- Inspect the attic for structural, moisture, and pest issues
- Document dimensions and sketch possible layouts
- Research code and permit requirements for your area
- Draft a realistic budget, including a 15% contingency
2. Cleanout and Demolition
- Remove old insulation, debris, and any non-structural partitions
- Address any signs of water damage or rot before proceeding
3. Structural and Rough Carpentry
- Reinforce floor joists as needed for load-bearing
- Add dormers or skylights if planned
- Frame new walls or built-in features (closets, nooks)
4. Mechanical, Electrical, and Plumbing (MEP)
- Run electrical wiring and install outlet boxes
- Extend HVAC ducts or install mini-split systems
- Rough-in plumbing if adding a bathroom
5. Insulation and Air Sealing
- Install insulation to code; consider spray foam for air-tightness
- Add vapor barriers where required
- Seal all penetrations to prevent drafts
6. Drywall, Flooring, and Finishes
- Hang and finish drywall (use moisture-resistant types in bathrooms)
- Install flooring—consider soundproof underlayment
- Paint, add trim, and install fixtures
7. Final Inspections and Move-In
- Schedule required inspections
- Install smoke and CO detectors
- Move in furniture and personalize your new loft!
Section 6: Maintenance Best Practices for Your New Loft
- Regularly check for roof leaks, especially after storms.
- Monitor humidity levels and use dehumidifiers if needed to prevent mold.
- Vacuum and dust frequently—attics can be dust-prone, especially if unfinished areas remain.
- Inspect insulation and ventilation annually to ensure ongoing comfort and efficiency.
- Check windows and skylights for condensation or seal failures.
- Test smoke/CO detectors monthly.
Conclusion: Your Blueprint for an Inspired, Comfortable Loft
Converting an attic into a livable loft is one of the most transformative DIY projects a homeowner can undertake. Beyond the obvious gain in usable square footage, it’s a chance to create a truly personalized space that reflects your lifestyle and aesthetic. From the inspiring stories of homeowners across the U.S. to the nitty-gritty details of budgeting, compliance, and construction, it’s clear that success comes down to careful planning, a willingness to tackle challenges head-on, and knowing when to call in the pros.
While the journey can be demanding—filled with unexpected obstacles like hidden moisture, headroom headaches, or surprise code requirements—the payoff is immense. Whether you’re dreaming of a serene home office, a cozy guest suite, or a whimsical playroom, your attic holds more potential than you might ever have imagined. By following the practical tips, cost breakdowns, and step-by-step guidance we’ve outlined, you’ll be well-equipped to avoid costly mistakes and deliver a finished loft that brings lasting value and daily enjoyment.
Remember: every successful attic conversion starts with a realistic assessment, unwavering attention to detail, and respect for your home’s structural and safety requirements. With patience and the right approach, you can turn that forgotten space above into your home’s new favorite room—and join the ranks of inspired U.S. homeowners who’ve already made the leap.