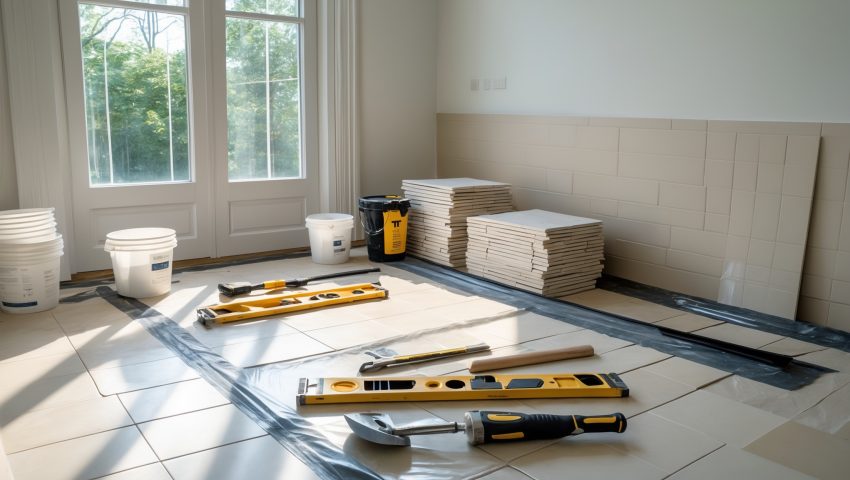
Introduction: Why DIY Tile Floors Are a Game-Changer—And the Challenges You Can Conquer
Tile flooring consistently ranks as a favorite among U.S. homeowners seeking durability, visual appeal, and easy maintenance. Whether you’re upgrading a kitchen, bathroom, entryway, or even a mudroom, installing tile floors yourself can save thousands of dollars on labor and allow you to fully customize the look of your space. However, DIY tile installation isn’t just about slapping tiles onto the floor—there’s a critical learning curve that, if overlooked, can lead to expensive mistakes and unsightly results. From accurate budgeting and the right tool selection to mastering the technique that prevents lippage (the unevenness between adjacent tiles, a common beginner’s pitfall), this guide will walk you through each phase of a successful DIY tile installation, tailored specifically to the unique needs and challenges U.S. homeowners face. Whether you’re a first-timer or looking to sharpen your skills, you’ll finish with the confidence to achieve professional-level results that last for decades.
Understanding the True Cost of DIY Tile Floor Installation
Breaking Down Material Costs
Before you even pick up a trowel, it’s essential to know what your project will cost. Tile flooring materials can vary dramatically:
- Tile: Ceramic and porcelain tiles are the most common for DIYers, ranging from $1 to $7 per square foot. Natural stone tiles (marble, slate, travertine) can climb to $10–$30+ per square foot.
- Mortar/Thinset: Plan on $15–$30 per 50 lb. bag. Most projects require 1–2 bags per 100 sq. ft., depending on tile size and subfloor flatness.
- Grout: $15–$40 per 25 lb. bag, with sanded vs. unsanded options based on grout joint width.
- Backer Board: Cement or fiberboard panels ($12–$20 for a 3×5 ft. sheet) are often required for wood subfloors.
- Edge Trims and Transitions: $2–$7 per linear foot for a polished finish where tile meets other flooring.
- Miscellaneous: Spacers, buckets, mixing paddles, and cleaning supplies. Budget $30–$75.
For a 120 sq. ft. kitchen, expect basic materials (excluding tools) to run $400–$1,500 depending on tile choice and project complexity.
Tool Investment: Renting vs. Buying
Investing in the right tools is nonnegotiable for a quality finish. Here’s what you’ll need:
- Wet Tile Saw: $60–$150 to rent for a weekend, or $250+ to purchase. Essential for straight, clean cuts.
- Tile Nippers and Scoring Tools: $10–$30. Handy for curves and notches.
- Notched Trowel: $10–$15. Size depends on tile type (typically 1/4” x 3/8” for floor tiles).
- Rubber Grout Float: $10–$20.
- Knee Pads: $15–$50. Don’t skip these—your joints will thank you.
- Level and Straightedge: $20–$50. Crucial for checking flatness and lippage.
- Spacers and Wedges: $5–$15 per pack.
Most DIYers rent a wet saw and buy the rest, keeping tool costs under $250 for a typical project.
Hidden Costs: Subfloor Prep and Waste
Proper subfloor preparation is vital. Older homes may require repairs to the subfloor or additional leveling compound ($30–$50 per bag). Always budget 10–15% extra tile for cuts, breakage, and future repairs.
Essential Tools and Equipment: What You Really Need
Must-Have Tools for DIY Tile Success
- Wet Tile Saw or Manual Tile Cutter: For precise, chip-free cuts.
- Notched Trowel: The right size ensures proper mortar coverage.
- Rubber Mallet: For gently tapping tiles into place without cracking.
- Level and Laser Level: For checking each row and the overall flatness.
- Tile Spacers and Wedges: Maintain uniform grout joints and help adjust for minor inconsistencies.
- Mixing Paddle and Drill: To blend mortar and grout thoroughly.
- Grout Float and Sponge: For smooth, even grout application and cleanup.
- Buckets, Rags, and Clean Water: Essential for mixing and wiping excess grout.
Nice-to-Have Extras
- Tile Leveling System: Clips and wedges that drastically reduce lippage, especially for large-format tiles ($25–$60 for a starter kit).
- Oscillating Multi-Tool: For undercutting door jambs and odd trim.
- Shop Vac: For keeping the workspace free of dust and debris.
Permits, Compliance, and Local Nuances
Do You Need a Permit?
Most U.S. municipalities do not require permits for tile replacement in single-family homes if you’re not altering the structure, subfloor, or plumbing. However, if your project involves:
- Removing or relocating walls
- Changing the subfloor
- Working in condos or multi-unit buildings (HOA rules often apply)
…always check with your local building department. Some cities require a simple notification or inspection, especially for bathrooms (waterproofing compliance).
Understanding Building Codes
Ensure your installation meets the ANSI A108 standards for tile and the TCNA Handbook recommendations. This guarantees your floor is safe, durable, and eligible for future insurance claims if needed.
Preparing for Success: Subfloor Prep and Layout
Assessing and Repairing the Subfloor
Start by removing old flooring and thoroughly cleaning the subfloor. Check for squeaks, dips, or damage. A flat, stable surface is non-negotiable—use a long level or straightedge to check, and fill low spots with floor leveler if deviations are more than 1/8” over 6 feet. For wood subfloors, install cement backer board according to manufacturer specs, staggering seams and securing with appropriate screws. Tape and mortar the joints for a seamless base.
Planning the Tile Layout
Dry-lay tiles to visualize the layout and minimize narrow slivers at walls, which look unprofessional. Snap chalk lines at the room’s center and perpendicular to the longest wall to create reference points. Adjust as needed so cut tiles at the edges are at least half a tile wide. This step is crucial for visual balance and a pro finish.
Step-by-Step Installation: Preventing Lippage for a Flawless Finish
Mixing Mortar and Setting Tiles
Mix thinset according to the manufacturer’s instructions using a drill and paddle. Only mix as much as you can use within 30–45 minutes. Spread mortar with a notched trowel at a consistent angle, combing lines in one direction for even coverage. Press tiles firmly into the mortar, twisting slightly to ensure full contact. Use spacers to maintain even joints.
Preventing Lippage: Pro Techniques
- Check Every Tile: After setting each tile, place a level or straightedge across adjacent tiles. The surface should be flush—no tile should protrude more than 1/32” above its neighbor.
- Use a Tile Leveling System: Especially for larger tiles (12”x24” or longer), install leveling clips and wedges as you go. This prevents tiles from settling at different heights as the mortar cures.
- Adjust as You Go: Don’t move too quickly. Step back every few rows to check for ridges or unevenness and correct immediately.
- Mind Mortar Consistency: Too much or too little mortar under a tile can create high or low spots. Maintain a steady hand and consistent trowel angle.
Cutting Tiles for Edges and Obstacles
Measure carefully and use a wet saw for straight cuts or a tile nipper for curves around pipes and corners. Always wear eye protection and smooth rough edges with a rubbing stone.
Grouting and Finishing Touches
Choosing the Right Grout
For joints wider than 1/8”, use sanded grout; for smaller joints, unsanded. Mix in small batches and apply with a grout float, pressing firmly to fill all gaps. Wipe away excess with a damp sponge, rinsing frequently. Allow grout to cure as recommended before light foot traffic (typically 24–48 hours).
Sealing (If Required)
Some grout and natural stone tiles require sealing to prevent staining. Follow manufacturer guidelines and reapply as needed for ongoing protection.
Installing Trim and Transitions
Install edge trims and transition strips at doorways or where tile meets other flooring types. This gives your project a clean, professional look and prevents tile edges from chipping over time.
Maintenance and Longevity: Caring for Your New Tile Floor
Routine Cleaning
Sweep or vacuum regularly to remove dirt and grit, which can scratch tiles. Mop with a mild, pH-neutral cleaner; avoid harsh chemicals that can damage grout or sealer.
Grout Care
Inspect grout lines periodically for cracks or stains. Spot-clean as needed and re-seal grout every 1–2 years if your grout requires it. Promptly address minor repairs to prevent water intrusion and subfloor damage.
Addressing Damage
Keep a few spare tiles for future repairs. If a tile cracks or chips, remove the grout around it, break out the damaged tile with a chisel, and set a new tile with fresh mortar and grout.
Common Mistakes to Avoid
- Rushing Subfloor Prep: Skipping leveling or not securing backer board leads to cracked tiles and grout.
- Inconsistent Mortar Application: Uneven mortar coverage causes hollow spots and lippage.
- Neglecting Expansion Gaps: Always leave 1/4” gap at room edges to allow for movement—cover with baseboard or shoe molding.
- Walking on Fresh Tiles: Wait the recommended curing time before foot traffic to prevent shifting and lippage.
- Poor Cleanup: Letting grout haze set too long makes it extremely difficult to remove.
Conclusion: Your Path to a Flawless DIY Tile Floor
DIY tile floor installation is one of the most satisfying home improvement projects you can tackle as a U.S. homeowner. Not only does it dramatically transform a room’s appearance, but it also offers long-term durability and can substantially boost your property’s value. The key to success lies in careful planning—honestly assessing your budget, investing in the right tools, and respecting every stage from subfloor prep to finishing touches. Preventing lippage is more than a cosmetic detail; it’s the difference between a floor that looks amateur and one that stands toe-to-toe with professional installs.
Don’t be intimidated by the technical aspects. With a methodical approach, the guidance in this guide, and a focus on the details, you’ll avoid the most common pitfalls and enjoy the satisfaction of a project well done. Remember, every home is unique, so adapt these best practices to your space, and don’t hesitate to consult local building codes or seek out specialty advice for tricky layouts or unusual tile materials. Most importantly, take your time and enjoy the process—your new tile floor will be a centerpiece you’ll appreciate for years to come.
Does the article recommend any specific tools or brands for first-time tile installers to help avoid lippage, or are any basic kits good enough?
The article suggests using a tile leveling system to help avoid lippage but doesn’t specify particular brands. It mentions that many basic kits available at home improvement stores should work well for beginners.
Can you recommend how to accurately estimate the amount of grout and mortar needed for odd-shaped rooms or spaces with lots of corners?
To estimate grout and mortar for irregular rooms, measure each section’s square footage separately and add them together. Account for extra corners by adding 10–15% more materials to cover odd angles, cuts, and potential waste.
Is there a big difference in installation difficulty or lippage risk between porcelain and natural stone tiles for a beginner?
Porcelain tiles are generally easier for beginners because they’re more uniform in size and thickness, which helps reduce lippage. Natural stone tiles can vary more, making them trickier to install flat and level if you’re new to tiling.
Is there a big difference in difficulty or long-term durability between using ceramic versus natural stone tiles for a DIY beginner?
Ceramic tiles are generally easier for beginners to install and require less maintenance than natural stone, which can be heavier and more prone to cracking. Natural stone can be more durable long-term but often needs sealing and extra care.
For a beginner, how do you decide between using cement backer board and fiberboard panels on a wood subfloor, especially in bathrooms where moisture is a concern?
For bathrooms with moisture concerns, cement backer board is generally better than fiberboard panels. It resists water and mold, making it safer for wet areas. Fiberboard can swell or deteriorate when exposed to moisture, so it’s less suitable for bathroom use.
How do I know if my subfloor is flat enough before laying down the backer board, and what should I do if it’s not?
Check your subfloor by laying a long straightedge or level across it; any gaps over 1/8 inch in six feet mean it’s not flat enough. If it’s uneven, fill low spots with a leveling compound or sand down high spots before installing the backer board.
Could you explain how to choose between sanded and unsanded grout if I’m using porcelain tiles with narrow joints in a kitchen?
For porcelain tiles with narrow joints (less than 1/8 inch), unsanded grout is usually the better choice. It fills tight spaces smoothly and won’t scratch your tiles. Sanded grout is better for wider joints.