Introduction
Smart lighting has rapidly become one of the most accessible and transformative home improvement projects for U.S. homeowners. With energy savings, enhanced ambiance, security benefits, and hands-free convenience, upgrading to smart lighting is no longer just a tech enthusiast’s dream—it’s a practical DIY project that can pay dividends in comfort and efficiency. Yet, for many, the process seems daunting: questions about compatibility, wiring, cost, and the sheer number of options can stall even the most motivated DIYers.
This comprehensive guide is designed to demystify the world of DIY smart lighting upgrades specifically for U.S. homes. We’ll break down the real costs, show you the tools you’ll need (and which ones you can skip), and provide a clear, step-by-step installation walkthrough. We’ll also address common stumbling blocks, recommend trusted brands, and share practical tips for maximizing both your investment and the final results. Whether you’re retrofitting a single room or planning a whole-home transformation, this guide will help you make informed decisions, avoid costly mistakes, and enjoy the confidence of a job well done.
Understanding Smart Lighting: What Are Your Options?
Types of Smart Lighting Solutions
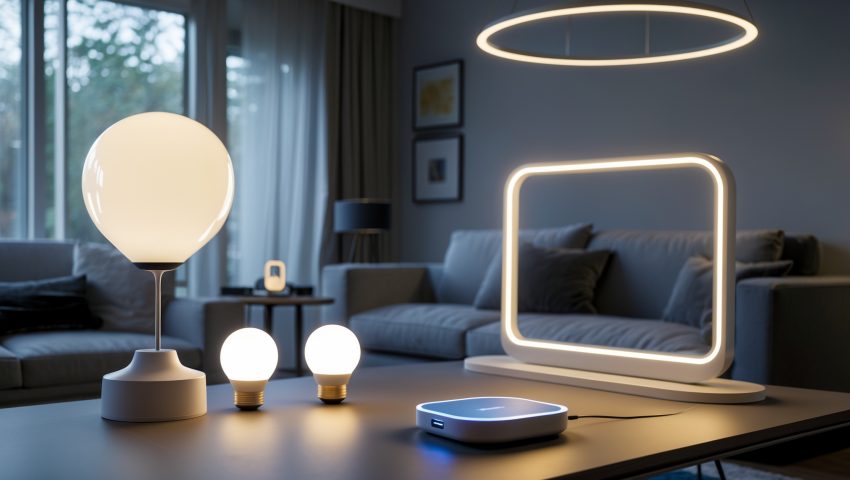
- Smart Bulbs: WiFi or Zigbee-enabled bulbs that replace existing screw-in bulbs. Offer color and dimming control, often with app or voice activation.
- Smart Switches: Wall switches with built-in smart controls. Require installation in place of traditional switches, but allow standard bulbs to become smart-controlled.
- Smart Plugs: Plug-in devices that let you control lamps and fixtures via app or voice.
- Smart Fixtures: Complete lighting fixtures (ceiling, under-cabinet, etc.) with integrated smart controls. Ideal for new installations.
Compatibility Concerns
Before purchasing, consider your existing wiring and smart home platform (Amazon Alexa, Google Home, Apple HomeKit, etc.). Not all smart devices work with every system. If your home lacks a neutral wire (common in pre-1980s U.S. homes), you may need to choose smart bulbs or specific switch models that support “no neutral” wiring.
Cost Breakdown: What to Expect for a Smart Lighting Upgrade
Upfront Equipment Costs
- Smart Bulbs: $8–$25 per bulb (standard white); $15–$50 per bulb (color-changing or high-end brands)
- Smart Switches: $20–$60 per switch
- Smart Plugs: $10–$30 per plug
- Smart Hubs: $50–$120 (if required for Zigbee/Z-Wave devices)
- Smart Fixtures: $40–$200 each
Tools and Installation Supplies
- Voltage tester: $10–$20
- Wire stripper/cutter: $10–$20
- Screwdrivers: $10–$20 set
- Needle-nose pliers: $8–$15
- Wire nuts/electrical tape: $5–$10
Estimated Project Costs
- Single Room (4–6 bulbs or 2 switches): $50–$250
- Whole Home (20–30 bulbs or 8–10 switches): $300–$1,000
DIY installation eliminates labor costs, which typically run $40–$100 per device for professional installation.
Essential Tools & Equipment: What You Really Need
- Voltage Tester: Ensures power is off before working on switches or fixtures.
- Wire Stripper/Cutter: For prepping electrical wires (required for switches/fixtures).
- Flathead and Phillips Screwdrivers: For removing/installing wall plates and switch screws.
- Needle-Nose Pliers: For twisting or maneuvering wires in tight spaces.
- Wire Nuts/Electrical Tape: For securing wire connections.
- Smartphone or Tablet: For app setup and configuration.
- Optional: Headlamp for hands-free lighting, label maker or painter’s tape for marking wires, stud finder for fixture installation.
Pre-Installation Planning: Avoiding Costly Mistakes
Assess Your Existing Wiring
Before purchasing switches or fixtures, turn off power at the breaker and remove an existing switch cover. Use a voltage tester to confirm power is off. Check for a neutral wire (usually white) in the box. Note wire arrangements—take photos for reference. If you lack a neutral wire, choose compatible smart switches or opt for smart bulbs instead.
Choose Your Smart Home Platform
Determine which voice assistant or ecosystem you plan to use. Some devices only work with specific platforms. For maximum flexibility, select lights/switches that are compatible with all major ecosystems (Alexa, Google, Apple HomeKit).
Map Out Your Lighting Zones
- Identify which rooms or fixtures will benefit most from smart control (e.g., entryways, kitchens, bedrooms, exterior lighting).
- Decide if you want grouped control (multiple lights or rooms activated together).
- Consider future expansion—buy devices that are easy to add onto later.
Step-by-Step DIY Installation Guide
Installing Smart Bulbs
- Turn off the existing light switch and allow bulbs to cool.
- Remove old bulbs and screw in smart bulbs.
- Restore power and ensure the wall switch remains ON (smart bulbs require constant power).
- Download the manufacturer’s app and follow pairing instructions.
- Assign bulbs to rooms or zones in the app.
- Integrate with your preferred smart home platform for voice or automation control.
Replacing a Standard Switch with a Smart Switch
- Turn off power at the circuit breaker.
- Remove the wall plate and unscrew the existing switch.
- Use a voltage tester to verify all wires are de-energized.
- Take a photo of existing wiring for reference.
- Disconnect wires from the old switch.
- Connect wires to the smart switch according to the manufacturer’s instructions (typically line, load, ground, and neutral, if available).
- Secure connections with wire nuts and electrical tape as needed.
- Mount the new switch, screw in, and replace the wall plate.
- Restore power and test manual operation.
- Follow app instructions to add the switch to your network and assign it to a room or scene.
Setting Up Smart Plugs and Fixtures
- Plug the smart plug into an existing outlet.
- Plug your lamp or device into the smart plug.
- Follow app instructions to pair the plug and assign it within your smart home ecosystem.
- For fixtures, follow the same safety steps as with switches: power off, verify with voltage tester, and carefully follow wiring instructions.
Integrating with Your Smart Home Ecosystem
- Open your chosen smart home app (Alexa, Google, Apple HomeKit).
- Discover new devices; add and label them appropriately.
- Create scenes and automations (e.g., “Movie Night,” “Bedtime,” “Away Mode”).
- Set schedules for lights to turn on/off automatically.
Maintenance and Troubleshooting
Maintaining Your Smart Lighting System
- Keep bulbs, switches, and plugs updated with the latest firmware (via app prompts).
- Regularly check connections if lights become unresponsive (reboot the device or router as needed).
- Replace bulbs or switches promptly if they fail—most are rated for 15,000–25,000 hours of use.
- Clean fixtures and switches with a dry cloth; avoid liquid cleaners near electronics.
Troubleshooting Common Problems
- If a device won’t pair, ensure your WiFi is 2.4 GHz (some devices don’t support 5 GHz), and that Bluetooth is enabled if required.
- Reset devices per manufacturer’s instructions before re-adding to your network.
- For flickering or non-responsive switches, check wire connections and verify compatibility with your home’s wiring.
- If voice commands fail, re-link the device in your chosen ecosystem and update firmware.
Maximizing the Value of Your Smart Lighting Investment
Energy Savings & Utility Rebates
LED smart bulbs use up to 80% less energy than incandescent bulbs. Many U.S. utility companies offer rebates for smart lighting upgrades—check your provider’s website for current offers. Schedule lights to turn off automatically when rooms are unoccupied to maximize savings.
Security Benefits
- Use smart lighting to create randomized schedules, giving the appearance of occupancy even when you’re away.
- Integrate with door/window sensors for instant illumination when doors are opened at night.
Enhancing Comfort and Ambiance
- Set color temperatures to match the time of day—cool white for productivity, warm white for relaxation.
- Create custom scenes for entertaining, dining, or bedtime routines.
Safety Considerations and Compliance
Electrical Safety
- Always turn off power at the breaker before working with any wiring.
- Use a voltage tester to confirm the absence of power—even if you’ve turned off the correct breaker.
- Follow manufacturer instructions precisely, and never force wires or connections.
- If you encounter aluminum wiring or outdated electrical boxes, consult a licensed electrician before proceeding.
Code Compliance
Most smart switches, bulbs, and fixtures available in the U.S. are UL or ETL listed. DIYers should not modify wiring beyond switch or fixture replacement. For any new wiring, always comply with local electrical codes—permits may be required for new circuit installations.
Recommended Smart Lighting Brands and Products
- Smart Bulbs: Philips Hue, LIFX, Sengled, TP-Link Kasa
- Smart Switches: Lutron Caseta, Leviton Decora Smart, TP-Link Kasa, GE Cync
- Smart Plugs: TP-Link Kasa, Wemo, Amazon Smart Plug
- Smart Fixtures: Philips Hue, Nanoleaf, GE Cync
- Smart Hubs: Samsung SmartThings, Hubitat, Amazon Echo (with Zigbee)
Conclusion
Upgrading to smart lighting is an investment in your home’s efficiency, comfort, and future value. With a modest set of tools and a thoughtful approach, U.S. homeowners can transform living spaces with customizable, energy-smart illumination—often in just an afternoon. By understanding your options, planning for compatibility, and following safe installation practices, you’ll avoid common pitfalls and unlock the full potential of smart lighting.
Remember to take advantage of energy rebates, integrate your new lighting with your preferred smart home ecosystem, and experiment with scenes and automations to make daily routines easier and more enjoyable. Don’t hesitate to start small: a single room upgrade can quickly show the benefits and build your confidence for larger projects. Should you encounter unique wiring or advanced installation needs, consulting a licensed electrician ensures safety and compliance.
As technology evolves, so will the possibilities for smart home improvements. By choosing reputable brands and keeping your system updated, your investment will continue to pay off for years to come. Embrace the convenience, savings, and creativity that DIY smart lighting brings to your U.S. home—and illuminate your world, your way.
Can you explain any potential issues when installing smart switches in older U.S. homes that might not have neutral wires at the switches?
In older U.S. homes, many switch boxes lack a neutral wire, which most smart switches need for power. Without a neutral, some smart switches won’t work properly or at all. Consider smart switches designed for no-neutral setups or consult an electrician for solutions.
How much should I realistically budget for upgrading just my living room to smart lighting, including any special tools mentioned in the guide?
For upgrading your living room, budget around $100 to $250 for smart bulbs or switches, depending on your choices. Add about $20–$40 for basic tools like a voltage tester and screwdriver, unless you already have them.