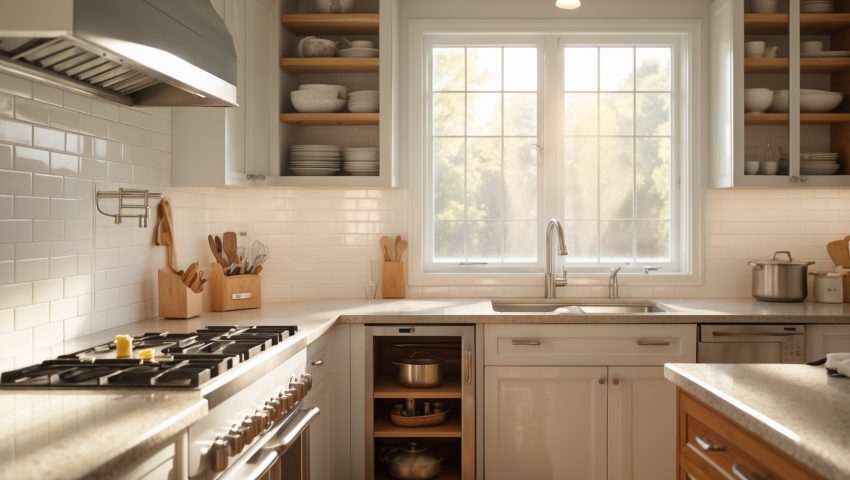
Introduction: Why a DIY Kitchen Backsplash is the Perfect Home Upgrade
Few home improvement projects offer as much visual impact and everyday practicality as installing a new kitchen backsplash. Whether your goal is to upgrade dated tile, shield your walls from splatters, or add a pop of personality, a well-executed backsplash can transform your space. And the best news? This is a project within reach for most U.S. DIYers, even those with modest tools and budgets.
But achieving a pro-level result involves more than choosing your favorite tile. Navigating the world of materials, adhesives, layouts, and finishing details can be daunting. Mistakes in prep, budgeting, or installation can turn a weekend project into a costly headache. This guide walks you through every stage of a DIY kitchen backsplash project—from setting a realistic budget to grouting and sealing for durability—so you can enjoy a flawless finish that stands the test of time.
We’ll break down material options, hidden costs, essential tools, and pro tricks for layout and cutting. Whether you dream of classic subway tile, mosaic glass, or bold patterned ceramics, you’ll find the practical advice and step-by-step tips you need to deliver a kitchen upgrade you’ll love.
Planning Your Project: Budgeting and Scope
Define the Area
Start by measuring the length and height of the wall sections where you’ll install the backsplash. Use a tape measure and record each segment (behind the stove, sink, and countertops). Multiply length by height to get square footage. Always add 10% to account for cuts and breakage.
Budget Breakdown
- Tile or Backsplash Material: $8–$50 per square foot, depending on the type (ceramic, glass, natural stone, peel-and-stick, etc.)
- Adhesives/Mastic: $15–$30 per bucket (covers 20–40 sq ft)
- Grout: $10–$30 per bag/tube
- Backer Board (if needed): $15–$25 per sheet
- Sealant/Caulk: $5–$10 per tube
- Tools (if not already owned): $40–$200 (for tile cutter, spacers, trowel, float)
- Miscellaneous: $20–$50 (sponges, cleaning cloths, painter’s tape)
For a typical 20 sq ft backsplash, expect total costs (materials and basic tools) to range from $250–$800 depending on tile choice and tool needs.
Choosing Materials: Tile Types and Alternatives
Classic Tile Options
- Ceramic: Affordable, easy to cut and install, wide range of colors/styles.
- Porcelain: Denser and more water-resistant, slightly harder to cut.
- Glass: Reflects light, modern look, requires special glass cutter and more finesse.
- Natural Stone (marble, travertine, slate): Luxurious, unique variation, requires sealing and more advanced cutting tools.
- Mosaic: Comes in sheets, easier for creating patterns, usually glass or ceramic.
Alternative Materials
- Peel-and-Stick Tiles: Fast, no-mess option; ideal for renters or low-splatter zones. Less durable than traditional tile.
- Metal Tiles: Stainless steel or aluminum; durable, easy to clean, modern look.
- Laminate or Acrylic Panels: Seamless, easy to install, limited design flexibility.
Tips for Material Selection
- Order samples to view color and texture in your kitchen lighting.
- Check for manufacturer recommendations on adhesive, grout, and sealer compatibility.
- Consider maintenance—porous materials like natural stone require regular sealing.
Tools and Equipment: What You’ll Need
- Measuring Tape and Level: For accurate layout and straight lines.
- Tile Cutter or Wet Saw: Essential for neat edges and fitting around outlets. Manual snap cutters work for ceramic; wet saws are best for porcelain or stone.
- Notched Trowel: For spreading adhesive.
- Rubber Grout Float: For pressing grout into joints.
- Tile Spacers: Ensures even grout lines.
- Sponge and Bucket: For cleaning excess grout.
- Pencil and Straightedge: For marking cuts.
- Painters Tape and Drop Cloths: To protect counters and cabinets.
- Caulk Gun: For applying silicone caulk at edges.
- Safety Gear: Gloves, safety glasses, and a mask (especially when cutting tile).
Preparation: Setting Up for Success
Surface Prep
Remove all appliances and clear counters. Wipe down walls with a degreaser and ensure they are dry and smooth. If the wall is glossy or painted with high-gloss paint, roughen the surface with sandpaper for better adhesion. Patch any holes or dents and let repair compound dry completely.
For damaged walls or uneven surfaces, consider installing cement backer board for a stable, moisture-resistant base.
Layout Planning
- Dry-fit your tiles on the countertop to visualize layout and minimize small edge pieces.
- Mark a level reference line along the wall to guide your first row.
- Plan around outlets and switches—remove cover plates and measure tile cuts carefully.
Step-by-Step Installation Guide
1. Apply Adhesive
Use the notched trowel to spread tile adhesive (mastic or thin-set) on a small section of the wall. Hold the trowel at a 45-degree angle for even ridges, which help tiles bond securely.
2. Set the Tiles
Press each tile firmly into the adhesive, using spacers for even joints. Work in manageable sections to prevent the adhesive from drying out before you set the tiles. Check alignment frequently with a level.
3. Cut Tiles as Needed
Use a tile cutter or wet saw to trim tiles for edges, outlets, and corners. Wear safety gear, and double-check measurements before cutting. For curved cuts, a tile nipper may be helpful.
4. Let Adhesive Cure
Allow the adhesive to dry for at least 24 hours (or manufacturer’s recommended time) before grouting. Avoid disturbing the tiles during this period.
5. Apply Grout
Mix grout according to package directions. Using a rubber float, press grout into the joints, holding the float at a 45-degree angle. Remove excess grout from tile surfaces with the edge of the float.
6. Clean Tiles
After about 15–30 minutes, wipe the tiles with a damp sponge to remove grout haze. Rinse the sponge frequently and avoid pulling grout from joints. Allow grout to cure as specified (typically 24–72 hours).
7. Seal and Finish
For porous tile or grout, apply a penetrating sealer after curing to protect against stains and moisture. Use a silicone caulk at the joint where the backsplash meets the countertop and at corners to allow for movement and prevent water intrusion.
8. Replace Outlet Covers and Clean Up
Reinstall outlet and switch covers. Wipe down all surfaces and remove protective coverings from counters and cabinets.
Pro Tips for a Flawless Finish
- Use tile leveling systems for large-format tiles to prevent lippage (uneven edges).
- Mix tiles from multiple boxes to blend color variations.
- Invest in a quality wet saw rental for stone or glass tile—clean cuts make a visible difference.
- Don’t rush grout cleanup—removing haze early prevents permanent residue.
- Choose grout color carefully; contrasting grout highlights tile shape, while matching grout gives a seamless look.
Handling Common Challenges
Dealing with Outlets and Switches
Carefully measure and mark tiles that will surround outlets. Use a tile saw or nippers for precise cuts. Outlet screws may need longer extensions to reach through tile—these are available at hardware stores.
Uneven Walls
If your wall bows or is uneven, use extra adhesive to build up low spots. For extensive irregularities, install cement backer board before tiling.
Working Around Windows and Corners
Plan tile layout to minimize visible cut edges. Use bullnose or trim pieces where tile ends at open edges or windows for a polished look.
Maintenance and Longevity
- Clean regularly with mild soap and water; avoid abrasive cleaners that can scratch tile or erode grout.
- Inspect grout and caulk annually; touch up or reseal as needed to prevent water damage.
- For glass or high-gloss tile, use a microfiber cloth to avoid streaks.
- Promptly clean spills, especially oils or acidic foods, to prevent staining.
Conclusion: Enjoying Your DIY Backsplash for Years to Come
Tackling a kitchen backsplash installation is one of the most rewarding DIY projects for U.S. homeowners. With careful planning, the right tools, and attention to detail, you can achieve a custom, high-end look at a fraction of the cost of professional installation. Beyond aesthetics, a quality backsplash protects your walls from moisture and mess, making kitchen cleanup easier and boosting your home’s value.
Remember, the key steps—accurate measurement, thoughtful material selection, meticulous prep, and patient installation—make all the difference in the final result. Don’t be afraid to take your time, ask for help with tricky cuts, or practice on spare tiles before starting. If you hit a snag, local home improvement stores and online forums are valuable resources for troubleshooting unique challenges.
By following this detailed guide, you’ll not only avoid common pitfalls but also gain practical skills that will serve you well in future projects. Step back and admire your handiwork; every time you cook or entertain, your new backsplash will serve as a testament to your creativity, resourcefulness, and commitment to your home. Happy tiling!
You mention adding 10% extra for cuts and breakage—is that enough for intricate mosaic designs, or should I budget for more waste with smaller tiles?
For intricate mosaic designs or smaller tiles, it’s wise to plan for a bit more waste—usually 15–20% extra—to account for the increased cuts and potential breakage. This ensures you have enough material for precise placement and pattern matching.
If my kitchen walls aren’t perfectly flat, will I need a backer board for all types of tile, or does it depend on the material?
Whether you need a backer board depends on both your wall’s condition and the tile type. For uneven walls, a backer board is especially important with ceramic or porcelain tiles to create a flat, stable surface. Some peel-and-stick tiles are more forgiving, but best results still need a smooth base.
How do you know if your kitchen needs backer board before installing new tile, or can most U.S. homes skip that step?
Check your current wall surface—if it’s drywall in good condition, you can usually tile directly over it. Use a backer board if the area is prone to moisture or if the drywall is damaged or uneven.
Is there a noticeable difference in durability or upkeep between peel-and-stick backsplash tiles and traditional ceramic ones for busy kitchens?
Yes, traditional ceramic tiles are generally more durable and easier to clean than peel-and-stick tiles, especially in busy kitchens. Peel-and-stick options may wear out faster and can be affected by heat and moisture over time.
For someone trying to keep costs low, which material from the $8–$50 per square foot options tends to be the most DIY-friendly for first-timers?
Peel-and-stick tiles are usually the most DIY-friendly and affordable option within that price range. They require minimal tools, are easy to cut and apply, and are forgiving for beginners compared to traditional ceramic or glass tiles.
For a small kitchen, would you recommend investing in a tile cutter or just getting tiles pre-cut at the hardware store to save on tool costs?
For a small kitchen project, having your tiles pre-cut at the hardware store can save money and effort, especially if your layout is straightforward. A tile cutter is useful if you expect many precise or custom cuts.
When you say to add 10 percent for cuts and breakage, is that usually enough for people who have never tiled before? Should first-timers budget even more tile just in case?
For first-time tilers, adding 10 percent is a good guideline, but if you’re worried about mistakes or using a tricky tile pattern, you might want to budget an extra 5 percent just for peace of mind.
I’m on a tight budget but want something more durable than peel-and-stick—are there affordable tile options that still hold up well in a busy family kitchen?
Ceramic subway tiles are a great affordable option and much more durable than peel-and-stick. They’re easy to clean, resist moisture, and are widely available at budget prices. Consider shopping at home improvement stores for sales or discontinued styles to save even more.
If I’m choosing between peel-and-stick and traditional ceramic tile, are there big differences in durability or cleaning over time for a busy kitchen?
Traditional ceramic tile is much more durable and resists heat, moisture, and scratches better than peel-and-stick options. Ceramic tile is also easier to deep clean and will hold up longer in a high-traffic, busy kitchen.