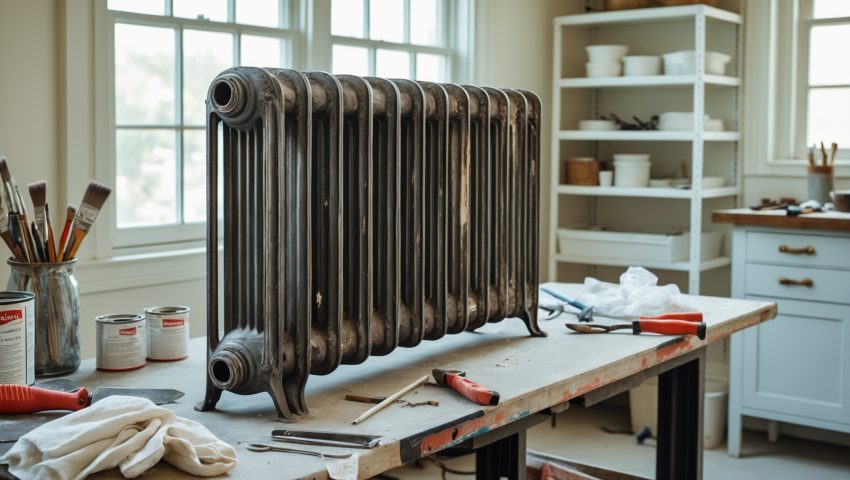
Introduction: Rediscovering the Charm and Efficiency of Cast-Iron Radiators
Across the United States, thousands of older homes boast ornate cast-iron radiators—hefty, beautifully detailed heating units that have survived generations of use. While many homeowners consider replacing them with modern systems, a growing movement of DIY enthusiasts is embracing radiator restoration, combining practical upgrades with historic preservation. Restoring a radiator isn’t just about aesthetics; it’s an opportunity to improve heating efficiency, reduce environmental impact, and save on replacement costs. However, this project involves more than a fresh coat of paint. From proper disassembly and cleaning to seal replacement and safe reinstallation, the process requires careful planning and the right tools. This in-depth guide explores every step of DIY radiator restoration, breaks down realistic costs, highlights essential equipment, and shares inspiring real-life makeovers from across the U.S. Whether you’re tackling your first radiator project or looking to perfect your technique, this article will help you approach the task with confidence and expertise.
Understanding the Value of Cast-Iron Radiators
Why Restore Instead of Replace?
- Longevity: With proper care, cast-iron radiators can last well over a century.
- Heat Retention: Cast iron holds heat longer, producing a steady, comfortable warmth.
- Historic Character: Original radiators often feature intricate designs that add vintage charm.
- Eco-Friendly: Restoring prevents unnecessary waste from sending old radiators to the landfill.
Common Problems in Old Radiators
- Rust and flaking paint
- Leaks at joints or valves
- Internal sludge buildup reducing efficiency
- Stuck or malfunctioning air vents
Planning and Budgeting Your Radiator Restoration
Key Factors Affecting Cost
- Radiator Size and Number: Larger units or multiple radiators increase material and labor time.
- Extent of Damage: Heavy rust, leaks, or broken sections may require extra repairs or even professional intervention.
- Finish Desired: High-gloss or specialty paints and powder coatings cost more than basic finishes.
- Tools on Hand: Investing in new equipment raises your initial outlay, but many tools are reusable for future projects.
Average Cost Breakdown (per radiator, DIY)
- Paint stripper/chemical remover: $15–$35
- Wire brushes and abrasives: $10–$25
- High-heat paint or powder coating kit: $20–$80
- Replacement gaskets/seals: $10–$20
- Valve or air vent replacement (if needed): $15–$40
- Drop cloths, gloves, respirator: $20–$50
- Total (DIY, typical): $90–$250
Contracting out professional sandblasting or powder coating can add $200–$500 per radiator, so DIY offers significant savings if you’re willing to invest the time and effort.
Essential Tools and Equipment Guide
Safety First
- N95 or P100 respirator (for paint removal and dust)
- Chemical-resistant gloves
- Eye protection
- Heavy-duty drop cloths or tarps
Removal and Transportation
- Radiator key or adjustable wrench (for valve removal)
- Pipe wrenches
- Moving dolly or furniture sliders (radiators are extremely heavy)
Cleaning and Surface Prep
- Paint stripper (gel or liquid, suitable for metal and older paints)
- Wire brushes (manual and drill attachments)
- Scrapers and putty knives
- Bucket and mild detergent
- Wet/dry vacuum for debris
Repair and Reassembly
- High-temperature sealant or thread tape
- Replacement gaskets or washers
- Pipe joint compound
- New air vents or bleed valves (if original parts are worn)
Painting/Finishing
- High-heat spray paint or brush-on enamel (rated for at least 400°F)
- Small detail brushes for ornate designs
- Painter’s tape for masking
- Optional: Powder coating kit (requires a heat source like a large oven)
Step-by-Step DIY Radiator Restoration
1. Preparation and Safety Precautions
Before getting started, ensure you have adequate ventilation. Lay down drop cloths to catch debris and paint. If your home dates before 1978, test painted surfaces for lead—use certified lead-safe practices if present, including a HEPA vacuum and specialized PPE.
2. Disconnecting and Removing the Radiator
- Turn off the heating system and allow the radiator to cool completely.
- Shut the supply valve and, for steam systems, close the return.
- Place a shallow pan under connections to catch any residual water.
- Loosen the union nuts and valves with a pipe wrench.
- With assistance, carefully slide the radiator onto a dolly or sliders—never attempt to lift a cast-iron radiator alone.
3. Stripping Old Paint and Cleaning
Apply paint remover per manufacturer instructions. Allow time to penetrate, then scrape off softened paint with a putty knife or wire brush. For deep crevices, use detail brushes and abrasive pads. Repeat as needed until bare metal is exposed. Wash thoroughly with warm soapy water, rinse, and dry completely to prevent flash rust.
4. Inspecting for Damage
- Check for cracks, pinholes, or evidence of leaks along the seams and columns.
- Inspect valve threads and bleed vents for wear.
- Replace any failed gaskets or washers.
- If you find major cracks or structural damage, consult a professional—welding cast iron is complex and not a DIY job.
5. Repairing and Reassembling
Apply new thread tape and pipe dope to all joints. Replace old valves or vents as needed. Reinstall gaskets carefully, ensuring tight and even seals. Assemble any disassembled sections (some large radiators can be split for easier handling).
6. Painting and Finishing Touches
- Mask off valve threads and any areas you don’t wish to paint.
- Use high-heat spray paint or brush-on enamel. Apply thin, even coats—typically two to three—for best coverage.
- Allow full drying time between coats, as recommended by the manufacturer.
- For a truly durable finish, consider powder coating; many DIYers opt to outsource this step to a local shop if they don’t have equipment.
7. Reinstallation
- With help, move the radiator back into place.
- Reconnect supply and return lines, tightening gently but firmly.
- Open valves and slowly refill.
- Bleed air from the system using the vent until water flows steadily.
- Check for leaks and monitor over the first few heating cycles.
Case Studies: Successful U.S. DIY Radiator Restorations
Midwest Victorian Home: From Rusted Relic to Showpiece
In Milwaukee, a homeowner faced a radiator caked in chipped paint and rust. After carefully testing for lead and using a combination of chemical stripper and wire brushing, they exposed the intricate scrollwork beneath decades-old layers. The radiator was painted with high-heat matte black enamel and reinstalled with new valves. Total cost: $170. Time invested: 15 hours over a weekend. The result: a functional, visually striking centerpiece that enhanced both heating and historic charm.
Brooklyn Brownstone: Powder Coated Perfection
A Brooklyn DIYer opted for professional sandblasting and powder coating after prepping the radiator at home. The glossy, durable finish complemented their modern décor while preserving the original unit. DIY labor plus outsourced powder coating brought the total cost to $340, still well below full replacement. The restored radiator now runs efficiently and adds undeniable character to the living space.
Pacific Northwest Bungalow: Addressing Leaks and Efficiency
In Portland, a homeowner discovered leaking at the joints of a bedroom radiator. After removal, they replaced all gaskets and valves, cleaned out decades of internal sludge, and repainted the exterior in a period-appropriate sage green. Leaks were eliminated, and heat output improved noticeably. All-in cost: $210. The homeowner notes the satisfaction of preserving the home’s heritage while boosting comfort.
Common Pitfalls and How to Avoid Them
- Underestimating Weight: Radiators can weigh several hundred pounds. Always get help and use proper equipment for moving.
- Skimping on Surface Prep: Paint will not adhere well to greasy, rusty, or dusty surfaces—thorough cleaning is critical.
- Ignoring Lead Paint Risks: Always test and follow safety procedures. Improper handling exposes your household to serious health risks.
- Overtightening Joints: Excess force can crack cast iron. Use joint compound and hand-tighten firmly, but avoid overtightening.
- Choosing the Wrong Paint: Standard paints will blister and peel. Only use finishes rated for high heat.
Maintenance Best Practices for Restored Radiators
- Bleed radiators at the start of each heating season to remove trapped air.
- Inspect for leaks or rust annually.
- Dust external surfaces regularly to maximize heat output.
- Touch up paint chips promptly to prevent corrosion.
- Check valves and vents for smooth operation; replace as soon as issues arise.
Conclusion: Reviving History, Enhancing Comfort
Restoring a cast-iron radiator is more than a weekend project—it’s an investment in your home’s comfort, efficiency, and historic character. While the process demands patience, attention to detail, and a commitment to safety, the rewards are lasting. DIY restoration allows you to preserve a piece of architectural heritage, personalize your living space, and save significantly compared to replacement or professional services. The stories from Milwaukee, Brooklyn, and Portland underscore the accessibility and satisfaction of this project for dedicated homeowners nationwide. Remember: careful planning and respect for the radiator’s weight, materials, and potential hazards are key. By following the steps outlined here, equipping yourself with the right tools, and learning from real-life successes, you can transform any old radiator from neglected eyesore to efficient, beautiful centerpiece. Whether your goal is improved heating, cost savings, or simply honoring your home’s history, DIY radiator restoration is a uniquely rewarding—and achievable—undertaking for U.S. home improvers.