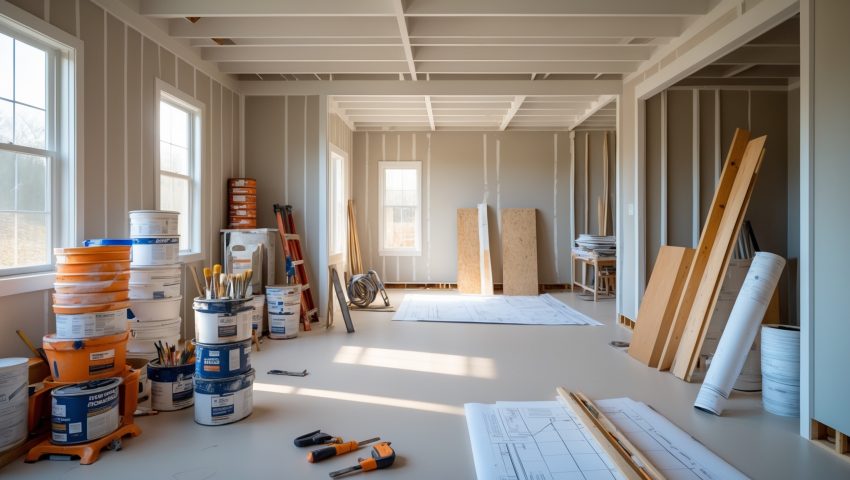
Introduction: Why Insurance Matters for DIY Home Projects
Home improvement is as American as apple pie. With the explosion of DIY culture, more homeowners are rolling up their sleeves and tackling everything from kitchen refreshes to major basement overhauls. These projects can boost property value, create personalized spaces, and save thousands in labor costs. But there’s a critical aspect many DIYers overlook: homeowners insurance. Does your policy cover damage from a slipped saw or a leaky pipe you installed yourself? What happens if your project accidentally causes a neighbor’s property damage? Understanding the relationship between DIY renovations and insurance coverage is essential before you ever swing a hammer. This guide demystifies what’s actually protected, common exclusions, how to avoid costly gaps, and why a quick call to your agent can save you serious headaches—plus real-world advice to keep your coverage strong while you bring your home improvement dreams to life.
How DIY Renovations Interact with Homeowners Insurance
Standard Policy Basics
Most standard U.S. homeowners insurance policies (HO-3 and HO-5) provide coverage for the structure of your home, your personal property, liability for injuries, and additional living expenses if you’re displaced. However, these policies are written with the assumption that home repairs and upgrades are completed by licensed professionals and meet all applicable building codes. DIY work introduces variables that can complicate coverage, especially when it comes to claims after a project goes wrong.
DIY Work: The Fine Print
- Negligence Exclusions: Policies often exclude coverage for damage resulting from poor workmanship, faulty construction, or code violations. If your DIY electrical upgrade causes a fire, your insurer may deny the claim if the work is deemed substandard or illegal.
- Material Misuse: Using the wrong materials or failing to follow manufacturer guidelines can void coverage for related losses.
- Unpermitted Work: Completing renovations without required permits is a red flag for insurers. If the project should have been inspected but wasn’t, any resulting damage may not be covered.
Common Insurance Gaps in DIY Projects
1. Structural Additions and Major Upgrades
If you finish a basement, add a bathroom, or build a deck, you’re increasing the value—and the rebuild cost—of your home. Unless you notify your insurer, your policy may not automatically reflect these improvements. In a loss, you could be underinsured and face out-of-pocket expenses to restore the upgraded areas.
2. Personal Liability
DIY projects pose risks to yourself, family, and guests. If a visitor trips over your tools and is injured, your liability coverage may respond. However, if the injury is tied to unsafe work or code violations, your claim could be denied. If you hire casual labor (like a neighbor or friend), you could be liable for their injuries unless proper coverage is in place.
3. Tool and Material Losses
High-end tools, appliances, and renovation materials stored on site are only covered up to the personal property limits in your policy. Standard policies often cap coverage for tools and may have lower limits for materials not yet permanently installed.
4. Water Damage and Mold
Improperly installed plumbing, unsealed windows, or failed waterproofing can lead to leaks and mold. Many policies specifically exclude water damage caused by neglect, poor workmanship, or gradual leaks—common issues in DIY projects.
What’s Usually Covered—and What Isn’t
- Covered: Accidental damage caused by sudden, unforeseen events (a tree limb crashes through your roof during a renovation, or a fire starts from a source unrelated to your work).
- Not Covered: Faulty workmanship, unpermitted structural work, code violations, gradual damage, or injuries to workers you hire informally.
- Gray Areas: Damage caused by your project but not directly by your work (e.g., a burst pipe near your new bathroom). Insurers may investigate the cause and could deny claims if poor installation is found.
Case Studies: When DIY Meets Insurance Claims
Case Study 1: The Self-Built Deck
John in Ohio built a backyard deck over several weekends. He didn’t pull a permit, assuming it wasn’t needed. A year later, the deck collapsed under a heavy snowfall. His insurance company denied the claim due to unpermitted construction and failure to meet load-bearing code requirements. John paid entirely out of pocket for the rebuild and repairs to his home’s exterior.
Case Study 2: DIY Kitchen Plumbing
Susan in Oregon replaced her kitchen faucet and supply lines herself. Months later, a slow leak developed and damaged the subfloor. Her claim was partially denied—the insurer cited improper installation and lack of prompt maintenance. Susan had to cover the full subfloor replacement cost.
Case Study 3: Smart Home Upgrades
Mike in New Hampshire installed smart thermostats and security cameras. During a lightning storm, several devices were fried. His insurance covered the loss under personal property, but only up to the sublimit for electronics—leaving him with a smaller than expected reimbursement.
How to Protect Yourself: Insurance-Smart DIY Practices
1. Notify Your Insurer Early
Before starting any significant DIY project (think: finished basements, bathroom additions, electrical upgrades), contact your insurance agent. They’ll advise if your current coverage is sufficient or if you need to increase limits, add endorsements, or document upgrades. Some insurers even offer renovation riders for in-progress work.
2. Pull All Required Permits
Permits aren’t just a bureaucratic hurdle—they’re proof that your project complies with local code and is inspected for safety. In the event of a claim, having permits and inspection records strengthens your case and can mean the difference between coverage and denial.
3. Keep Meticulous Records
- Take before-and-after photos of your project areas.
- Save receipts for materials, tools, and appliances.
- Document all permit applications, approvals, and inspection reports.
- Write a brief project summary outlining what was done, when, and by whom.
This documentation is vital if you need to prove the value of improvements or the quality of work in a claim.
4. Follow Codes and Manufacturer Guidelines
Use UL-listed materials, follow the National Electrical Code, and adhere to local building codes. Always install appliances, fixtures, and structural elements as the manufacturer specifies—deviating can void warranties and insurance coverage alike.
5. Consider Professional Help for High-Risk Tasks
Some jobs are better left to pros, both for safety and insurance reasons. Electrical wiring, major plumbing, roof work, and structural changes often require licensed contractors. If you’re unsure, consult a pro for critical phases or inspections.
6. Update Your Policy After Completion
Once your project is complete, ask your insurer to update your dwelling coverage (Coverage A) to reflect the increased value. This ensures you’re not underinsured and will be made whole after a total loss.
Special Insurance Endorsements for DIYers
Renovation Riders
Some insurers offer renovation or builder’s risk endorsements for homeowners tackling major projects themselves. These temporarily expand coverage during the renovation period, including for theft of materials or damage during construction.
Increased Limits for Tools and Equipment
If you own expensive tools or keep a large inventory of materials on-site, ask about scheduling these items or raising sublimits for personal property. This is especially important if you have a dedicated workshop or storage shed.
Personal Liability Umbrella Policies
An umbrella policy adds an extra layer of liability protection, which is crucial if your project could impact neighbors or common areas (think: fences, trees, or shared driveways).
Risk Management: Safety and Security Considerations
Site Safety
- Keep workspaces clean and free from trip hazards.
- Store tools and materials securely, especially sharp or powered equipment.
- Use proper PPE (personal protective equipment) for all tasks.
- Post clear signage if areas are unsafe for children or visitors.
Theft and Vandalism Prevention
- Lock up high-value tools and materials when not in use.
- Install motion-activated lights or temporary cameras during major projects.
- Notify trusted neighbors if you’re away or the property is exposed for long periods.
What to Do If You Need to File a Claim
Step-by-Step Claim Process for DIY-Related Incidents
- Document the Damage: Take detailed photos and videos as soon as you notice a problem.
- Review Your Policy: Check for exclusions related to DIY work, unpermitted renovations, and personal property limits.
- Contact Your Agent: Be honest about your project and how the damage occurred. Withholding information can jeopardize your claim.
- Submit Documentation: Provide all records, permits, receipts, and inspection reports. These support your claim and can sway the outcome.
- Meet with Adjusters: Walk through the damage, answer questions, and clarify any details about the work performed.
- Appeal If Necessary: If your claim is denied, request a detailed explanation in writing and consider appealing or consulting a public adjuster.
Key Questions to Ask Your Insurance Agent Before (and After) DIY Projects
- Does my policy cover damage from DIY work? Are there specific exclusions?
- Do I need to update my coverage if I finish a basement or add a room?
- Are tools, appliances, and stored materials fully covered during renovations?
- What proof do I need to validate permitted work and code compliance?
- Can I get a temporary endorsement for major DIY renovations?
- Is my liability coverage sufficient if someone is injured on my property during a project?
Conclusion: DIY with Confidence—And Smart Insurance Protection
Tackling home improvements yourself is empowering, cost-effective, and rewarding. But even the most skilled DIYers aren’t immune to accidents, mistakes, or unexpected disasters. Insurance is your financial safety net, but only if you understand its limits and take proactive steps to maintain robust coverage. By notifying your insurer before big projects, securing all necessary permits, following codes and manufacturer directions, and updating your policy post-renovation, you set yourself up for protection—not just pride—in your work. Remember that not all policies are created equal, and coverage can vary widely by state, insurer, and project type. Regular communication with your insurance agent, careful documentation, and a commitment to safety are your best allies. Whether you’re painting a room or framing a new addition, the smartest DIYers know that every great project starts with a solid foundation—and that includes your homeowners insurance. Before you pick up those tools, make sure your coverage is as strong as your ambition. This way, you can enjoy your improved space with true peace of mind for years to come.