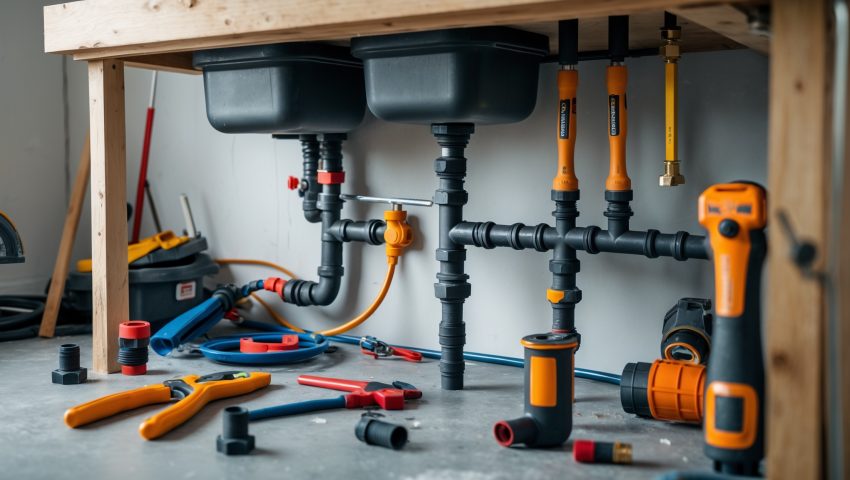
Introduction: The High Stakes of DIY Plumbing Repairs
Every homeowner faces a plumbing issue sooner or later, from a leaky faucet to a clogged drain or an unexpected pipe burst. The allure of handling these repairs yourself is easy to see—saving on labor costs, learning valuable skills, and gaining control over your home’s maintenance. But DIY plumbing is not without its pitfalls. In fact, some of the most expensive home repairs stem from well-intentioned but poorly executed fixes. Mistakes can lead to water damage, mold, or even major structural problems. For beginners, the risks are even higher: simple oversights like using the wrong materials, skipping crucial steps, or misjudging building codes can turn a $50 repair into a $5,000 headache. This comprehensive guide is designed to help U.S. homeowners avoid the most common and costly plumbing mistakes, understand the true costs and compliance requirements, and approach basic repairs with the confidence and knowledge to get it right the first time.
Understanding the Basics: What Every DIY Plumber Must Know
What Makes Plumbing Unique?
Plumbing systems are more complex than many other home improvement tasks because they often involve hidden pipes, pressurized water, and strict local codes. Unlike painting or assembling furniture, a minor error in plumbing can have cascading consequences. Water always finds a way—and when it leaks, it can cause damage fast.
Key Plumbing System Components
- Supply lines: Pipes that bring fresh water in.
- Drain-waste-vent (DWV) system: Carries wastewater out and allows proper drainage.
- Fixtures: Sinks, toilets, bathtubs, and appliances connected to the system.
- Shutoff valves: Allow you to control water flow to specific areas.
When DIY Makes Sense—And When to Call a Pro
- DIY-friendly repairs: Leaky faucets, clogged drains, toilet flush valve replacement, replacing supply hoses.
- Call a professional for: Major leaks, main line clogs, water heater repairs, pipe replacement in walls/floors, or if you’re unsure about local codes.
Common Beginner Mistakes—and How to Avoid Them
1. Not Turning Off the Water Supply
This is the classic rookie error. Always locate and shut off the water supply before starting any plumbing repair. For most fixtures, there are local shutoff valves. For bigger jobs, turn off the main supply.
2. Over-Tightening Connections
It’s tempting to tighten fittings with all your strength, but over-tightening can crack plastic or brass parts, strip threads, and lead to leaks. Tighten until snug, then give an extra quarter turn—no more. If unsure, check manufacturer guidelines.
3. Using the Wrong Tools
Adjustable wrenches, pipe wrenches, basin wrenches, and plumber’s tape are essentials. Using vice grips or channel locks in place of a proper pipe wrench can deform pipes and fittings. Invest in the right tools from the start.
4. Mixing Incompatible Pipes and Fittings
Never connect copper pipes directly to galvanized steel without a dielectric union—it causes galvanic corrosion. Know the difference between PVC, CPVC, PEX, and copper. Each has unique connectors and compatibility concerns.
5. Ignoring Slope Requirements on Drains
Horizontal drains must slope at 1/4 inch per foot for optimal flow. Too flat or too steep and you risk clogs or slow drainage. Use a level to check your work.
6. Skipping Plumber’s Tape or Pipe Dope
Threaded connections need plumber’s tape (Teflon tape) or pipe thread compound to prevent leaks. Wrap tape clockwise around threads three times, or use a small amount of compound for metal pipe joints.
7. Poor Planning and Measuring
Double-check all measurements before cutting pipes or buying fittings. Dry-fit (assemble without glue or solder) before final installation to ensure everything lines up.
8. Not Testing for Leaks Before Finishing
Always turn the water back on slowly and check every joint for leaks with a dry paper towel. Let the repair run for several minutes before closing up walls or cabinets.
Cost Breakdown: What to Budget for Basic DIY Plumbing Repairs
Sample Cost Ranges for Common Repairs
- Leaky faucet repair: $10–$45 (replacement cartridge, washers, plumber’s tape)
- Toilet fill/flush valve replacement: $20–$40
- Replacing a P-trap under a sink: $8–$25 (plastic), $18–$40 (metal)
- Unclogging a drain (tools/chemicals): $6–$40
- Basic pipe repairs (PEX or copper): $20–$100 (fittings, pipe sections, tools)
Hidden Costs and Budgeting Tips
- Always budget extra for unexpected parts or additional trips to the hardware store.
- Factor in the cost of specialty tools—sometimes renting is cheaper than buying.
- Protective gear (gloves, goggles) adds a small but important cost.
- Budget for minor wall/paint repairs if you need to access hidden pipes.
Essential Tools and Equipment Guide
Must-Have Tools for DIY Plumbing
- Adjustable wrench
- Pipe wrench (10″–14″)
- Basin wrench (for tight spaces under sinks)
- Plumber’s tape (Teflon tape)
- Pipe cutter (for copper or PEX)
- Hacksaw (for PVC/metal pipes)
- Plunger and hand auger (drain snake)
- Bucket and old towels (for catching water)
Nice-to-Have Extras
- Pipe thread compound (pipe dope)
- Pex crimping tool (for PEX repairs)
- Tube flaring tool (for copper lines)
- Inspection mirror and flashlight
- Non-contact voltage tester (if working near electrical lines)
Compliance, Permits, and Local Codes
Which Repairs Require Permits?
Minor repairs (like replacing a faucet or P-trap) usually don’t require permits. But any work involving relocating pipes, replacing water heaters, or touching the main supply/drain lines may require a permit and inspection. Always check with your local building department before starting.
Understanding U.S. Plumbing Codes
Most U.S. communities follow the International Plumbing Code (IPC) or Uniform Plumbing Code (UPC), with local amendments. Key requirements include:
- Proper venting for drains
- Correct pipe sizing
- Approved materials for potable water
- Backflow prevention on hose bibs and irrigation lines
Staying Compliant
- Never bury unapproved pipe types in walls or underground.
- Label any repairs clearly for future inspections or home sales.
- Keep receipts and photos of all work completed.
Insurance Essentials: Protecting Yourself and Your Property
Does Homeowner’s Insurance Cover DIY Plumbing?
Most policies cover sudden, accidental water damage but not damage due to faulty DIY work or gradual leaks from improper repairs. Document your work thoroughly and never attempt repairs beyond your skill level.
Tips for Staying Covered
- Keep a log of all DIY plumbing work, including dates, materials, and photos.
- If you have any doubt about liability, consult your insurance agent before starting major repairs.
- If selling your home, disclose major DIY repairs and provide documentation to avoid future claims disputes.
Step-by-Step Tutorial: Replacing a Sink P-Trap
Tools and Materials Needed
- New P-trap assembly (plastic or metal, matching existing pipe size)
- Adjustable wrench or channel locks
- Plumber’s tape
- Bucket and towels
- Work gloves
Step 1: Preparation
Place a bucket under the P-trap to catch any water. Put on gloves. Clear out the cabinet for space to work.
Step 2: Remove the Old P-Trap
Loosen the slip nuts at both ends of the trap. If stuck, use your wrench gently. Slide the trap down and let any water drain into the bucket.
Step 3: Clean and Inspect
Wipe down the pipe ends and check for corrosion or cracks. Replace any damaged sections before proceeding.
Step 4: Assemble the New Trap
Dry-fit the new P-trap to ensure alignment. Wrap plumber’s tape clockwise around any threaded connections. Hand-tighten the slip nuts, then use the wrench for a final snug fit.
Step 5: Test for Leaks
Turn the faucet on slowly and let water run for at least two minutes. Use a dry paper towel to check each joint for moisture. Tighten any leaking nuts gently as needed.
Step 6: Clean Up
Dispose of the old trap properly. Wipe down the work area and replace items in the cabinet. Save receipts and take a photo for your records.
Maintenance Best Practices for Plumbing Longevity
- Inspect visible pipes quarterly for leaks, corrosion, or drips.
- Clean faucet aerators and showerheads annually to prevent mineral buildup.
- Flush drains with hot water and baking soda every three months to prevent slowdowns.
- Test shutoff valves twice a year to ensure they operate smoothly.
- Replace old supply hoses every 5 years—especially those connected to washing machines and toilets.
Safety Checklist: Plumbing Projects
- Always shut off water supply before starting any repair.
- Use gloves and safety glasses when cutting or working with chemicals.
- Be cautious when working near electrical outlets or wiring.
- Work in a well-ventilated area if using glues, solvents, or pipe cleaners.
- Clean up all water spills immediately to prevent slips and mold growth.
- Dispose of old pipes and chemicals according to local regulations.
Conclusion: Build Confidence, Save Money, and Protect Your Home
Tackling your own plumbing repairs can be empowering and cost-effective, but only when approached with preparation, respect for the risks, and a commitment to doing the job right. By understanding the common beginner mistakes and learning how to avoid them, you won’t just save money—you’ll also protect your home from water damage, maintain your property value, and gain a deeper appreciation for your home’s infrastructure. Always start small, invest in the right tools, and don’t hesitate to consult local codes or professionals when in doubt. With each successful repair, your skills and confidence will grow, making you a more capable and resourceful homeowner. Remember, the best DIY plumbing repair is one that lasts, keeps your water flowing safely, and gives you peace of mind for years to come.
If I’m fixing a leaky faucet myself, how do I know if I need to shut off the main water supply or just a local shutoff valve?
Check under your sink for a local shutoff valve—if there is one, turn it off before starting repairs. Only use the main water shutoff if you can’t locate or operate the local valve.
If I mess up a supply line repair, how quickly can water damage start causing real issues like mold or structure problems, and is there any immediate step I should take to limit the damage?
Water damage can begin causing problems within hours, and mold may start to grow in as little as 24–48 hours. Immediately shut off the water supply, dry the area thoroughly, and use fans if possible to minimize damage while assessing repairs.
You mention the risk of violating local codes when doing DIY plumbing. How can I check what codes apply to small repairs in my area before I start?
To find out which plumbing codes apply locally, contact your city or county building department. They can tell you about permits, code requirements, and any specific rules for small DIY repairs in your area.