Introduction: Why Every U.S. Homeowner Should Tune Up Their Garage Door
Garage doors are one of the most heavily used and often overlooked mechanical systems in American homes. Whether your garage shelters your car, acts as a workspace, or serves as extra storage, its door cycles open and shut thousands of times each year. This constant motion, combined with exposure to the elements, makes garage door maintenance crucial—but it’s a task that’s frequently neglected until something breaks or malfunctions.
This long-form guide empowers U.S. homeowners to take garage door care into their own hands. We’ll walk you through a thorough DIY tune-up, from assembling the right tools to step-by-step maintenance procedures that help prevent squeaks, jerks, and sudden breakdowns. You’ll learn how to spot early signs of trouble, lubricate moving parts, adjust hardware, and even handle some basic troubleshooting—saving hundreds of dollars in potential repair bills and extending the lifespan of your door. We’ll also highlight key safety precautions and common mistakes to avoid, ensuring your tune-up is both effective and secure.
Whether you’re a DIY novice or a seasoned home improver, this practical guide will help you approach garage door maintenance with confidence—protecting not just your investment, but also your home’s security and curb appeal.
Understanding the Importance of Garage Door Maintenance
How Garage Doors Work
Garage doors seem simple, but they’re complex systems involving springs, rollers, cables, tracks, and an opener. When you press the remote, torsion or extension springs counterbalance the heavy door, enabling the opener’s motor to move it up or down smoothly. Every component must work in harmony for safe, reliable operation.
Common Garage Door Problems and Their Root Causes
- Noisy Operation: Often caused by dry rollers, worn hinges, or misaligned tracks.
- Uneven Movement: Can result from bent tracks, loose hardware, or spring imbalances.
- Slow or Jerky Opening/Closing: Typically due to lack of lubrication or debris in the tracks.
- Sudden Stop or Reversal: Sensor misalignment or obstructions are common culprits.
Routine tune-ups address these issues before they escalate, minimizing repair costs and reducing the risk of sudden failures—especially during extreme U.S. weather.
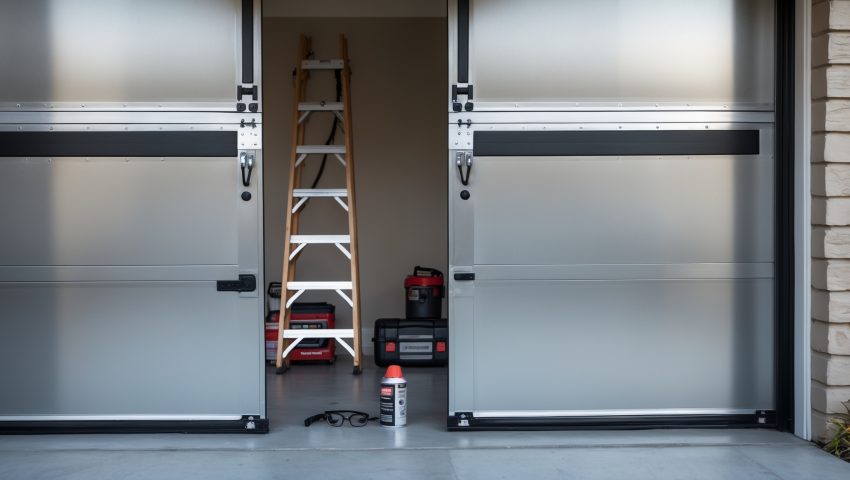
Essential Tools and Materials for a DIY Garage Door Tune-Up
- Wrench set (including socket wrenches): For tightening loose nuts and bolts.
- Screwdrivers (Phillips and flathead): For adjustment and cover removal.
- Garage door lubricant (non-silicone, lithium-based spray): Specifically formulated for moving parts.
- Clean rags: For wiping tracks and hardware.
- Ladder: For safe access to high tracks and springs (use a sturdy, non-slip ladder).
- Safety glasses: Protect your eyes from dust or flying debris.
- Work gloves: Essential when handling metal parts and springs.
- Level: To check track alignment.
- Vacuum or brush: For removing dirt from tracks.
Optional but helpful: socket driver with extension, small paintbrush for precise lubrication, and a flashlight for inspecting hard-to-see areas.
DIY Garage Door Tune-Up: Step-by-Step Maintenance Guide
Step 1: Safety First
- Disconnect the Opener: Unplug the garage door opener or disconnect it from power to prevent accidental activation.
- Engage the Manual Release: Pull the emergency release cord to move the door by hand. Never work on springs under tension.
- Wear Safety Gear: Always use safety glasses and gloves.
Step 2: Visual Inspection
- Check all visible hardware for wear, rust, or damage—bolts, hinges, rollers, cables, and springs.
- Examine the tracks for bends, dents, or debris.
- Inspect weatherstripping at the bottom of the door for cracks or brittleness.
- Look for frayed cables. Do not attempt to repair or replace garage door cables yourself; call a professional if damaged.
Step 3: Tighten Hardware
Garage doors vibrate with use, causing nuts and bolts to loosen over time. Using your socket wrench, carefully tighten all roller brackets, track supports, and hinge bolts. Do not overtighten, as this may strip threads or damage components.
Step 4: Clean the Tracks
- Wipe tracks with a dry rag to remove dust and grime.
- If necessary, use a vacuum or brush to remove stubborn debris.
- Do not lubricate the tracks: Lubrication here can attract dirt and create more problems. Tracks should be clean and dry for smooth operation.
Step 5: Lubricate Moving Parts
- Rollers: Apply a small amount of garage door lubricant to ball bearings (avoid nylon rollers without exposed bearings).
- Hinges: Lubricate the pivot points where hinges bend as the door moves.
- Springs: Lightly spray torsion or extension springs, keeping a safe distance. Avoid over-lubricating.
- Bearings and Pulleys: Apply lubricant if accessible.
- Lock and Arm Bar: A dab of lubricant keeps manual locks and arm bars working smoothly.
Wipe away excess lubricant with a rag to prevent drips and dirt accumulation.
Step 6: Inspect and Replace Weatherstripping
Weatherstripping keeps out drafts, moisture, and pests. Check the bottom seal and side strips for cracks or hardening. If they’re worn, replace with new garage door weatherstripping—most home centers carry universal fits. Follow manufacturer instructions for removal and installation.
Step 7: Test Door Balance
- With the opener still disconnected, raise the door manually halfway. A properly balanced door should stay in place or move very slowly.
- If it quickly falls or rises, the springs may need adjustment—spring adjustment is dangerous; call a professional for any spring work.
Step 8: Check Auto-Reverse and Safety Sensors
- Reconnect the opener and power.
- Place a 2×4 board flat on the floor where the door closes. Lower the door—if working properly, it should reverse upon touching the board.
- Test photo-eye sensors by blocking their path as the door closes; the door should reverse direction.
- If the auto-reverse fails, consult your opener manual for adjustment or contact a technician.
Step 9: Final Inspection and Clean-Up
- Operate the door several times, listening for unusual noises and watching its movement.
- Clean up tools, dispose of old weatherstripping, and wipe away any spills.
Cost Breakdown: What You’ll Spend (and Save)
Typical DIY Tune-Up Costs
- Garage door lubricant: $7–$15
- Weatherstripping (if needed): $10–$25
- Basic tools (if not on hand): $0–$40 (most homeowners already own these)
Total estimated cost for a routine DIY tune-up: $10–$40, plus 1–2 hours of your time.
Professional Service Comparison
- Nationwide, professional garage door tune-up services typically charge $75–$150 per visit.
- Emergency repairs for neglected doors often run $200–$500 or more.
DIY tune-ups save money, prevent breakdowns, and extend the life of your door’s components.
Common Mistakes to Avoid
- Attempting to adjust or replace springs yourself: Garage door springs are under extreme tension. Mishandling can cause severe injury or death. Leave spring work to certified professionals.
- Over-lubricating: Excess lubricant attracts dust, creating sticky buildup.
- Using the wrong lubricant: Household oils (like WD-40) are not suitable; they can gum up and do not withstand temperature extremes.
- Ignoring subtle signs of wear: Squeaks, slow movement, or gaps in weatherstripping often precede major issues.
- Forgetting safety checks: Always test sensors and auto-reverse after any tune-up!
Seasonal Maintenance Checklist for U.S. Regions
Spring/Summer
- Inspect tracks for pollen, dust, and increased insect activity.
- Check weatherstripping for cracks from winter freezing.
- Lubricate all moving parts as described above.
Fall/Winter
- Wipe away leaves and debris from tracks and sensors.
- Inspect for rust or water damage after heavy storms.
- Check that the door seals tightly against snow and wind.
Regional Notes
- Coastal Areas: Watch for corrosion and salt buildup on metal parts.
- Northern States: Ice accumulation can damage weatherstripping and cause freeze-ups.
- Southwest: UV exposure hardens rubber seals; check for brittleness twice yearly.
When to Call a Professional
While most homeowners can handle routine maintenance, certain issues demand expert help:
- Broken or stretched springs
- Frayed or snapped cables
- Bent or damaged tracks
- Door off its tracks
- Electrical or opener malfunctions beyond simple sensor adjustments
Attempting these repairs without proper tools and training can be dangerous. For complex issues, always consult a licensed garage door technician.
Real-Life Case Study: Saving a Garage Door (and a Wallet) in Ohio
After a particularly harsh Ohio winter, homeowner Sarah noticed her garage door was squeaking loudly and sticking halfway up. Fearing a costly repair, she researched DIY maintenance and performed a tune-up: cleaning the tracks, lubricating rollers and hinges, and replacing cracked weatherstripping. Not only did her door operate smoothly again, but she also saved an estimated $120 in service fees. Sarah now tunes up her door every spring and fall, reporting zero issues since.
Maintenance Best Practices: Keeping Your Garage Door in Top Shape
- Perform a tune-up twice a year—spring and fall are ideal.
- Keep the area around tracks and sensors free of clutter.
- Listen for new noises; address minor issues before they escalate.
- Store manual and warranty information in an accessible spot.
- In snowy or rainy regions, check for water seepage and dry the interior frequently.
Conclusion: Invest an Hour, Save Hundreds—DIY Garage Door Tune-Up Pays Off
Garage door tune-ups are one of the most rewarding DIY projects for U.S. homeowners. With just a few basic tools and an hour or two of your time, you can drastically reduce the risk of malfunction, improve the safety of your home, and save significant money on repairs. Regular maintenance prevents breakdowns that could leave your car stranded or your home exposed—and helps you get the most out of your garage door investment.
The step-by-step process outlined in this guide gives you the confidence and know-how to tackle garage door care head-on. By inspecting, tightening, cleaning, and lubricating critical components, you’ll keep your door running smoothly through every season. Remember: while most maintenance is safe and straightforward, always defer to professionals for springs, cables, and major repairs. Safety first!
Make garage door tune-ups part of your home care routine—your wallet, your car, and your peace of mind will thank you. If you’re new to DIY, start with the basics and build from there. With regular attention, your garage door will provide years of reliable, quiet service—no emergency repair bills required. Happy tuning!