Introduction: Why DIY Basement Waterproofing Matters
Basements are the unsung heroes of American homes—providing storage, living space, and, sometimes, a safe haven during severe weather. But their position below ground level also makes them vulnerable to moisture, leaks, and even flooding. Left unchecked, a damp basement can lead to mold growth, structural damage, ruined possessions, and a significant drop in property value. Professional waterproofing can be expensive, but with the right approach, many U.S. homeowners can tackle key aspects themselves, saving thousands of dollars. However, DIY basement waterproofing is not a weekend paint-and-go project. It requires careful planning, proper tools, and a solid understanding of what causes water intrusion. In this comprehensive guide, we’ll walk you through proven DIY basement waterproofing strategies, provide a realistic cost breakdown, highlight common pitfalls, and share maintenance tips to ensure your hard work lasts. Whether you’re dealing with minor dampness or want to preempt future water woes, this article will empower you to protect your home—and your investment—with confidence.
Understanding Basement Water Intrusion
Common Sources of Moisture
Before you can fix a wet basement, you need to know where the water is coming from. The most frequent culprits include:
- Surface water: Rain or melting snow pooling around your foundation due to poor grading, clogged gutters, or downspouts that dump water too close to the house.
- Groundwater: Hydrostatic pressure pushing water through cracks or porous concrete, especially after periods of heavy rain.
- Plumbing leaks: Leaky pipes, water heaters, or washing machines in the basement itself.
- Condensation: Warm, humid air meeting cool basement surfaces, causing water to bead up.
Key Signs of Water Problems
- Visible water on floors or walls
- Damp, musty odors
- Efflorescence (white powdery deposits on masonry)
- Mold or mildew growth
- Peeling paint or wall covering
- Rust on appliances or metal fixtures
Pinpointing the source is crucial. Treating symptoms without addressing root causes leads to wasted time and money.
DIY Basement Waterproofing: Step-by-Step Guide
Step 1: Inspect and Prep the Basement
- Clear out belongings: Move furniture, boxes, and stored items away from walls and off the floor.
- Clean surfaces: Sweep and vacuum debris. Scrub walls and floors to remove dirt, efflorescence, and mold using a solution of water and detergent (add a little bleach for mold, but never mix bleach and ammonia-based cleaners).
- Document problem areas: Mark cracks, stains, or spots where water is entering.
- Dry out the space: Use fans, dehumidifiers, or a wet-dry vac for standing water. Moisture meters can help identify hidden dampness.
Step 2: Address Exterior Drainage
Most basement water issues start outside. The following DIY tasks can have the biggest impact:
- Gutters and Downspouts: Clean gutters and add downspout extensions to direct water at least 6 feet from your foundation.
- Grading: Ensure soil slopes away from your home at a 5% grade (about 6 inches drop over 10 feet). Add soil as needed to fill low spots.
- Check for landscaping issues: Avoid flower beds or mulch that trap moisture against the foundation.
- Driveway and walkway drainage: Make sure hard surfaces slope away from the home or add drains as needed.
Step 3: Repair Cracks and Gaps
- Hairline cracks in concrete: Clean with a wire brush, then fill with concrete crack filler or hydraulic cement. Use a putty knife for a smooth finish.
- Larger cracks (wider than 1/4 inch): Underlying structural issues may be present. For non-structural cracks, use an epoxy injection kit. If the crack is still moving or you notice bowing walls, consult a professional.
- Gaps around pipes or wires: Fill with expanding foam sealant or hydraulic cement.
Step 4: Apply Waterproof Coatings
These coatings create a barrier on interior walls and floors:
- Masonry waterproofing paint: Brush or roll on two coats. Only apply to bare, clean masonry—avoid painting over previous coatings.
- Elastomeric sealants: Great for areas with minor movement or flexing.
Follow manufacturer instructions for drying times and safety precautions (ventilation is key).
Step 5: Install Interior Drainage Solutions (Optional)
- Baseboard drainage systems: These channel water seepage to a sump pump. Kits are available for moderate DIYers.
- Sump pump installation: For persistent water, installing a sump pump in a pit at the basement’s lowest point is a robust solution. While DIY kits exist, this project requires confidence with concrete cutting and plumbing.
Step 6: Combat Humidity and Condensation
- Dehumidifier: A basement-rated unit keeps relative humidity below 60%.
- Insulate cold water pipes: Prevent condensation and drips with foam pipe wrap.
- Seal dryer vents and exhaust fans: Ensure they vent outside, not into the basement.
- Encapsulate crawl spaces: If your basement connects to a crawl space, consider a vapor barrier.
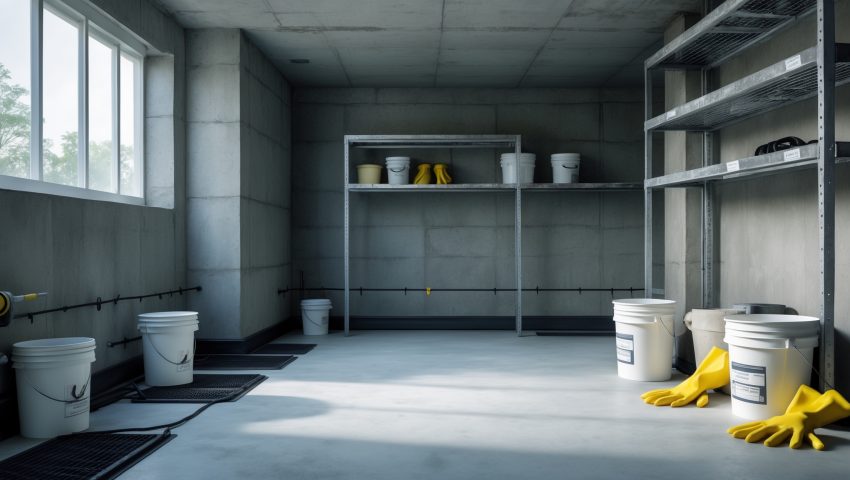
Essential Tools and Materials for DIY Basement Waterproofing
- Wire brush and stiff scrub brush
- Shop vacuum or wet-dry vac
- Utility knife and putty knife
- Concrete crack filler or hydraulic cement
- Epoxy crack injection kit (for wider cracks)
- Masonry waterproofing paint and rollers/brushes
- Caulking gun and waterproof caulk
- Expanding foam sealant
- Dehumidifier
- Vapor barrier plastic sheeting (for crawl spaces)
- Downspout extensions
- Safety gear: gloves, goggles, mask/respirator
Cost Breakdown: What to Expect
DIY basement waterproofing costs can vary widely depending on the size of your basement, the severity of the problem, and the solutions you choose. Here’s a rough cost guide for common items:
- Basic tools & cleaning supplies: $50–$150
- Crack fillers & hydraulic cement: $10–$30 per tube/container
- Masonry waterproofing paint: $35–$60 per 5-gallon bucket (covers ~75–100 sq ft with two coats)
- Dehumidifier: $150–$300 (for a reliable, basement-sized unit)
- Downspout extensions: $10–$25 each
- Sump pump kit (if needed): $150–$400
- Interior drainage system kit: $200–$1,000 depending on length and type
For a typical 1,000 sq ft basement with minor leaks, expect to spend $250–$600 for supplies. More complicated issues like repeated flooding or significant structural cracks may require partial professional intervention (costing $2,000–$10,000+), but even then, DIY prep and minor repairs can save you money.
Common DIY Waterproofing Mistakes to Avoid
- Ignoring exterior drainage: Skipping gutter cleaning or proper grading means interior fixes will only be temporary.
- Painting over existing coatings or efflorescence: Waterproofing products must bond to clean, bare masonry.
- Underestimating humidity: Failing to use a good dehumidifier or ignoring condensation can undo your hard work.
- Missing hidden leaks: Overlooking pipe leaks or HVAC condensation lines is a common oversight.
- Skipping safety gear: Mold spores, dust, and chemical fumes can be hazardous—always wear gloves, goggles, and masks.
- Attempting major structural repairs solo: Bowed walls, wide or shifting cracks, and significant foundation settling require a professional assessment.
When to Call a Professional
- Major foundation cracks (wider than 1/2 inch) or shifting walls
- Recurrent flooding despite surface drainage fixes
- Extensive mold infestations
- Unexplained drops in water pressure or persistent plumbing leaks
Timely professional evaluation can prevent catastrophic damage and higher repair bills down the road.
Maintenance Best Practices for a Dry Basement
- Check gutters and downspouts every season: Clean debris and ensure water flows away from the house.
- Inspect basement walls and floors quarterly: Watch for new cracks or damp spots.
- Run a dehumidifier year-round: Especially in humid climates or summer months.
- Store items off the floor: Use shelving or pallets for boxes and furniture.
- Maintain grading and landscaping: Re-grade soil and trim back plants as needed.
- Test sump pump operation: Pour water into the pit every few months to ensure it activates properly.
Case Study: A Real-Life DIY Waterproofing Success
In suburban Ohio, homeowner Lisa M. noticed musty odors and efflorescence in her 1960s basement. After a heavy spring rain, water pooled near a back wall. Following DIY research, Lisa spent a weekend cleaning, sealing cracks, and painting with waterproofing paint. She also extended her downspouts and added new soil around the foundation. The total cost was just under $400. Over the next year, her basement stayed dry—even through a record-breaking rainfall. Lisa credits her success to thorough prep, not skipping exterior fixes, and running a dehumidifier. She continues to monitor her basement for new issues each season.
Conclusion: Empowering Yourself with DIY Basement Waterproofing
Waterproofing your basement yourself is one of the most rewarding—and impactful—home improvement projects you can undertake. By understanding the science behind water intrusion, using the right tools and materials, and committing to careful prep work, you can solve many common basement moisture problems without breaking the bank. Remember: the most effective solutions start outside, where you can influence how water behaves around your foundation. Interior repairs, while essential, only last if exterior drainage is addressed. Don’t be discouraged by initial setbacks; persistence and attention to detail are your best allies in this battle. And by keeping up with simple maintenance tasks, you’ll extend the life of your basement waterproofing efforts for years to come. If you ever encounter a problem beyond your DIY comfort level, don’t hesitate to call in a professional—your home’s safety and value are worth it. With this guide, you’re well-prepared to reclaim a dry, healthy, and usable basement space, adding comfort and value to your home for the long haul.
How can I tell if my basement’s musty smell is just from condensation or if there’s water actually seeping through the foundation?
A persistent musty smell can come from both condensation and water seepage. Check for damp spots, peeling paint, or white powdery residue on walls—these usually indicate water intrusion. Condensation typically leaves surfaces damp without visible leaks or stains.
Can you provide more details on how to tell if moisture is coming from surface water versus groundwater before starting repairs?
To distinguish surface water from groundwater issues, check after rainfall: if moisture appears soon after, it’s likely surface water. Persistent dampness, even in dry weather, usually points to groundwater. Inspect for stains—surface water leaves marks higher on walls, while groundwater seeps up from the floor.
Could you clarify how to tell if moisture issues are due to condensation versus groundwater, and whether the DIY solutions differ based on the source?
Condensation usually appears as water droplets on cool surfaces like pipes or walls, often in humid weather. Groundwater issues cause water seepage from cracks or where the wall meets the floor. DIY fixes differ—condensation is managed with dehumidifiers and ventilation, while groundwater usually needs sealing or drainage solutions.
If I mostly notice musty odors and a little efflorescence, is it enough to just improve grading and gutters, or does that usually mean I need to waterproof inside too?
Improving grading and gutters is a great first step and may solve minor moisture issues. However, if musty odors and efflorescence persist, interior waterproofing might also be needed to fully address hidden moisture problems.
When you mention surface water pooling around the foundation, do you recommend regrading the soil myself, or is that best left to a contractor?
Regrading soil to direct water away from your foundation can be a DIY project if the slope needed is minor and you’re comfortable with yard work. For significant grading or drainage issues, it’s safer to consult a contractor.
When budgeting for DIY waterproofing, did the article break down which materials or tools tend to be the biggest expense for typical American homeowners?
Yes, the article mentions that waterproofing membranes and sealants are usually the most significant expenses for homeowners. It also notes that tools like sump pumps and dehumidifiers can add to the overall cost if needed.
If my basement only has a musty smell and some efflorescence but no visible water, do I still need to do the full waterproofing process mentioned here?
If you’re only noticing a musty smell and some efflorescence, you may not need a full waterproofing overhaul right away. Start by improving ventilation and using a dehumidifier, but monitor the situation for any signs of moisture or leaks.
You mentioned clogged gutters being a source of surface water—how often should I be cleaning them to prevent basement leaks, especially with all the rain we get in the Midwest?
In the Midwest, it’s best to clean your gutters at least twice a year—spring and fall. If you have lots of trees nearby or experience frequent storms, check and clean them more often to prevent clogs and protect your basement.
You mention that professional waterproofing is expensive—about how much can a typical DIY project save compared to hiring someone, especially for a medium-sized basement?
A typical DIY waterproofing project for a medium-sized basement can save you between $2,000 and $8,000 compared to hiring professionals, depending on materials chosen and the complexity of the work.
Could you clarify how to tell if moisture in the basement is from condensation versus a plumbing leak? The signs sound similar and I want to target the right source.
Condensation often appears on cool surfaces like pipes or walls, especially in humid weather, and usually forms droplets. A plumbing leak typically results in localized wet spots, persistent dampness, or puddles even in dry weather. Check for musty odors and monitor if moisture persists when humidity is low.
When sealing basement walls as a DIYer, is there a specific type of product that works best for older poured concrete versus concrete block foundations?
For older poured concrete walls, use a penetrating concrete sealer. For concrete block foundations, a masonry waterproofer or elastomeric coating is best since it fills pores and small cracks in the blocks. Always prep and clean surfaces thoroughly before application.
When it comes to fixing surface water issues like poor grading or clogged gutters, is there an order I should tackle them in before starting any interior basement waterproofing?
Yes, start by addressing surface water issues first. Fix poor grading and unclog gutters and downspouts before moving on to interior waterproofing. This approach prevents new water from entering and helps your basement solutions last longer.
How much should I realistically budget for materials if my main issue is groundwater seeping through porous concrete after heavy rain, as mentioned in the article?
For groundwater seepage through porous concrete, you should budget around $200 to $500 for materials like hydraulic cement, waterproofing sealant, crack fillers, and application tools. Costs may vary based on the basement size and specific products chosen.
If most of my basement moisture seems to be from condensation rather than leaks, are there specific DIY methods you recommend to address humidity and prevent mold growth?
To tackle basement condensation, use a dehumidifier to reduce moisture levels, insulate cold water pipes, and ensure good ventilation. Also, avoid drying clothes indoors and store items off the floor to help prevent mold growth.
If visible water on basement floors is already present, should I address drainage outside first before starting any indoor waterproofing steps?
Yes, it’s best to address any exterior drainage issues first. Fixing gutters, downspouts, and grading around your home can prevent more water from entering, making your indoor waterproofing efforts more effective.
What kinds of tools or supplies should I budget for if I want to address minor dampness myself without hiring a professional?
For minor dampness, budget for supplies like waterproof paint or sealant, a stiff brush, caulk, a dehumidifier, safety gloves, and possibly a sump pump. You may also need crack repair kits, sponges, and cleaning solutions.
If condensation is one of the main moisture sources, would a dehumidifier be enough, or do I really need to address grading and gutters too?
A dehumidifier can help with condensation, but if your grading or gutters are causing water to enter the basement, those issues should also be fixed. Addressing both sources provides better long-term moisture control and protects your basement from damage.
If I see peeling paint but no visible water, should I still be worried about a hidden moisture problem or is it usually just cosmetic?
Peeling paint, even without visible water, can be a sign of hidden moisture issues. It’s a good idea to check for dampness, musty odors, or mold, as moisture problems can sometimes be present behind walls or under surfaces.
Can you give a ballpark cost breakdown for DIY waterproofing vs. hiring a pro for a typical 1,000 square foot U.S. basement?
DIY basement waterproofing for 1,000 square feet typically runs $500 to $2,000, depending on materials and method. Hiring a professional often costs $5,000 to $10,000 or more, but includes warranties and expert installation.