Introduction: Why Upgrade Your Home Office?
The shift to remote work across the United States has turned the humble home office from an afterthought into a productivity powerhouse. Whether you telecommute full-time, run a side hustle, or simply need a quiet space for bills and brainstorming, your workspace can make or break your focus. But not every home is equipped with a ready-made office—or the peace and quiet you need for peak performance. Enter the home office makeover: a targeted DIY project that transforms any spare room, nook, or corner into a functional and inviting workspace. In this guide, we’ll break down the costs, tools, and step-by-step soundproofing strategies needed to create a distraction-free zone—without blowing your budget. From selecting affordable materials to choosing the right soundproofing techniques for different U.S. climates and home styles, you’ll get proven, actionable advice to create the ultimate home office environment tailored to your needs.
Planning Your Home Office Makeover
Assessing Your Workspace Needs
Before grabbing your toolkit, take a moment to define your goals. Do you need a full-scale transformation or just a few key upgrades? Consider:
- Noise Level: Is your workspace adjacent to a busy street, noisy family room, or shared wall?
- Lighting: Do you have access to natural light, or is artificial lighting a must?
- Privacy: Do you require visual separation or just sound reduction?
- Space: Are you working with a dedicated room, a converted closet, or a multi-use area?
- Budget: How much can you realistically invest in this project?
Setting a Realistic Budget
Home office upgrades can range from $200 for basic improvements to $2,500+ for comprehensive makeovers. Here’s a typical budget breakdown for a DIY soundproofing-focused project:
- Acoustic panels and materials: $100–$400
- Weatherstripping and door sweeps: $25–$80
- Rugs and soft furnishings: $75–$300
- Lighting upgrades (bulbs, lamps): $40–$150
- Desk and chair upgrades: $200–$700 (optional)
- Paint and decor: $50–$200
- Basic tools (if not owned): $50–$150
Set aside a 10–15% contingency for surprises—like discovering a drafty window or hidden gaps behind trim.
Essential Tools & Equipment for a DIY Home Office Makeover
Having the right tools on hand will save you time and headaches. For most home office upgrades, you’ll need:
- Measuring tape and ruler
- Utility knife and scissors
- Caulk gun and acoustic caulk
- Hammer and nails or a nail gun
- Power drill and screwdriver set
- Stud finder
- Level
- Paintbrushes and rollers
- Staple gun
- Ladder or step stool
If you’re adding shelves, mounting panels, or building a custom desk, consider renting specialty tools from your local hardware store to save money.
Step-by-Step DIY Soundproofing for U.S. Homes
Step 1: Identify and Seal Air Gaps
Sound often travels through the smallest cracks. Begin by inspecting your office for:
- Gaps under doors
- Cracks around window frames
- Outlets and switch boxes
- Baseboards and crown molding joints
Apply acoustic caulk or weatherstripping to seal these gaps. For electrical outlets, install foam gaskets behind the cover plates. Add a door sweep or draft stopper to block noise seeping in from hallways.
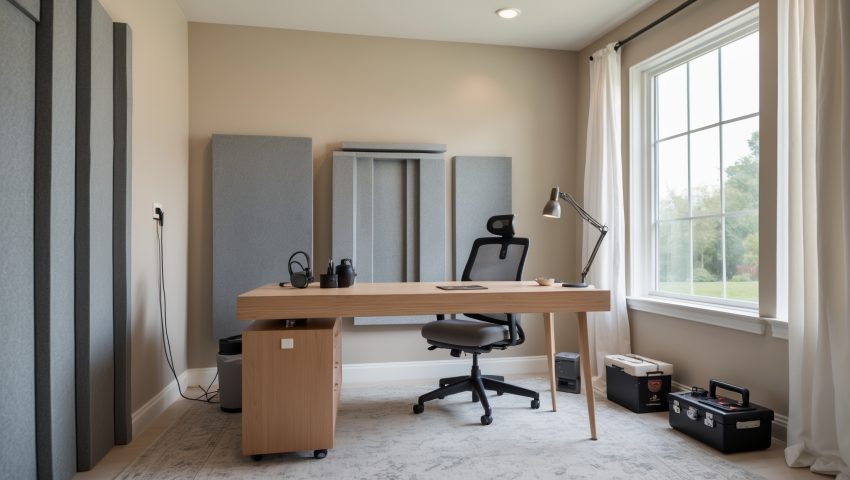
Step 2: Add Mass to Walls and Doors
Heavier surfaces absorb more sound. For a quick DIY fix:
- Mount acoustic panels or dense foam tiles on shared walls—focus on the area behind your desk and on walls facing the source of noise.
- Hang thick curtains or moving blankets over windows and doors. Inexpensive and removable, these can be layered for extra absorption.
- Replace hollow-core doors with solid-core models, or add a mass loaded vinyl (MLV) sheet to the back of the existing door.
Step 3: Soften Hard Surfaces
Echoes bounce off hard floors and bare walls. Minimize this by:
- Laying down a thick area rug or carpet tiles, especially for wood or tile floors.
- Adding upholstered furniture, like a reading chair or cushioned bench.
- Installing fabric-covered bulletin boards or wall hangings.
For renters, these solutions offer maximum impact with minimal permanence.
Step 4: Address Windows
Windows are notorious for leaking both light and sound. To upgrade:
- Install double-cell blackout shades or heavy drapes to dampen exterior noise.
- Apply clear acrylic window inserts for extra insulation (great for colder regions).
- Seal around window frames with acoustic caulk.
If you’re in a historic home, prioritize reversible solutions to avoid damaging original window casings.
Step 5: Consider the Ceiling
If you have upstairs neighbors or open rafters, treat the ceiling:
- Install acoustic tiles or decorative drop panels.
- Hang a tapestry or sound-absorbing fabric overhead.
Attic offices may benefit from extra insulation between the joists.
Step 6: Fine-Tune for Regional Challenges
- Urban homes: Prioritize window and door upgrades to block street noise.
- Suburban homes: Focus on wall and floor softening to minimize echoes in open layouts.
- Rural homes: Target HVAC vents and gaps that let in wildlife or outdoor sounds.
Design Upgrades That Boost Productivity
Lighting for Focus and Comfort
Good lighting reduces eye strain and enhances mood. Combine natural light with layered artificial sources:
- Desk lamps with adjustable color temperature
- Overhead fixtures with dimmers
- Task lighting for specific work zones
Position your desk perpendicular to windows to avoid glare on screens.
Ergonomics on a Budget
Comfort is as important as quiet. To upgrade ergonomics without overspending:
- Invest in a secondhand or refurbished office chair with lumbar support.
- Use a monitor riser or stack of books to raise your screen to eye level.
- Add a footrest or anti-fatigue mat if standing.
Check Craigslist, Facebook Marketplace, or local office supply stores for deals on quality furniture.
Storage and Organization
Clutter kills productivity. Maximize vertical storage with:
- Wall-mounted shelves and pegboards
- Under-desk rolling cabinets
- Desk organizers or trays for cables and supplies
Label everything. Use clear bins for small parts and cords.
Common DIY Mistakes to Avoid
- Underestimating Noise Sources: Don’t forget about HVAC vents, shared plumbing, or exterior walls.
- Ignoring Sound Flanking Paths: Sound can travel through ductwork, joists, or even light fixtures.
- Over-Investing in High-End Materials: Many affordable solutions—like weatherstripping and rugs—offer big improvements for less.
- Skipping the Prep Work: Take time to clean, measure, and plan before installing anything.
- Neglecting Electrical and Fire Safety: Don’t block vents, overload circuits, or cover outlets with flammable materials.
Maintenance Best Practices for a Quiet and Productive Office
- Check and replace weatherstripping every 6–12 months.
- Re-tighten screws and hardware on doors and windows annually.
- Dust acoustic panels and curtains regularly to maintain air quality.
- Inspect for new gaps or cracks after seasonal changes.
- Rotate or clean rugs and cushions to reduce allergens.
Periodic check-ins keep your upgrades working their best, ensuring lasting comfort and performance.
Regional Case Studies: Real U.S. Home Office Transformations
Brooklyn, NY: Apartment Nook to Sound Sanctuary
Faced with constant traffic noise, a remote worker in Brooklyn transformed a corner nook by adding dense blackout curtains, peel-and-stick acoustic panels, and a plush rug. The result: a 60% reduction in ambient noise and noticeably improved Zoom call quality—all for under $350.
Austin, TX: Garage Conversion with Climate Considerations
An Austin homeowner converted a detached garage into a home office. To combat heat and outside noise, they added insulation batts to the ceiling, sealed the garage door with weatherstripping, and installed heavy curtains. Total cost was $1,100, but utility savings and comfort paid off within a year.
Minneapolis, MN: Attic Office for All Seasons
In a chilly Minneapolis attic, soundproofing tape around windows, a thick wool rug, and DIY fabric wall panels provided both noise and thermal insulation. The project cost just $425 and doubled as a cozy winter retreat.
Conclusion: Your Next Steps for a Better Home Office
Upgrading your home office isn’t just about aesthetics—it’s about creating a functional, quiet, and comfortable environment that supercharges your productivity. With thoughtful planning, a clear budget, and the right DIY techniques, you can achieve professional-level results without hiring a contractor or spending a fortune. Focus on sealing gaps, adding mass with acoustic materials, and softening hard surfaces to drastically reduce noise. Layer in lighting, ergonomic furniture, and smart storage to complete your transformation.
Remember, every home—and every workspace—has unique challenges. Take time to assess your needs, prioritize improvements, and maintain your upgrades over time. If you’re renting or have a limited budget, start small: a simple door sweep or set of curtains can make a surprising difference. For homeowners, investing in quality soundproofing and ergonomic upgrades can pay dividends in comfort, health, and even property value.
Your home office should reflect not just your professional requirements, but your personal style and needs. Use these tips as a launchpad for your own creative solutions. Don’t be afraid to experiment, and enjoy the process of building a workspace where you can truly thrive—no matter where you are in the U.S.
Could you explain which soundproofing techniques work best for homes in humid climates like the Southeast?
In humid climates, dense materials like acoustic panels and heavy curtains are effective since they resist moisture better than foam. Seal gaps with weatherstripping, and avoid traditional fiberglass as it can absorb moisture and cause mold issues over time.