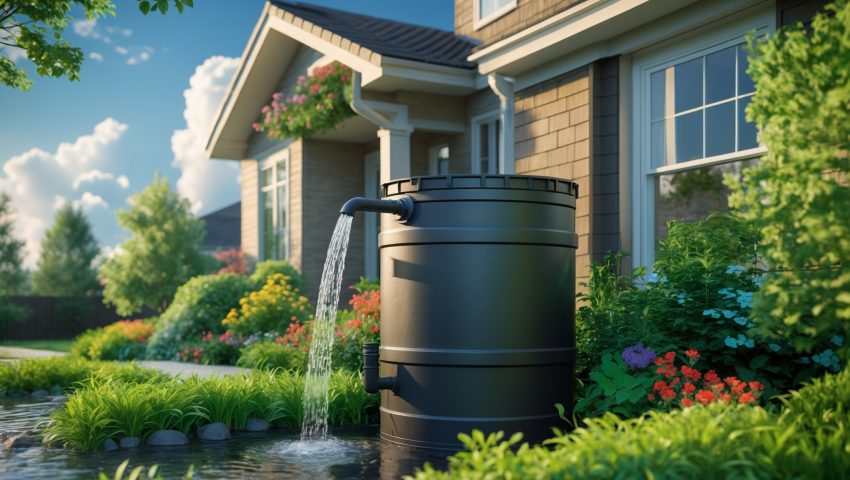
Introduction: Why Rain Barrels Are a Smart Choice for U.S. Homeowners
Water conservation is no longer just an environmental buzzword—it’s a practical necessity for homeowners across the United States. With water bills rising and drought conditions becoming more common in many regions, collecting and reusing rainwater is both eco-friendly and budget-wise. Installing a rain barrel system is one of the simplest ways to take advantage of free, naturally soft rainwater for your landscaping, gardens, and even certain household chores. But success hinges on more than just propping a barrel under your downspout. U.S. homeowners must consider local regulations, acquire the right tools, ensure effective setup, and stay on top of seasonal maintenance to prevent algae growth, mosquito breeding, and system failures. This in-depth guide walks you through every step—from selecting the right barrel to staying compliant with local laws and keeping your system running smoothly year-round.
Understanding Rain Barrel Benefits and Potential Limitations
Environmental and Financial Advantages
- Lower Water Bills: Irrigate your lawn, garden, or flower beds using stored rainwater instead of tap water.
- Reduces Runoff: Minimizes stormwater runoff that can cause soil erosion and overwhelm municipal systems.
- Plant Health: Rainwater is free from chlorine, salts, and other chemicals found in municipal water, making it better for most outdoor plants.
- Emergency Supply: In drought-prone areas, stored rainwater can be a vital backup for non-potable uses.
Potential Drawbacks
- Limited Capacity: Even the largest barrels can fill quickly during a heavy rain but run dry during droughts.
- Not For Drinking: Untreated rainwater is unsafe for consumption or bathing.
- Maintenance Needs: Barrels require regular cleaning and inspection.
- Pest Risks: Without proper setup, barrels can become breeding grounds for mosquitoes.
Compliance, Permits, and Local Restrictions
Know Before You Install
Rainwater harvesting is legal in most—but not all—U.S. states, and some municipalities impose specific restrictions on the size, placement, or use of collected water. Before purchasing or assembling a rain barrel system, take these steps:
- Research State Laws: Some states (e.g., Colorado) limit the number or capacity of rain barrels. Others, like Texas, actively encourage rainwater harvesting.
- Check Local Codes: City or county ordinances may regulate setbacks, allowable uses, or require screens to prevent mosquito breeding.
- Homeowner Association (HOA) Rules: If you live in an HOA, check for restrictions on the appearance or placement of barrels.
- Permits: Most single-barrel installations do not require a permit, but large or linked systems might.
Visit your city or county website or contact your local extension office for up-to-date information before proceeding.
Choosing the Right Rain Barrel System
Types of Barrels
- Ready-Made Rain Barrels: Commercially available in plastic, wood, or metal, often with spigots and overflow valves pre-installed.
- DIY Barrels: Repurposed food-grade barrels can be converted with simple modifications. Avoid barrels that previously held chemicals.
Key Features to Look For
- Capacity: Typical residential barrels range from 40 to 80 gallons. Consider your roof’s catchment area and average rainfall.
- Overflow Valve: Essential to redirect excess water away from your foundation.
- Screened Inlet: Keeps out debris and insects.
- Sturdy Base: Full barrels are heavy—ensure a strong, level platform.
- Spigot Placement: Should be low enough to maximize usable capacity but high enough to fit a watering can beneath.
Essential Tools and Materials
- Rain barrel (commercial or DIY)
- Downspout diverter or flexible downspout elbow
- Leveling base materials (cinder blocks, pavers, or gravel)
- Drill with hole saw bits (for DIY barrels)
- Utility knife
- Adjustable wrench
- Teflon tape (for leak-proof spigot installation)
- Fine mesh screen (if not included)
- Overflow hose (optional for directing water further from the foundation)
- Safety gloves and goggles
Step-by-Step Installation Guide
1. Site Selection and Preparation
Choose a location beneath an existing downspout, ideally near your garden or landscaping. The surface should be level and stable. Remove grass or debris and create a flat base using pavers, bricks, or a compacted layer of gravel. This prevents tipping and improves access to the spigot.
2. Assemble the Barrel
If using a DIY barrel, drill a hole near the bottom for the spigot and another near the top for the overflow valve. Apply Teflon tape to threaded fittings and tighten securely. Attach a fine mesh screen over the water inlet to block debris and insects.
3. Modify the Downspout
Measure and cut your downspout to the correct height so water flows directly into the barrel. Install a downspout diverter or elbow to direct water into the screened inlet. Diverters are especially helpful for seamlessly switching between barrel collection and normal water flow.
4. Position the Barrel
Set the barrel on your prepared base. Ensure it’s stable and the spigot is easily accessible. Connect the overflow outlet to a hose or pipe to direct excess water away from your house’s foundation—this is essential for preventing water damage.
5. Test and Inspect
After the next rainfall, check all joints and fittings for leaks. Ensure water enters freely, the screen remains in place, and overflow is directed safely.
Seasonal Maintenance Best Practices
Spring
- Inspect the barrel for cracks, leaks, or winter damage.
- Clean out any debris or sediment from the bottom of the barrel.
- Rinse and reattach the mesh screen.
- Ensure all connections are tight and overflow is clear.
Summer
- Regularly check for mosquito larvae. Always keep the inlet and overflow screened.
- Use stored water frequently to prevent stagnation.
- Periodically clean the barrel interior if algae growth appears.
Fall
- Clear gutters and downspouts of leaves to prevent clogs.
- Inspect the base for settling or instability.
- Empty the barrel as the season winds down to reduce weight for winterizing.
Winter
- Drain and disconnect the barrel before freezing temperatures arrive to prevent cracks or bursting.
- Store the barrel upside down or in a sheltered area.
- Reconnect the downspout to direct water away from the foundation when the barrel is not in use.
Advanced Tips for Optimizing Your Rain Barrel System
Connecting Multiple Barrels
If you have a larger catchment area or want more storage, link barrels together using connector kits or DIY hoses near the base. This allows overflow from the first barrel to fill the next without complicated rerouting.
Using a Pump
For larger gardens or to supply drip irrigation, consider adding a small submersible pump designed for rainwater use. Solar-powered options are available for off-grid convenience.
Water Quality Enhancements
- Add a first-flush diverter to divert the initial, debris-laden flow of rainwater away from your barrel.
- Install a UV-resistant barrel or a shade cover to minimize algae growth.
Common Mistakes to Avoid
- Poor Placement: Setting the barrel on uneven ground can lead to tipping or spigot inaccessibility.
- No Overflow Management: Failing to direct overflow away from your home’s foundation risks water damage.
- Neglecting Maintenance: Dirty barrels lead to foul odors, clogs, and mosquito problems.
- Using Non-Food-Grade Barrels: Containers that once held chemicals can leach toxins into your water.
- Ignoring Local Laws: Installing a system without checking local codes may result in fines or removal.
Frequently Asked Questions
- Can I use rain barrel water inside my home? No. Unless treated, rainwater is suitable only for outdoor, non-potable uses like irrigation.
- How much water can I collect? A 1,000-square-foot roof can yield over 600 gallons from a single inch of rain. Barrels fill quickly, so plan overflow accordingly.
- Do rain barrels attract mosquitoes? Only if left uncovered. Always use screens and check regularly for larvae.
- Is it worth installing a barrel in a dry climate? Yes—occasional storms can provide enough water for targeted irrigation, especially during water restrictions.
Conclusion: Making the Most of Your Rain Barrel Investment
Installing a rain barrel system is a manageable DIY project that delivers lasting rewards in water savings, garden health, and environmental stewardship. By following this step-by-step guide, you not only ensure a safe and effective installation but also avoid the pitfalls that can undermine your efforts—like ignoring overflow management or local compliance rules. Remember, the key to a successful system lies in careful planning: choose the right barrel, prepare a strong base, and install robust screening to keep pests at bay. Seasonal maintenance is non-negotiable, but the reward is a reliable, sustainable source of water for your home and garden, year after year.
As U.S. homeowners face increasing pressure to manage water use, a rain barrel offers a practical, affordable solution that pays dividends in both savings and sustainability. From complying with local codes to optimizing your setup for your climate and landscaping needs, a little attention to detail goes a long way. Embrace the process, stay proactive with maintenance, and enjoy the satisfaction of making a tangible difference—one rainstorm at a time.
Are there certain types or brands of barrels that are easiest to keep clean and maintain, especially for families with limited free time?
Food-grade plastic barrels with a smooth interior are usually easiest to clean and maintain. Brands offering removable lids or large openings make access simpler, saving time for busy families. Look for models with built-in debris screens and accessible spigots.
How do I find out if my state or city has any restrictions or permit requirements before installing a rain barrel?
Contact your local city or county government office or visit their official website to check for rain barrel regulations. You can also call your local water department or building permit office for specific information about restrictions or permit requirements in your area.
If my local area has certain regulations about rainwater collection, do you recommend contacting the city first or are there standard permits most homeowners can expect to need?
It’s best to contact your local city or municipal office first since rainwater collection rules and permit requirements can vary widely. They can tell you exactly what permits or approvals, if any, you’ll need for your area.
Could you clarify what type of regular inspections are needed to prevent mosquito breeding in the rain barrel system?
Inspect your rain barrel weekly for standing water on lids and around fittings, ensure all screens or mesh covers are intact, and check for leaks or gaps where mosquitoes could enter. Empty any debris and clean screens regularly to keep mosquitoes out.