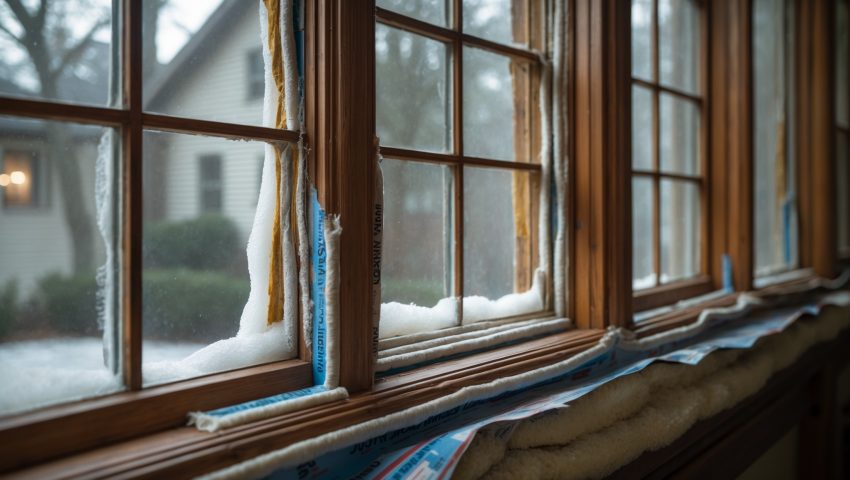
Introduction: Why Weatherizing Old Windows Matters
For many U.S. homeowners, the charm and character of older windows can be both a blessing and a burden. While original wood-framed or steel casement windows lend undeniable style and historic value, they often come with a hidden cost: energy inefficiency. Gaps, cracks, and single-pane glass can lead to chilly drafts in winter, sweltering rooms in summer, and a constant strain on your heating and cooling systems. The result? Higher utility bills, reduced comfort, and, in some cases, unwanted moisture damage or even mold growth. Fortunately, you don’t have to replace your old windows to see dramatic improvements. Weatherizing—sealing air leaks, adding insulation, and optimizing hardware—can transform your home’s comfort and energy profile for a fraction of the cost of window replacement. In this comprehensive guide, you’ll learn everything you need to successfully weatherize old windows in your U.S. home. We cover essential tools, realistic budgeting, material selection, and a detailed step-by-step process, including pro tips and troubleshooting for common challenges. Whether you’re prepping for winter, fighting summer heat, or simply seeking to preserve your home’s historic integrity while boosting efficiency, this guide will help you get results that last.
Understanding the Basics: What Does Weatherizing Old Windows Involve?
Weatherizing old windows is a multi-step process aimed at minimizing air infiltration and heat transfer. The main goals are:
- Sealing gaps and cracks that allow drafts
- Improving insulation around window frames
- Ensuring operability of sashes and locks
- Reducing heat loss through glass surfaces
Unlike full window replacement, weatherization preserves your original windows while making them work better for today’s energy standards. Typical weatherization methods include applying caulk, installing weatherstripping, adding storm windows or insulation film, and repairing or adjusting hardware to ensure a tight seal.
Budget Breakdown: What to Expect When Weatherizing Old Windows
Average Costs for U.S. Homeowners
The cost of weatherizing old windows can vary widely depending on the number and size of windows, the specific upgrades you choose, and whether you do the work yourself. Here’s a realistic breakdown:
- Basic DIY Supplies (per window): $10–$25 (caulk, weatherstripping, foam backer rod)
- Window Insulation Kits (per window): $5–$15 (plastic film + adhesive)
- Storm Window Inserts (per window): $50–$200 (removable acrylic or glass panels)
- Tools (one-time purchase): $30–$80 (caulking gun, utility knife, putty knife, heat gun, tape measure)
- Total DIY Project (10 windows): $150–$800 depending on approach
By comparison, professional window replacement can run $500–$1,000+ per window, making weatherization an excellent value for many older homes.
Budgeting Tips
- Shop local hardware stores for bulk discounts on weatherstripping and caulk.
- Invest in quality tools—they’ll pay off over multiple projects.
- Prioritize windows in rooms you use most or those with the worst drafts.
Essential Tools and Materials for DIY Window Weatherization
Before you start, assemble all necessary supplies. Here’s what you’ll need for most weatherization projects:
- Caulking gun and high-quality exterior-grade caulk (silicone or latex, paintable if needed)
- Weatherstripping (foam tape, V-strip, felt, or rubber for sash and frame)
- Foam backer rod (for larger gaps)
- Putty knife (to remove old caulk or paint)
- Utility knife and scissors (for trimming materials)
- Heat gun or hair dryer (for window insulation film kits)
- Tape measure
- Cleaning supplies (rags, vacuum, mild detergent)
- Replacement hardware (locks, sash cords, or pulleys if needed)
- Optional: Removable storm window inserts or insulation panels
Step-by-Step DIY Process: Weatherizing Old Windows
1. Inspect and Assess Each Window
Start by carefully examining each window inside and out. Look for:
- Visible gaps between sash, frame, and wall
- Cracked, missing, or dried-out caulk
- Loose or worn weatherstripping
- Broken locks, latches, or sash cords
- Signs of moisture, rot, or mold
Mark or photograph problem areas for reference during repairs.
2. Clean and Prep Surfaces
Use a vacuum and damp rag to remove dust, cobwebs, or debris from window frames and sills. Old caulk or loose paint should be scraped off with a putty knife. Allow surfaces to dry fully before applying new materials.
3. Caulking Cracks and Gaps
- Load your caulking gun with exterior-grade caulk.
- Apply a continuous bead along seams where the window frame meets the wall (interior and exterior).
- For larger gaps, insert foam backer rod first, then caulk over it.
- Smooth caulk with a wet finger or caulk tool for a tidy finish.
- Allow caulk to cure as directed (usually 24 hours).
4. Installing or Replacing Weatherstripping
- Measure the length of sash and frame that need sealing.
- Choose appropriate weatherstripping (self-adhesive foam for most; V-strip for double-hung windows).
- Cut strips to length with scissors or a utility knife.
- Apply weatherstripping along the meeting rails, bottom of the sash, and sides as needed.
- Check for smooth operation—windows should open and close easily but snugly.
Pro tip: For historic wood windows, select non-damaging options that preserve finish and allow reversibility for future restoration.
5. Adding Window Insulation Film (Optional)
For single-pane glass or extremely drafty windows, consider a window insulation kit:
- Clean glass and frame thoroughly.
- Apply double-sided tape around the inside of the frame.
- Stretch plastic film over the window, pressing firmly onto the tape.
- Use a heat gun or hair dryer to shrink the film for a taut, invisible barrier.
These kits are removable and especially useful for winter months.
6. Repairing or Adjusting Hardware
- Tighten loose screws on locks, latches, and hinges.
- Replace worn sash cords or pulleys if double-hung windows won’t stay open or closed.
- Lubricate moving parts with silicone spray for smooth operation.
Secure hardware helps maintain a tight seal and deters break-ins.
7. Installing Removable Storm Windows or Inserts (Optional)
If your budget allows and you want maximum efficiency, consider:
- Removable acrylic or glass storm panels: Custom-cut inserts that fit inside the window frame and can be taken out seasonally.
- Magnetic or compression-fit panels: Easy to install and remove, useful for historic homes or rental properties.
Storm inserts can cut heat loss by up to 50% and reduce outside noise.
Common Pitfalls and How to Avoid Them
- Skipping surface prep: New caulk or weatherstripping won’t adhere to dirty or damp surfaces.
- Oversealing: Blocking window weep holes can cause condensation and wood rot.
- Poor material choice: Interior caulk on exteriors will crack and fail; always match product to location.
- Forgetting ventilation: Overly tight windows can cause indoor air quality issues—ensure some windows can be opened when needed.
Maintenance Best Practices for Lasting Results
Annual Inspection Checklist
- Check caulk and weatherstripping for cracks, gaps, or wear.
- Clean sills and frames to prevent mold and rot.
- Test locks and hardware for security and function.
- Touch up paint or finish as needed to protect wood or metal frames.
- Reapply insulation film or swap storm inserts as seasons change.
Seasonal Tips
- Fall: Inspect and repair before cold weather hits. Pay extra attention to north- and west-facing windows.
- Spring: Remove insulation film, clean glass, and check for any moisture damage or leaks from winter.
When to Call a Pro
If you find extensive wood rot, mold, or structural issues around your windows, consult a professional contractor or preservation specialist. DIY weatherization works for most minor repairs, but serious damage requires expert intervention to ensure safety and structural integrity.
Case Study: Weatherizing a 1920s Bungalow in the Midwest
Consider the experience of a homeowner in Des Moines who weatherized twelve original double-hung windows in their 1920s bungalow. After carefully removing old caulk, applying new silicone sealant, and installing foam weatherstripping and removable acrylic storm inserts, their winter heating bills dropped by 20%. Drafts were eliminated, and the home’s character was fully preserved. The total DIY material cost was around $500—compared to over $9,000 for full window replacement. The homeowner spent two weekends on the project and gained valuable skills for future maintenance.
Conclusion: Preserving Character, Saving Energy
Weatherizing old windows is one of the most cost-effective, rewarding DIY projects for homeowners who value both comfort and historic integrity. Instead of surrendering to high energy bills or sacrificing beautiful original details, you can take practical steps to seal drafts, improve insulation, and extend the life of your windows for years to come. The process—while requiring some careful attention to detail and an investment of time—pays off in the form of lower utility costs, reduced environmental impact, and a cozier, quieter home. Remember, every window you weatherize not only saves you money but also helps sustain the craftsmanship and character that make older U.S. homes so special. With the right tools, a realistic budget, and the guidance in this step-by-step tutorial, you’re well equipped to tackle your next window weatherization project. Take it one window at a time, celebrate your progress, and enjoy the lasting benefits of a draft-free home—no replacement required.
Can you share how to estimate a reasonable budget for weatherizing several original wood windows in a modest-sized home?
To estimate a budget, count your windows and list needed supplies: caulk, weatherstripping, plastic film, and possibly rope caulk or foam. Expect to spend $10–$25 per window if you do it yourself. Add extra for tools or if repairs are required.
When adding insulation film to old windows, is there a type that works better for historic wood frames without damaging the finish?
For historic wood frames, look for removable, low-adhesive window insulation film made for delicate surfaces. Choose products that use double-sided tape designed for wood, as these minimize the risk of damaging finishes when the film is removed.
When adding insulation film to old windows, is it possible to reuse the film each year or does it need to be replaced every season?
Insulation film is usually designed for single-season use. Removing it often damages the material or adhesive, so it’s best to plan on replacing the film each year for the best insulation and appearance.
Could you clarify how much a typical DIY weatherization project would cost per window, including all the recommended materials?
A typical DIY weatherization project costs about $10–$30 per window for materials like weatherstripping, caulk, and window film. Exact costs depend on the window size and material choices, but this range covers most standard windows.