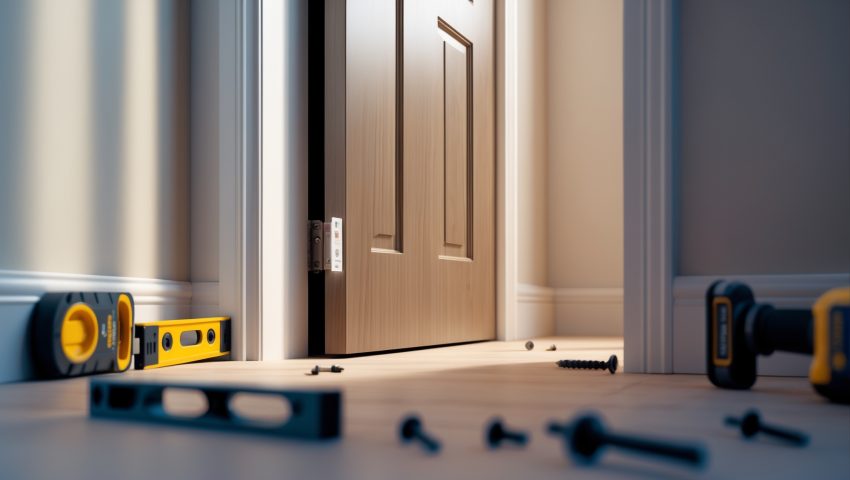
Introduction: Why DIY Interior Door Installation Matters
Replacing or installing an interior door can dramatically transform the look and function of any room in your home. Whether you’re updating outdated styles, repairing damage, or simply seeking a fresh aesthetic, learning how to install interior doors yourself saves money and offers immense satisfaction. Yet, many U.S. homeowners underestimate the precision needed for a flawless fit—misaligned doors can lead to sticking, uneven gaps, and wasted effort. This comprehensive guide provides every detail you’ll need: from accurate cost planning and the essential tools, to preventing the most common DIY alignment mistakes seen in American homes. By the end, you’ll be equipped not only to tackle your project confidently, but also to ensure your new interior door operates smoothly and looks professionally installed.
Planning Your DIY Interior Door Project
Assessing Your Needs
Start by identifying which doors need replacement or installation. Interior doors come in a variety of types—hollow core, solid core, panel, flush, French, and more. Determine the function (bedroom, bathroom, closet), preferred style, and whether you’re working with a standard or custom-sized opening.
Measuring for Success
- Door Size: Measure the height, width, and thickness of your existing door or door opening. Standard U.S. interior doors are typically 80 inches tall and 24, 28, 30, 32, or 36 inches wide.
- Frame & Jamb: Measure jamb width (the thickness of the wall) and check for squareness. Use a carpenter’s square to verify corners.
- Clearances: Allow for floor coverings—carpet, tile, or hardwood—when measuring the bottom gap.
DIY vs. Prehung vs. Slab Doors
- Prehung Doors: These come attached to a frame and are easier for beginners, especially if the existing frame is damaged or out of square.
- Slab Doors: Cost less but require you to mortise hinges, cut holes for hardware, and align everything precisely. Best for experienced DIYers or when replacing only the door itself.
Cost Breakdown: What to Expect in the U.S.
Material Costs
- Hollow Core Door: $40–$90 each
- Solid Core Door: $90–$250 each
- French Door or Glass Panel: $150–$500 each
- Prehung vs. Slab: Prehung doors typically add $40–$100 to the cost
Hardware
- Hinges: $5–$20 per set
- Door Knobs/Handles: $15–$80 each
- Latch/Lockset: $10–$60 each
Tools & Supplies
- Level: $20–$40
- Cordless Drill: $50–$150
- Wood Chisel Set: $10–$30
- Hammer: $10–$30
- Measuring Tape: $10–$25
- Shims: $3–$10 per pack
- Screwdriver Set: $10–$30
- Utility Knife: $5–$15
- Finishing Nails/Screws: $5–$15
- Paint/Finish (if applicable): $15–$40
Unexpected Expenses
- Trim/Moulding: $10–$40 per door
- Drywall Repair Supplies (if frame work is needed): $10–$30
- Disposal Fees (for old doors/frames): $0–$20
Total DIY Cost Range
For most U.S. homeowners, expect total costs between $90 and $400 per door, depending on material, hardware, and whether you need new framing or trim.
Essential Tools & Equipment List
Having the right tools on hand is crucial for a smooth installation. Here’s a breakdown of what you’ll need, with tips for each:
- Measuring Tape: For precise measurements of door and frame.
- Carpenter’s Square: Ensures frame squareness for proper alignment.
- Level (24” or 48”): Absolutely vital to prevent future sticking or gaps.
- Cordless Drill & Bits: For pilot holes, installing screws, and hardware.
- Wood Chisel & Hammer: Needed for mortising hinges on slab doors or minor adjustments.
- Utility Knife: Trimming shims and scoring paint or caulk.
- Shims: Thin, wedge-shaped pieces to adjust frame and door position.
- Screwdrivers (Phillips & Flathead): For hardware installation and adjustments.
- Finishing Nails or Screws: Attaching trim or securing jambs.
- Safety Gear: Safety glasses, work gloves, and dust mask as needed.
Step-by-Step: Installing a Prehung Interior Door
1. Remove the Old Door & Frame (if Needed)
- Use a utility knife to cut through any paint or caulk along the trim.
- Pry off the casing with a flat pry bar.
- If replacing the frame, remove the old jamb carefully to avoid wall damage.
2. Prepare the Rough Opening
- Clean debris and check for squareness using a level and square.
- Measure the opening; it should be about 2 inches wider and taller than the door itself to allow room for shims.
- Repair any damaged framing or drywall.
3. Dry Fit the Door
- Set the prehung door in the opening. Check clearance at the top, bottom, and sides.
- Ensure the hinge side is plumb using a level.
4. Shim and Secure the Hinge Side
- Starting at the bottom hinge, insert shims between the jamb and framing. Repeat at each hinge location.
- Check plumb with the level after shimming each hinge.
- Fasten the jamb to the framing with 2.5” screws through the hinge holes (remove one screw per hinge, replace with a longer one).
5. Shim and Secure the Latch Side
- Close the door and adjust shims along the latch side for even spacing (reveal) between door and jamb—typically 1/8 inch.
- Secure with finishing nails or screws through the jamb at shim locations.
6. Check Door Operation
- Open and close the door several times, checking for sticking or uneven gaps.
- Adjust shims as needed for smooth operation and proper alignment.
7. Attach Trim and Finish
- Reinstall or replace casing/trim around the door.
- Fill nail holes with wood filler, sand smooth, and paint or finish as desired.
Common Alignment Mistakes (and How to Avoid Them)
1. Skipping the Level and Square
Many DIYers rely on visual alignment alone. Always use a level and carpenter’s square—walls and floors in older U.S. homes may not be plumb or square, so trust your tools, not your eyes.
2. Inadequate Shimming
Shims are vital for adjusting the door frame within the rough opening. Poorly placed or insufficient shims result in a door that sags, binds, or allows drafts. Shim at every hinge and latch location, as well as the top corners if needed.
3. Over-Tightening Screws
Driving screws too tightly into the jamb can twist the frame, pulling it out of alignment. Tighten just enough to secure, then check operation before final tightening.
4. Ignoring Floor Coverings
Installing the door without accounting for carpet, tile, or hardwood can lead to scraping or excessive gaps. Always factor in the final floor height before trimming or hanging the door.
5. Uneven Reveal
The reveal—the gap between the door and the jamb—should be even on all sides. Adjust shims until the gap is consistent (about 1/8 inch) to prevent sticking and ensure a professional look.
6. Misaligned Hinges
If mortising hinges on a slab door, align them perfectly with the frame. Misaligned hinges cause binding and improper closing. Use a template or mark carefully before chiseling.
7. Forgetting to Pre-Drill
Especially when working with hardwood jambs or doors, always pre-drill for screws to prevent splitting.
Special Cases: Slab Doors and Non-Standard Openings
Installing a Slab Door
- Mark and mortise hinge locations using the old door or jamb as a template.
- Chisel carefully to achieve a snug fit.
- Drill holes for the knob and latch precisely—use a hole saw kit for clean cuts.
- Hang the door, making small adjustments as needed for smooth operation.
Fitting a Door to a Non-Standard Frame
- Custom cut the door’s width or height if needed, using a circular saw with a straightedge guide for accuracy.
- Seal any cut edges with paint or finish to prevent moisture absorption.
- Consider ordering custom-sized doors for overly irregular frames—this can save frustration in older U.S. homes.
Finishing Touches: Painting, Hardware, and Final Inspection
Painting or Staining
- Paint or finish the door before installation for the cleanest result.
- If painting after hanging, use painter’s tape to protect hardware and jambs.
Installing Hardware
- Follow manufacturer instructions for knob, lever, or lock installation.
- Ensure latch aligns with strike plate—adjust as needed.
Final Inspection Checklist
- Door swings freely and latches securely.
- Gap is even and consistent on all sides.
- No rubbing on floor or jamb.
- Trim is flush and securely attached.
- Paint or finish is smooth, with no drips or bare edges.
Maintenance Best Practices for Interior Doors
Well-installed interior doors require minimal maintenance, but some basic upkeep extends their lifespan and keeps them looking new:
- Lubricate Hinges: A drop of household oil prevents squeaks.
- Tighten Hardware: Regularly check screws on hinges and knobs, tightening as needed.
- Touch Up Paint: Cover scuffs or chips promptly to prevent moisture damage.
- Monitor Fit: If doors begin to stick, check for settling or humidity changes and adjust shims or plane edges if necessary.
Conclusion: Confidence in Every Swing
Installing an interior door is a home improvement project that pays off immediately in both function and style. With careful planning, the right tools, and an understanding of common alignment pitfalls, you can achieve professional results and avoid the frustrations that often trip up DIYers. Remember to plan your budget realistically, measure meticulously, and use shims and a level as your best allies. Whether you’re upgrading a single room or refreshing your entire home, each successful installation grows your confidence and skill.
Take time to review your work, maintain your doors, and share your experience with fellow DIY enthusiasts. Every well-aligned door is a testament to your attention to detail and commitment to quality. If you encounter a stubborn issue, don’t hesitate to revisit the alignment steps—it’s far quicker to adjust early than to live with a sticking or gapping door. The satisfaction of a door that swings true and closes with a gentle click is worth every ounce of effort. Happy building!
For budgeting, what are the main cost differences between installing a solid core versus a hollow core interior door?
Solid core doors generally cost more than hollow core doors, both in material and sometimes installation due to their heavier weight. Expect solid core doors to be about two to three times pricier. Labor may also be slightly higher for solid core options.
If my door opening isn’t perfectly square, should I try to fix the framing first or can I still use a prehung door to cover up small imperfections?
You can often use a prehung door to cover small imperfections, as it comes with its own frame. However, if the opening is significantly out of square, correcting the framing first will ensure a better fit and smoother operation.
When measuring for the bottom gap above flooring, is there a standard clearance to aim for if I plan to install new carpet afterwards?
When installing a door before new carpet, it’s best to leave a gap of 3/4 inch from the subfloor. This allows enough space for most carpet and padding to fit comfortably underneath.
If my existing interior door frame isn’t perfectly square, is it better to try to fix the frame or just go with a prehung door like you mention?
If your frame isn’t square, a prehung door is usually easier since it comes with its own frame and can help correct any alignment issues. Fixing the old frame can be tricky and time-consuming.
Could you expand on the types of mistakes people make with clearances, especially over different floor coverings like carpet versus tile?
People often misjudge door clearance for various floor types. For example, installing a door too low over thick carpet can cause rubbing, while too high over tile can leave an unsightly gap. Always measure floor thickness before trimming your door.
What was your actual cost breakdown for tools and materials when you last installed a solid core bedroom door yourself?
When I last installed a solid core bedroom door, my costs were roughly $160 for the door, $35 for hinges and hardware, $25 for trim, and about $60 for tools like a chisel, level, drill, and screws.
How do you know if your existing door frame is too out of square to use a slab door instead of a prehung one?
To check if your door frame is too out of square, measure the diagonals from corner to corner. If the difference is more than about 1/4 inch, fitting a slab door will be difficult, and a prehung door is likely a better choice.
You mention that slab doors are cheaper but require more precise work. In terms of time and tools needed, how much more work is it for a beginner to install a slab door versus a prehung one?
Installing a slab door usually takes longer for beginners—often several hours more—because you’ll need to carve out hinge and latch recesses, align everything precisely, and possibly trim the door. You’ll need tools like a chisel, drill, measuring tape, and possibly a planer.
If my interior door opening isn’t a standard size, do you recommend attempting to trim a prehung door myself, or is it safer to order a custom size?
If your door opening isn’t standard, ordering a custom-size prehung door is usually safer and yields better results. Trimming a prehung door yourself can be tricky and may affect fit and function if not done carefully.
When measuring for new interior doors, how do you handle situations where the existing frame isn’t perfectly square? Any tips beyond using a carpenter’s square?
If the frame isn’t perfectly square, measure the width and height at multiple points—top, middle, and bottom for width; left and right for height. Order a door to fit the smallest measurements, and be prepared to plane or trim edges for a precise fit.
Could you clarify how to measure the correct bottom gap for new doors if I’m planning to change from carpet to hardwood floors soon?
When switching from carpet to hardwood, measure the gap from the subfloor, not the carpet. Standard bottom gap for hardwood is about 1/2 inch, allowing for floor expansion and airflow. Adjust your door trimming to fit the future hardwood height.
Are there any notable cost differences in tools required for installing a slab door versus a prehung door for a typical bedroom replacement?
Yes, installing a slab door usually requires more specialized tools like chisels, a door plane, and a hole saw for hinges and hardware. Prehung doors often need just basic tools, making them a bit less expensive on the tool side.
You mentioned prehung and slab doors, but if my wall isn’t perfectly square, would prehung still be easier, or will I run into fit issues either way?
If your wall isn’t perfectly square, prehung doors can still be easier since the frame and door are already aligned, but you may need to shim the frame more carefully to ensure a good fit and smooth operation.
How much extra should I budget for tools if I’m starting from scratch and want to install a solid core slab door for a bedroom?
If you’re starting from scratch, budget about $75–$150 for essential tools like a drill, screwdriver, chisel, hammer, tape measure, level, and possibly a circular saw. Quality and brands can affect the total, but this range covers most basic needs.
About budgeting, what are some hidden costs to watch for when switching from a hollow core to a solid core door in a standard bedroom?
When upgrading to a solid core door, watch for hidden costs like reinforced hinges, upgraded hardware, possible trimming for a proper fit, and increased labor if your frame needs adjustment due to the heavier weight of solid doors.
You mention the importance of precise measurements, but what is the best way to ensure my carpenter’s square is actually giving accurate readings for checking the jamb corners?
To check your carpenter’s square for accuracy, place it against a known straight factory edge and draw a line. Flip the square, align it with the same mark, and draw another line. If the lines match, your square is true.
Could you clarify roughly how much extra a homeowner should budget for tools if they’re starting from scratch, especially for prehung versus slab door installations?
If starting from scratch, expect to spend about $75–$150 for basic tools with a prehung door. For a slab door, budget closer to $150–$250, since you’ll need extra tools like chisels, a router, and a drill for mortising hinges.
How do I figure out the right bottom gap if I plan to install thick carpet later on? Should I leave extra space when measuring?
Yes, you should leave extra space when measuring for the bottom gap if you’ll add thick carpet later. Measure your carpet’s thickness and add that to the recommended standard gap, which is usually about half an inch for airflow.
Could you clarify if there are any hidden costs to factor in when choosing between prehung and slab doors, beyond just the initial price difference?
Yes, besides the initial price, prehung doors may require more labor for installation and possible trim repairs, while slab doors might need extra work for fitting hinges, handles, and cutting to size. Consider hardware, paint, and possible disposal fees too.
When measuring for a new interior door, do you recommend leaving a bigger gap at the bottom if installing over thick carpet, or is there a standard clearance I should stick to?
If you’re installing over thick carpet, it’s wise to leave a slightly larger gap at the bottom—usually about 3/4 inch—to ensure the door swings freely. Standard clearance is 1/2 inch, but adjust as needed for your carpet height.