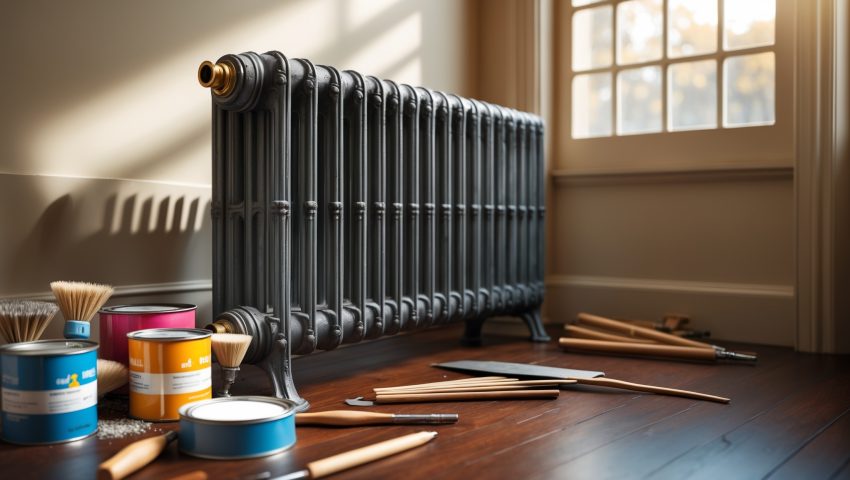
Introduction: Why Restore Old Radiators?
In many older homes across the U.S., classic cast iron radiators provide both warmth and charm. Their intricate designs and robust construction make them a centerpiece in period properties, especially in pre-war homes and brownstones. However, years of use can leave these radiators rusty, inefficient, or simply in need of a visual refresh. Restoring radiators isn’t just about aesthetics—well-maintained units can improve heating efficiency, reduce noise, and extend your system’s lifespan. This guide is designed for homeowners who want to tackle radiator restoration themselves, with practical advice on budgeting, tools, safety, and step-by-step processes. Whether you’re working with a single-room radiator or a whole-house system, this resource will help you revive your radiators safely and effectively, adding both comfort and value to your home.
Understanding Your Radiator: Types and Common Issues
Types of Radiators in U.S. Homes
- Cast Iron Radiators: Heavy, ornate, and common in pre-1950s homes. Renowned for heat retention.
- Baseboard Radiators: Sleek, modern, and often found in mid-century or newer construction.
- Steam vs. Hot Water: Steam systems have one pipe per radiator, while hot water systems have supply and return lines.
Common Radiator Problems
- Rust and Flaking Paint: Often caused by moisture or condensation.
- Leaks or Drips: Usually at valve connections or pinholes in old metal.
- Cold Spots: Air trapped inside, sludge buildup, or improper balancing.
- Noise: Banging (steam), hissing (air), or gurgling (water flow) may signal issues.
Budgeting for a DIY Radiator Restoration
Cost Breakdown
- Basic Supplies: $35–$75 per radiator (wire brushes, sandpaper, primer, heat-resistant paint).
- Valve or Bleeder Replacement: $10–$40 each, if needed.
- Professional Pressure Testing/Flush (optional): $50–$150 per radiator.
- Specialty Tools Rental (e.g., heavy-duty wrenches, pipe threaders): $10–$30/day.
- Total DIY Cost: Expect $50–$150 per radiator, depending on condition and your tool inventory.
Saving on Costs
- Borrow or rent heavy tools from local hardware stores.
- Buy supplies in bulk if restoring multiple radiators.
- Tackle cosmetic restoration yourself, but consult pros for leaks or major system issues.
Essential Tools and Materials
- Wire brushes (manual and drill-mounted)
- Sandpaper (medium to fine grit)
- Shop vacuum or compressed air
- Drop cloths and painter’s tape
- Heat-resistant primer and paint (oil-based or specialty radiator paint)
- Pipe wrenches and adjustable spanners
- Bleeder key or screwdriver (for hot water systems)
- Leak repair kit (epoxy or pipe sealant)
- Personal protective equipment (gloves, mask, goggles)
Pre-Restoration Safety Checklist
- Turn off the heating system and allow radiators to cool completely.
- Shut off water supply (for hot water systems) or steam (for steam systems).
- Relieve system pressure by opening bleed valves or drain points.
- Protect floors and nearby walls with drop cloths.
- Ventilate the area, especially when sanding or painting.
- Wear gloves, mask, and goggles to protect against rust, dust, and fumes.
Step-by-Step Radiator Restoration
1. Inspection and Preparation
- Check for leaks, cracks, and excessive corrosion.
- Test valves and bleeders for smooth operation.
- Remove any furniture or obstacles near the radiator.
2. Cleaning and Stripping Old Paint
- Use a wire brush or drill-mounted wire wheel to remove loose paint and rust.
- For stubborn paint, apply a chemical stripper rated for metal (always follow safety instructions).
- Vacuum or blow out dust and debris from fins and crevices.
- Wipe down surfaces with a damp cloth and allow to dry thoroughly.
3. Surface Repairs
- For small rust pits, sand smooth and fill with metal epoxy if necessary.
- Replace faulty valves, bleeder screws, or fittings as needed.
- Seal any pinhole leaks with epoxy or consult a professional for major leaks.
4. Priming and Painting
- Apply a thin coat of heat-resistant primer with a brush or spray (follow manufacturer’s drying times).
- After primer dries, apply 1–2 coats of heat-resistant radiator paint. Use a small brush for detailed areas.
- Allow full cure time before reconnecting or using the radiator (often 24–48 hours).
5. Reassembly and Bleeding
- Reinstall any removed valves or fittings using pipe sealant.
- Turn the system back on and check for leaks.
- Bleed air from hot water radiators using a bleeder key until water flows steadily.
Common Mistakes to Avoid
- Skipping the Cooling Period: Working on a hot radiator can cause burns or improper paint adhesion.
- Inadequate Surface Prep: Paint will flake if rust or old paint remains.
- Using Regular Paint: Ordinary wall paint will discolor or peel under heat.
- Neglecting Ventilation: Chemical fumes from paint and strippers can be hazardous.
- Overtightening Fittings: Can crack older cast iron or strip threads.
Maintenance Best Practices After Restoration
- Dust radiators regularly to prevent buildup that reduces efficiency.
- Inspect valves and bleeders each heating season for leaks or corrosion.
- Bleed radiators at the start of each winter to remove trapped air.
- Touch up paint chips promptly to prevent rust from forming.
- Monitor for unusual noises or cold spots, indicating further attention is needed.
When to Call a Professional
- Major leaks or cracks in radiator bodies.
- Radiators that will not heat after bleeding and basic troubleshooting.
- System-wide issues (e.g., boiler problems, persistent pressure loss).
- Lead paint concerns—if your home was built before 1978, test for lead before sanding or stripping.
Regional Considerations Across the U.S.
Cold Climate Tips (Northeast, Midwest)
- Insulate behind radiators with heat-reflective panels to maximize efficiency.
- Check for frozen pipes during deep freezes.
Humid Climates (Southeast, Gulf Coast)
- Use rust-inhibiting primer and paint to combat moisture-induced corrosion.
- Run dehumidifiers in rooms with radiators during the off-season.
Historic Homes and Compliance
- Check with local historic commissions before painting radiators in designated properties.
- Maintain original hardware and valves where possible for authenticity.
Creative Restoration Stories: Real-Life U.S. Examples
Brooklyn Brownstone Revival
A Brooklyn homeowner stripped decades of paint from ornate radiators, using eco-friendly strippers and a custom metallic finish. The result: period-appropriate warmth and a stunning design statement.
Chicago Bungalow Efficiency Upgrade
After restoring several radiators, a Chicago family added reflective foil behind each unit, boosting heat output and reducing energy bills by 10% over winter.
Southern Victorian Preservation
In Savannah, a historic home’s radiators were restored using anti-rust primer, with careful attention to original brass valves and fittings, preserving both function and heritage value.
Conclusion: A Warm Investment in Comfort and History
Restoring classic radiators isn’t just a weekend project—it’s an investment in your home’s comfort, efficiency, and character. By planning your budget, gathering the right tools, and following safe, proven restoration steps, you can breathe new life into these timeless fixtures. The satisfaction of seeing gleaming, efficient radiators at work—knowing you preserved a piece of your home’s history—makes the effort worthwhile.
Remember, the key to success is preparation. Take time to inspect, clean, and repair each radiator carefully, and don’t hesitate to call in professionals for complex issues or safety concerns. With regular maintenance after restoration, your radiators can provide reliable, cozy warmth for decades to come. Whether you’re restoring a single room or an entire house, these tips and stories from across America will help you tackle your project with confidence and pride. Here’s to a warmer, more beautiful home—one radiator at a time.
If a radiator in my pre-war home is leaking at the valve connection, does the article recommend any particular sealant or is valve replacement usually necessary?
The article suggests that if a radiator is leaking at the valve connection, you should first try tightening the connection or using plumber’s tape for minor leaks. If the leak persists, valve replacement is generally recommended.
You mentioned costs for specialty tool rentals—are there alternatives for heavy-duty wrenches if I only have standard ones at home?
Standard wrenches can work if your radiator fittings aren’t too tight, but for stubborn or rusted parts, try using a pipe placed over the wrench handle for extra leverage. Just be careful not to strip the fittings.
You mention both steam and hot water systems—are there specific restoration tools or supplies that only apply to one type versus the other?
Yes, steam and hot water radiators do have some differences in restoration tools and supplies. Steam systems often need specialized vents and pressure valves, while hot water systems might require air bleeder valves and circulator pump parts.
Do you have tips for safely dealing with stubborn rust on really old cast iron radiators without damaging the detailing?
To tackle stubborn rust on ornate cast iron radiators, use a wire brush or fine steel wool gently to avoid harming details. Apply a rust remover with a cloth, not abrasive pads, and rinse thoroughly. Work slowly to preserve intricate features.
If I notice banging noises coming from my steam radiator, is that something I can fix myself during the restoration or should I call a pro?
Banging noises in a steam radiator are often caused by trapped water or uneven pipes. You can try leveling the radiator and checking the pitch toward the steam pipe. If the noise continues, or you’re unsure, it’s safer to call a professional.
For a mid-century baseboard radiator, do you recommend a different type of heat-resistant paint or any specific prep steps compared to cast iron ones?
For mid-century baseboard radiators, use high-temperature enamel spray paint designed for metal surfaces. Clean thoroughly, sand lightly, and remove rust. Unlike cast iron, baseboard units often need extra attention to degreasing and ensuring all vents are clear of paint.
If I want to paint over a cast iron radiator that’s already got a few layers of old paint, do I need to strip it all off first or can I just sand and repaint?
You don’t need to strip all the old paint unless it’s flaking or lead-based. Just sand the surface to smooth out rough spots and remove loose paint, then clean and repaint for good results.
You mentioned valve or bleeder replacement costs—are there telltale signs that these parts definitely need replacing, or can they often be cleaned and reused?
If a valve or bleeder is leaking, stuck, or corroded beyond cleaning, replacement is needed. Sometimes, minor leaks or blockages can be fixed by cleaning, but persistent issues or visible damage usually mean it’s time to replace the part.
Is there a big difference in the tools or supplies needed for hot water versus steam radiators, especially if I’m replacing valves during restoration?
Yes, there are some differences. Steam radiators usually require specific steam valves and air vents, while hot water radiators use water valves and sometimes bleeder valves. Make sure you get the correct type for your system to ensure proper function.
For a steam radiator that’s making banging noises and has cold spots, would the restoration steps be different from those for a hot water radiator, or does your guide cover both types?
The guide mainly covers both steam and hot water radiators, but steam radiators do have some unique issues like water hammer and venting problems. For banging noises and cold spots, pay special attention to leveling the radiator and checking the steam vent.
For a DIYer working alone, how long should I expect the restoration process to take for a single cast iron radiator from start to finish?
Restoring a single cast iron radiator yourself usually takes about one to two days. This includes removing, cleaning, stripping paint, making repairs, repainting, and reinstalling, depending on the radiator’s size and your experience level.
Can you elaborate on how to deal with persistent cold spots after a full DIY restoration, especially in baseboard radiators?
Persistent cold spots in baseboard radiators often mean trapped air or buildup inside. Try bleeding the system to release air, and check for any blockages or buildup in the pipes. Flushing the system can also help restore even heating.
For a home with both steam and hot water radiators, are there any major tool or technique differences I should watch out for when restoring each type?
Yes, there are differences. Steam radiators often have one pipe and need vents cleaned or replaced, while hot water systems have two pipes and may require bleeding air from the system. Use proper wrenches and be mindful of the specific valves and fittings for each type.
If I have a cast iron radiator with both rust and flaking paint, should I treat the rust first or strip all the paint at once?
Start by stripping all the old paint first so you can fully expose any rusted areas. Once the paint is removed, treat the rust thoroughly before priming and repainting your radiator.
Can you recommend the safest way to deal with rust on a cast iron radiator without damaging the intricate designs?
Use a fine wire brush or steel wool to gently remove surface rust, taking care not to press too hard on decorative areas. Afterward, wipe clean and apply a rust-inhibiting primer specifically made for metal before repainting.
For a homeowner with mostly cast iron radiators, do you recommend DIY pressure testing before repainting, or is it safer to hire a professional for that step?
For cast iron radiators, it’s safer to hire a professional for pressure testing. They have the right equipment to check for leaks or weaknesses, which reduces the risk of damaging your system or missing hidden issues before you repaint.
For rust issues, is there a particular brand or type of heat-resistant paint you recommend for the best long-term results on radiators?
For long-term protection against rust, look for high-temperature enamel paints specifically labeled for radiators or metal surfaces, such as Rust-Oleum High Heat or Krylon High Heat. Always follow the manufacturer’s prep and application instructions for best results.
You mentioned wire brushes and heat-resistant paint for budgeting, but is there a specific type or brand you recommend for old steam radiators in pre-war homes?
For old steam radiators, look for a stainless steel wire brush for removing rust and flaking paint. For paint, choose high-temperature enamel spray paint rated at least 400°F; Rust-Oleum and Krylon are both reliable brands commonly used for this purpose.
For older cast iron radiators with both leaks and rust, would you recommend tackling repairs and painting at the same time, or should leaks be professionally fixed first?
It’s best to have leaks professionally repaired first to ensure the radiator is safe and watertight. Once the leaks are fixed and the unit is dry, you can move on to rust removal and painting for lasting results.
Is the optional professional pressure testing worth it for radiators that just have some rust and flaking paint, or can I skip that step to save on costs?
If your radiators just have surface rust and flaking paint but no visible leaks or signs of water damage, you can usually skip professional pressure testing to save money. Just inspect them carefully before starting restoration.
How much time should I set aside per radiator for the full DIY restoration process, including drying time for paint and primer?
For a full DIY radiator restoration, plan on 2–4 hours of active work per radiator. Including drying time for primer and paint, allow at least 24–48 hours before reinstalling or using the radiator.
If a radiator is leaking from a valve connection, is it worth trying to fix this myself or should I call in a professional?
If the leak is minor and you feel comfortable, you can try tightening the valve or replacing some washers yourself. However, if you’re unsure or the leak persists, it’s safer to call a professional to avoid water damage.
If my radiator is making a loud banging noise and has cold spots, should I try bleeding it myself first or consider a professional pressure flush as mentioned?
Start by bleeding your radiator yourself, as trapped air is often the cause of banging noises and cold spots. If bleeding doesn’t solve the problem, then consider a professional pressure flush for deeper issues.
If I notice banging noises in my radiator but no visible leaks, should I be more concerned about air in the system or possible internal rust buildup?
Banging noises are often caused by air trapped in the radiator or uneven heating, not usually by rust. Try bleeding the radiator first. If the noise persists, consider having a professional check for internal rust or other issues.