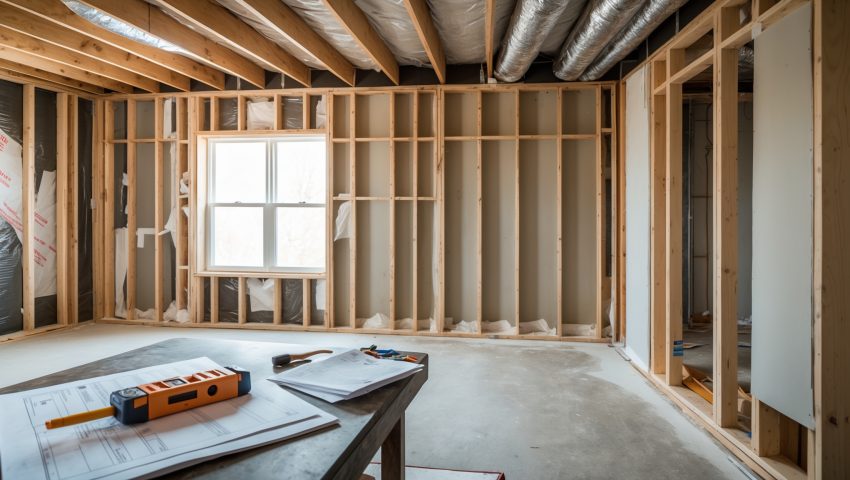
Introduction: Why Permits and Compliance Matter in DIY Basement Finishing
Finishing your basement is one of the most rewarding DIY projects a U.S. homeowner can undertake. Not only does it expand your livable space, but it can also increase your property value and provide a tailored area for family needs. However, transforming an unfinished basement into a functional, comfortable environment involves more than just framing, drywall, and paint. Navigating the maze of building permits, local codes, and compliance requirements is a critical step that many DIYers underestimate—or skip entirely, often at great cost. Failing to secure the right documentation or ignoring code requirements can lead to expensive fines, forced demolition, trouble with insurance claims, and even safety hazards. In this in-depth guide, we’ll walk you through every aspect of DIY basement finishing compliance, from deciphering permit types to understanding egress, electrical, and insulation codes. By the end, you’ll have a practical roadmap to ensure your project is above board, safe, and adds true value to your home.
Understanding Why Permits Are Required for Basement Finishing
Legal Obligations for Homeowners
Every U.S. municipality has its own building codes and permit requirements, but almost all require permits for basement finishing projects. Permits ensure that the work meets minimum safety standards and is completed in accordance with local regulations. These rules protect not just the current occupants but also future owners, emergency responders, and the broader community.
Consequences of Skipping Permits
- Fines and Stop-Work Orders: Unpermitted work can lead to hefty municipal fines and forced removal of completed renovations.
- Insurance Issues: Insurance companies may deny claims related to unpermitted or non-code-compliant work, especially in cases of fire, flooding, or injury.
- Resale Roadblocks: Unpermitted improvements can delay or derail home sales, as buyers and lenders often require proof of code compliance.
- Safety Hazards: Building codes exist to prevent hazards such as electrical fires, structural failures, and inadequate egress in emergencies.
Basement Finishing Projects That Typically Require Permits
While requirements vary by jurisdiction, most U.S. municipalities require permits for the following basement finishing activities:
- Adding or removing walls (framing and drywall)
- Electrical wiring or adding outlets/lighting
- Plumbing (bathrooms, laundry, wet bars)
- Installing HVAC systems or ductwork
- Insulation and vapor barriers
- Finished flooring (especially if it impacts egress or moisture control)
- Creating bedrooms or sleeping areas (triggers egress window requirements)
Cosmetic changes like painting or installing removable flooring may not require permits, but always check with your local building department.
The Permit Process: Step-by-Step for DIYers
1. Research Local Requirements
Start by visiting your city or county’s building department website. Search for “basement finishing,” “remodel permits,” or “residential building permits.” Download relevant checklists, applications, and code booklets. If information is unclear, call or visit the permit office in person—most inspectors are happy to clarify requirements for homeowners.
2. Prepare Detailed Plans
Most permit offices require a set of plans showing proposed changes. These don’t need to be professionally drafted but should include:
- Floor plan with room dimensions and labels (bedroom, bathroom, storage, etc.)
- Location of windows, doors, stairs, and utility systems
- Details of new electrical, plumbing, and HVAC work
- Materials specifications (insulation, vapor barriers, fire blocking, etc.)
Some offices provide sample drawings to guide you. Accurate plans reduce approval time and prevent costly mistakes.
3. Submit Your Application
Bring your plans and completed application to the building department. Be prepared to pay permit fees (these vary but range from $100–$1,000+ depending on project scope and location). Some municipalities now allow online submissions.
4. Wait for Approval and Address Plan Review Comments
Most offices review residential permit applications within a few days to a couple of weeks. You may be asked to revise your plans for code compliance. Respond promptly to avoid delays.
5. Schedule Inspections
Permitted work typically requires multiple inspections at key stages:
- Framing
- Rough electrical and plumbing
- Insulation and vapor barrier
- Final inspection (post-drywall and finishes)
You must call to schedule each inspection before covering up work (e.g., don’t hang drywall until rough-in inspections are passed).
6. Close the Permit
Once all inspections are passed, the permit is closed, and your basement is officially code-compliant. Keep all documentation for your records and any future home sale.
Key Compliance Considerations for DIY Basement Finishing
Egress Windows: Non-Negotiable for Bedrooms
Code requires that any basement room used for sleeping must have an egress window or door large enough for a person to escape in an emergency. Requirements typically include:
- Minimum opening width: 20 inches
- Minimum opening height: 24 inches
- Minimum net clear opening: 5.7 square feet
- Maximum sill height: 44 inches above floor
- Window wells (if needed) must allow the window to fully open and provide a ladder if deeper than 44 inches
Adding an egress window is a major task, often involving foundation cutting, and almost always requires a permit. Failing to provide egress in a basement bedroom is both illegal and extremely dangerous.
Electrical System Safety and Permits
All new wiring, outlets, or lighting installations must comply with the National Electrical Code (NEC) and local amendments. Key points include:
- Dedicated circuits for major appliances or rooms
- Ground-fault circuit-interrupter (GFCI) protection in bathrooms and near sinks
- Arc-fault circuit-interrupter (AFCI) protection in living and sleeping areas
- Correct wire sizing and breaker ratings
- Properly installed electrical boxes, fixtures, and cable supports
Electrical permits are almost always required, and inspections are mandatory before covering walls. If you’re not comfortable with electrical work, consider hiring a licensed professional for this portion.
Plumbing and Mechanical Codes
Adding or altering plumbing—such as installing a bathroom, wet bar, or laundry—requires careful adherence to plumbing codes and proper permits. Pay attention to:
- Drain slope and venting for waste lines
- Approved materials (e.g., PVC, copper, PEX)
- Backwater valves or sump pumps to prevent basement flooding
For HVAC, extending ductwork or installing supplemental heating/cooling units must meet energy and safety standards. Gas appliance work (e.g., water heaters) requires additional permits and strict inspection protocols.
Insulation, Vapor Barriers, and Fire Blocking
Basements are prone to moisture and thermal loss, so energy codes specify minimum insulation levels (often R-13 to R-19 for walls) and require vapor barriers on the warm side of exterior walls in colder climates. Fire blocking—material that slows the spread of fire between floors and wall cavities—is required at specific locations, such as between framing and top plates or around penetrations. Inspectors check all these details before approving drywall installation.
Common DIY Compliance Mistakes and How to Avoid Them
- Skipping the permit process: Always confirm with your local department—don’t assume your project is too minor.
- Inadequate egress: Measure egress windows precisely and plan for window wells if required.
- Improper electrical work: Don’t mix circuits, overload panels, or ignore GFCI/AFCI requirements.
- Poor insulation/vapor barrier installation: Gaps or reversed vapor barriers invite moisture problems and fail inspection.
- Missing fire blocking: Ask your inspector to point out required locations if you’re unsure—they’ll appreciate your diligence.
- Covering work before inspection: Always call for inspection before moving to the next stage.
Budgeting for Permit and Compliance Costs
Permitting and compliance add to your project’s timeline and budget, but they’re essential investments. Typical costs include:
- Permit fees: $100–$1,000+, depending on location and project complexity
- Plan review or revision fees: $50–$200 (if plans are returned for changes)
- Inspection re-visits (for failed inspections): $50–$150 per visit
- Upgrades for code compliance (e.g., new windows, GFCI outlets): varies
Factor these into your budget early to avoid surprises. Remember, the cost of fixing unpermitted work or paying fines far exceeds doing it right from the start.
Tips for a Smooth Compliance Journey
- Be proactive: Reach out to your building department early and keep documentation of all communications.
- Document everything: Take photos of each stage, especially before closing up walls.
- Stay organized: Keep a binder or digital folder with permits, plans, inspection results, and receipts.
- Ask questions: Building inspectors are an invaluable resource—don’t hesitate to clarify requirements.
- Respect timelines: Don’t rush work to meet inspection dates; quality and safety come first.
Case Study: A Real-World Basement Finishing Compliance Journey
Consider the experience of James, a homeowner in Ohio who decided to finish his 800-square-foot basement as a family rec room and guest suite. James started by researching his city’s permit requirements online, then called the building department to confirm details. He prepared hand-drawn plans showing new walls, an egress window for the guest bedroom, a bathroom layout, and electrical additions. The permit office reviewed his plans and flagged the need for a larger window and added a smoke detector requirement. James revised the plans and received approval.
Throughout construction, James scheduled and passed inspections for framing, electrical, plumbing, insulation, and final finishes. When his inspector questioned the placement of a vapor barrier, James provided product documentation and photos, which helped resolve the issue quickly. The entire process took four months, with about $450 spent on permits and $700 on code-related upgrades. When it came time to sell his home, the finished basement added significant value and attracted multiple offers, with no hiccups at closing thanks to complete compliance documentation.
Conclusion: Building Value, Safety, and Peace of Mind
Finishing your basement is more than a weekend project—it’s an investment in your home’s comfort, safety, and value. Navigating the world of permits and compliance might seem daunting at first, but it’s a crucial step that sets apart successful, lasting renovations from costly mistakes. Taking the time to research local codes, prepare thorough plans, and follow the inspection process ensures your project meets legal and safety standards, protects your investment, and keeps your family safe. Remember, inspectors and building departments are not adversaries—they’re partners in creating safe, high-quality living spaces. When you approach your basement finishing project with a compliance-first mindset, you not only avoid fines and future headaches but also gain the confidence and satisfaction of a job truly well done. Keep your paperwork, ask questions, and celebrate each milestone as you turn your basement into a code-compliant haven for years to come.
How much time should I expect the permit process to add to my basement finishing timeline? I want to avoid costly delays.
The permit process typically adds anywhere from one to four weeks to your timeline, depending on your local jurisdiction and how complete your application is. Starting early and double-checking documentation can help prevent unnecessary delays.
If my basement already has some finished features from previous owners, how can I determine which parts require permits or code updates before I start my own remodeling?
Start by contacting your local building department with photos or descriptions of the existing features. They can clarify what’s up to code and which areas may need permits or updates before you begin your remodeling project.
You mentioned insurance companies may deny claims for unpermitted work—does this apply even if the work passes a later inspection, or is the lack of a permit always a dealbreaker?
Even if your work passes a later inspection, some insurance companies may still deny claims because the correct permit wasn’t obtained initially. It’s safest to get permits before starting work to avoid any coverage issues.