Introduction: Why Attic Air Sealing Matters for Every U.S. Home
If you’ve felt drafts in winter, watched your summer energy bills soar, or battled persistent ice dams, your attic may be to blame. Air sealing attics is one of the most effective—and often overlooked—methods to improve home comfort, reduce utility costs, and prolong the life of your insulation and roof. Yet, the approach to attic weatherproofing isn’t one-size-fits-all. Climate, building age, and regional construction quirks all play a role in how, where, and why your attic leaks air. Understanding these factors is crucial for any DIYer looking to maximize results and avoid common pitfalls.
This comprehensive guide dives deep into the tools, regional considerations, cost breakdowns, and step-by-step methods for effective attic air sealing. Whether you’re in the humid Southeast, arid Southwest, snowy Midwest, or coastal New England, you’ll find tailored advice to make your project a success. By tackling attic air leaks, you’re not just chasing comfort—you’re investing in the long-term health and value of your home. Let’s explore how you can confidently weatherproof your attic for lasting benefits, no matter where you live.
Understanding Attic Air Leaks: The Science Behind the Savings
What Causes Attic Air Leaks?
Air leaks in the attic occur where gaps or cracks allow conditioned indoor air to escape into the unconditioned space above your ceilings. Typical culprits include:
- Plumbing and electrical penetrations
- Recessed lighting fixtures
- Attic access hatches or pull-down stairs
- Chimney chases and vent stacks
- Gaps along top plates of walls
- Unsealed ductwork
Why Air Sealing is Essential
Unsealed attics are responsible for up to 30% of a home’s heating and cooling loss, according to the U.S. Department of Energy. Air sealing:
- Improves indoor comfort by reducing drafts and temperature swings
- Lowers energy bills year-round
- Prevents moisture intrusion and related mold or rot
- Reduces risk of ice dams in cold climates
- Enhances overall insulation performance
Regional Differences: Customizing Your Attic Weatherproofing Approach
Cold Climates (Northeast, Midwest, Mountain States)
Attic air leaks here contribute to ice dams, heat loss, and high heating bills. Focus on sealing:
- Gaps around chimneys and vent pipes
- Attic hatches (insulation and weatherstripping are key)
- Top plates where interior walls meet the attic floor
Use fire-rated caulk near heat sources and consider rigid foam board for added R-value.
Hot & Humid Climates (Southeast, Gulf Coast)
Moisture control is as important as air sealing. Key targets:
- HVAC penetrations—seal with mastic or foil tape
- Exhaust fans—ensure they vent outside, not into the attic
- Continuous vapor barriers to prevent humid air infiltration
Hot & Dry Climates (Southwest, Desert West)
Solar heat gain and dust infiltration are primary concerns. Focus on:
- Cracks at soffit intersections and between attic and garage
- Weatherstripping attic doors
- Sealing around recessed lights to prevent air and dust movement
Coastal & Marine Climates (Pacific Northwest, New England)
Moisture-laden air and salt can degrade materials. Prioritize:
- Corrosion-resistant weatherstripping and fasteners
- Sealed vapor barriers (poly sheeting or specialty paints)
- Attention to roof ventilation to reduce condensation
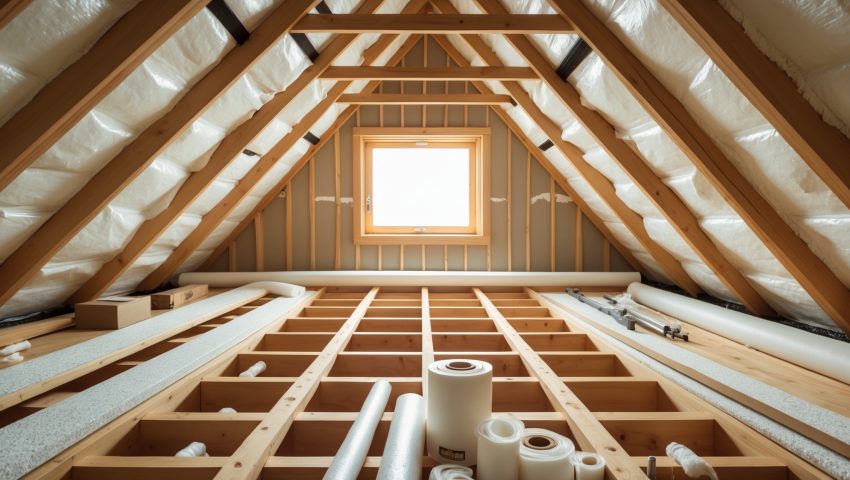
Essential Tools & Materials for DIY Attic Air Sealing
Must-Have Tools
- Caulk gun and premium acrylic or silicone caulk
- Expanding spray foam (low-expansion for small gaps, high-expansion for larger voids)
- Utility knife and heavy-duty scissors
- Measuring tape and straightedge
- Protective gear: gloves, safety glasses, respirator
- Flashlight or headlamp (attics can be dark!)
- Putty knife or scraper
Recommended Materials
- Weatherstripping (foam, rubber, or felt)
- Rigid foam board or batt insulation
- Fire-rated caulk (for sealing near chimneys and flues)
- Foil tape or duct mastic (for HVAC joints)
- Polyethylene sheeting (for vapor barriers)
- Metal flashing (for large penetrations)
Optional but Helpful
- Infrared thermometer or thermal camera (to find hot/cold spots)
- Blower door test (can be rented for pinpointing leaks)
Budget Breakdown: What to Expect for a Typical DIY Project
National Averages
- Materials: $80–$350 (depending on attic size and material choice)
- Tool rental (if needed): $25–$60
- Blower door test (optional): $100–$300
Most single-story homes can be air sealed for under $400 in materials and basic tools, especially if you already own a caulk gun or utility knife. Larger, older homes or attics with complex layouts may require additional investment. Labor is free when you DIY, but plan for 1–2 full weekends.
Regional Cost Modifiers
- Coastal regions may pay more for corrosion-resistant materials
- Cold climates might need extra insulation or fire-rated products
- Areas with high humidity may require vapor barriers, adding $30–$80
Step-by-Step Attic Air Sealing: A DIY Walkthrough
1. Prep and Safety First
- Schedule work for cool, dry weather
- Wear long sleeves, gloves, and a respirator (especially around old insulation)
- Lay down boards or plywood to safely walk between joists
- Turn off attic power at the breaker box before sealing around wires
2. Locate and Prioritize Leaks
- Check common culprits: light fixtures, chimney chases, plumbing stacks, attic hatch
- Use an incense stick or thermal camera to spot airflow on breezy days
- Mark leaks with painter’s tape or a marker for quick reference
3. Seal Small Gaps and Cracks
- Fill gaps under 1/4-inch wide with caulk
- Apply caulk smoothly and evenly; tool with a wet finger for a neat finish
- Let cure per manufacturer’s directions (usually 24 hours)
4. Fill Larger Holes and Penetrations
- Use low-expansion spray foam for gaps up to 3 inches
- Install metal flashing and fire-rated caulk around chimneys and flues
- Seal attic access points with weatherstripping and attach rigid foam board to attic hatch lids
5. Address Ductwork and Vents
- Seal HVAC joints with foil tape or duct mastic—never ordinary duct tape
- Ensure all bathroom and kitchen exhausts vent outdoors, not into attic space
6. Vapor Barriers and Insulation (as needed)
- Install polyethylene sheeting in humid or coastal regions
- Replace any disturbed insulation and add more if necessary to meet local R-value recommendations
7. Final Inspection and Clean Up
- Double-check all sealed areas for missed gaps
- Remove debris and dispose of old insulation safely
- Restore power and ensure attic ventilation is unobstructed
Common Pitfalls to Avoid
- Ignoring Safety: Never seal around electrical or heat sources without using fire-rated materials.
- Blocking Ventilation: Don’t cover soffit vents or attic fans—airflow is essential.
- Overusing Spray Foam: Too much can warp trim or create pressure on drywall.
- Skipping the Attic Hatch: This is often the largest single leak source in many homes.
- Neglecting Moisture Control: In humid regions, always pair air sealing with vapor barriers.
Weatherproofing for the Long Haul: Maintenance Best Practices
Annual Inspection Checklist
- Check all sealed joints and penetrations for cracks or shrinkage
- Inspect for signs of moisture, mold, or insulation movement
- Verify that attic vents remain clear and functional
- Reapply caulk or foam as needed
After Major Weather Events
- Look for water stains or new drafts following storms, hurricanes, or heavy snows
- Confirm that all attic ventilation is intact
Seasonal Tips
- In cold climates, check for ice dams or frost inside the attic in winter
- In hot/humid areas, monitor for condensation or mold in summer
Case Study: Attic Air Sealing in Three U.S. Regions
Midwest Colonial Home, Minneapolis, MN
Problem: Chronic ice dams and $300+ monthly winter heating bills.
Solution: DIYer used fire-rated caulk, rigid foam insulation, and weatherstripping. Sealed attic hatch and top plates. Cost: $425.
Result: Heating bills dropped 20%, no more ice dams after two winters.
Gulf Coast Ranch, Mobile, AL
Problem: Attic mold and muggy upstairs rooms.
Solution: Focused on vapor barrier installation, sealed HVAC penetrations, improved exhaust venting. Cost: $390.
Result: Significant drop in attic humidity, improved indoor comfort, no more mold.
Southwest Bungalow, Tucson, AZ
Problem: Dust infiltration and high summer cooling bills.
Solution: Sealed soffit intersections, weatherstripped attic hatch, used low-expansion foam for recessed lights. Cost: $310.
Result: Fewer dust issues, cooling costs fell by 15%.
Conclusion: Turn Your Attic into an Energy-Saving Asset
Attic air sealing is a project where smart planning pays big dividends. While it may seem daunting at first, tackling air leaks with the right tools and regional know-how transforms your home’s comfort, energy profile, and resilience against the elements. Every region of the U.S. presents unique weatherproofing challenges, but the principles remain the same: identify leaks, use appropriate materials, and prioritize safety and ventilation. By following the detailed steps outlined in this guide, you can expect tangible savings on your energy bills, fewer headaches from moisture or dust, and a more comfortable living environment year-round.
What sets attic air sealing apart from other DIY upgrades is its lasting impact. Unlike new paint or décor, a well-sealed attic delivers benefits season after season, protecting your insulation and home systems from unnecessary strain. Plus, it’s a project most homeowners can tackle in a weekend with modest investment and basic skills. Regular maintenance and inspection will keep your efforts effective for years to come.
Ready to get started? Gather your tools, study your attic’s unique quirks, and take the first step toward a quieter, cozier, more efficient home—no matter your zip code. With a little sweat equity and informed preparation, you’ll transform your attic from energy liability to energy asset, and set the stage for a future of savings and comfort.
How do I know if the air leaks in my attic are coming mostly from recessed lights or from the attic hatch, and which should I seal first for the best results?
To find the main source of leaks, check for drafts or insulation discoloration around recessed lights and the attic hatch. Usually, sealing the attic hatch first has the biggest impact since it’s often a larger gap.
The article says air sealing can cut heating and cooling loss by up to 30 percent—about how long does it usually take to see those savings on my utility bill?
You’ll typically start noticing lower utility bills within the first one or two billing cycles after sealing your attic, especially during months with extreme temperatures when heating or cooling is most used.
When sealing gaps around recessed lighting, is it necessary to use fire-rated covers or are there other safe DIY options for older homes?
For older homes, it’s safest to use fire-rated covers over recessed lights, especially if they’re not IC-rated. These covers prevent insulation contact and reduce fire risk, but always check your local building codes for any specific requirements.
My building is over 50 years old and I noticed lots of old wiring running through the attic. Are there special safety steps or tools I should use to seal around electrical penetrations?
For older wiring, avoid using expanding foam directly around electrical cables as it may trap heat. Use fire-rated caulk or putty and be sure not to disturb or pinch wires. If the wiring looks damaged, consider consulting an electrician first.
The article mentions different strategies based on region. I live in a humid part of the Southeast—should I worry more about moisture barriers in addition to air sealing my attic?
Yes, in humid Southeastern regions, it’s important to use both air sealing and moisture barriers. This combination helps prevent excess humidity from entering your attic and reduces the risk of mold and insulation damage.
What are the signs that moisture from attic leaks is already causing mold or rot before I start sealing?
Look for musty odors, dark spots or staining on wood and insulation, warped or soft wood, visible mold growth, and damp insulation. These are common signs that moisture has already caused mold or rot in your attic.
If my house is older and has a combination of knob-and-tube wiring and recessed lights in the attic, are there special precautions I should take before air sealing?
Yes, take extra care with knob-and-tube wiring and recessed lights. Do not cover or insulate over knob-and-tube wiring as it can overheat. For recessed lights, use only air-sealing materials rated safe for contact with those fixtures.
If my attic access hatch is one of the main sources of air leaks, what’s the best way to seal it without making it too hard to open and close?
You can use weatherstripping around the hatch perimeter to block drafts while keeping it easy to open. Adding an insulated cover or foam board on the hatch underside also helps without affecting accessibility.
For older homes with unusual attic layouts, are there specific tools or materials you recommend for sealing around complex penetrations like chimney chases or irregular ductwork?
For tricky areas like chimney chases and ducts in older attics, use high-temperature caulk or fire-rated spray foam for safety. Flexible flashing, fire-resistant caulk, and foil tape can help seal gaps around irregular shapes effectively.
For homes in the humid Southeast, are there specific types of air sealing materials that work better against moisture or mold issues in the attic?
In the humid Southeast, closed-cell spray foam and specialized vapor barriers are especially effective for air sealing attics. These materials resist moisture and help prevent mold growth, making them better suited for damp climates compared to traditional fiberglass insulation.
The article mentions cost breakdowns for attic weatherproofing—roughly how much should I budget for materials if I’m doing this myself in a humid Southeast climate?
For DIY attic weatherproofing in a humid Southeast climate, budget around $200 to $400 for materials like caulk, weatherstripping, spray foam, and insulation. Costs vary based on attic size and the extent of sealing needed.